
Chevrolet
Camaro Rear Side Marker Light Bulb Replacement Guide
How to change a burnt out rear side
marker light bulb in a 5th generation 2010-2015 GM Chevy Camaro with pictures.

By Paul B. Michaels Author & Photographer Auto Mechanic Since 1989 |
||
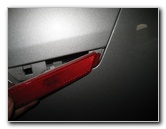
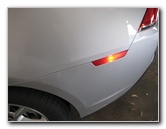
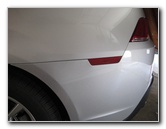 2014 Camaro Rear Side Marker |
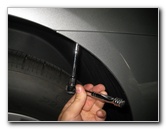
 7mm Wheel Well Screw |
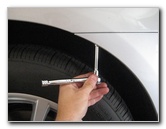 Loosen 7mm Screw |
| This
automotive maintenance tutorial was specifically written to assist
owners of the fifth generation (2010, 2011, 2012, 2013, 2014 & 2015)
GM Chevrolet Camaro in changing a burnt out rear side marker light
bulb in the back fascia bumper cover. Owners of other General Motors vehicles such as the Spark, Cruze, Malibu, Sonic, Impala, Traverse, Tahoe, Trax, SS, GMC Terrain, Acadia, Yukon, Buick Verano, Regal, LaCrosse, Encore, Enclave and the Holden Barina may also find these DIY instructions to be helpful. A replacement side marker light bulb is part number 194 which is available from various manufacturers such as Sylvania, GE, Eiko and PIAA. If you would like to have brighter side marker lights, install some compatible 194 LED bulbs. The tools needed to complete this procedure include a 7mm socket and a 1/4" drive ratcheting wrench. |
||
|
|
||
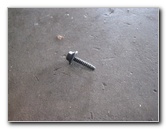 7mm Screw Removed |
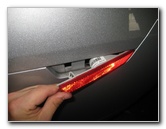
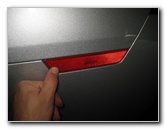
 Pull Out Side of Fascia |
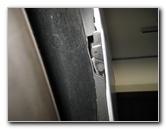
 Release Retaining Clip |
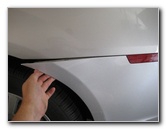
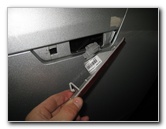
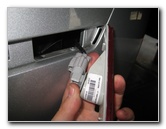
| The first step is
to remove the 7mm screw that holds the rear fascia bumper cover in place to
the back quarter panel. Loosen the screw by turning it counterclockwise with the 7mm socket and ratcheting wrench. Set the screw aside in a safe place. Carefully but firmly pull the front edge of the rear fascia bumper cover straight out towards yourself to release the clips. |
||
 |
 Gently Press In Clip |
 Pull Out Side Marker |
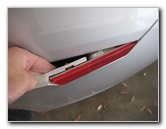
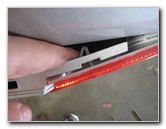
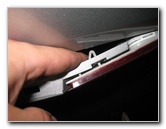
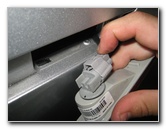
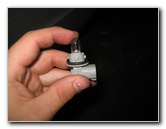
| Reach in until you
can access the retaining clip located at the front of the side marker bulb
housing. Gently push in the retaining clip to release the housing. Pull the housing out of the fascia bumper cover. |
||
 Press Release Tab |
 Disconnect Power Plug |
 1/4 Turn Counterclockwise |
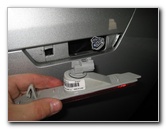
| Press the release
tab on the electrical connector and slide the plug straight off the base of
the bulb socket. Rotate the bulb socket 1/4 turn counterclockwise before pulling it straight out of the housing. |
||
|
|
||
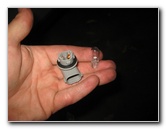 Pull Out Old Bulb |
 Push In New # 194 Bulb |
 1/4 Turn Clockwise - Lock |
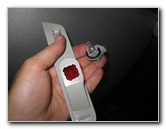
| Pull the old bulb
straight out of the socket. Push in a new # 194 bulb straight in to the socket. If necessary, you may also use any other miniature wedge base bulbs such as the # 158, 168, W5W, 2825 or a compatible LED unit. Re-insert the bulb socket in to the housing and rotate it 1/4 turn clockwise to secure it in place. |
||
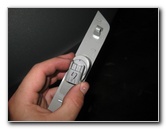
 Push On Electrical Connector |
 Re-Insert Rear Plastic Tab |
 Line Up Retaining Clip |
| Push the power plug
straight on to the base of the bulb socket until it clicks securely in to
place. Re-insert the grey plastic tab on the rear edge of the housing in to the fascia cover. |
||
 Pop In Retaining Clip |
 Replace 7mm Screw |
 Side Marker Bulb Replaced |
| Gently snap in the
retaining clip on the front edge of the light housing. Replace the screw to secure the fascia bumper cover to the quarter panel by turning it clockwise with the 7mm socket and ratcheting wrench. Test the new rear side marker light bulb by turning on the headlights. For more,
check out my other
2010-2015 GM Chevrolet Camaro DIY Repair Guides. |
||
| If you found this guide to be helpful,
please consider making a small donation by clicking on the PayPal.com
"Donate" button located to the right of this paragraph. Thank you!
(Note: I am not a registered charity. Donations are not tax deductible.) |