
Chevrolet
Aveo Cabin Air Filter Replacement Guide
How to clean or change the A/C system's
cabin air filter element in a 1st generation 2007-2011 GM Chevy Aveo sedan.

By Paul B. Michaels Author & Photographer Auto Mechanic Since 1989 |
||
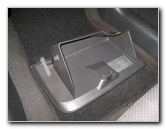
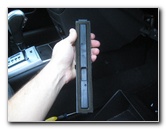
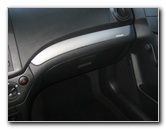 Chevy Aveo Glove Box |
 Open Glove Box - Empty Out |
 Press In Side Walls |
| This
automotive maintenance tutorial was specifically written to assist
owners of the revised first generation (2007, 2008, 2009, 2010 &
2011) GM Chevrolet Aveo in changing a burnt out dome (A.KA. "map")
light bulb in the headliner. Owners of other General Motors vehicles such as the Buick Verano, Regal, LaCrosse, Cascada, Encore, Enclave, Envision, GMC Canyon, Sierra 1500, Terrain, Yukon, Denali, Savana, Spark, Sonic, Cruze, Malibu, Impala, Volt, Camaro, Corvette, SS, Trax, Equinox, Traverse, Tahoe, Suburban, Colorado, Silverado and Express may also find these DIY instructions to be helpful. A few compatible replacement cabin air filters with their part numbers are as follows: Fram CF10546, TYC 800027P, ACDelco CF1219, Ecogard XC35898, Wix 24685, OEM CAF121P, ATP CF-35, Purolator C35898, Mann Filter MC 1082, Mahle Original LA 361, Denso 453-4014, Hastings AFC1306, Pentius PHB5898 and Premium Guard PC1040. The only tool needed to access and replace the filter is a Phillips head screwdriver. |
||
|
|
||
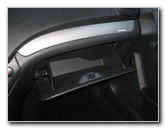
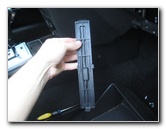
 Release Side Stops |
 Glove Box Removed |
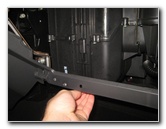
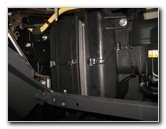
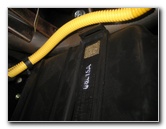
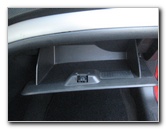
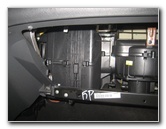 HVAC Blower Motor |
| The first few steps
are to sit in the front passenger seat, open the glove box and then remove
the contents. Firmly push the two side walls of the glove box in towards the center until the side stops can be released from behind the dashboard. Gently lower the glove box down towards the passenger floor mat. The plastic hinges on the bottom of the glove box might separate, but they can easily be re-attached later. The black plastic HVAC blower motor housing is located on the left side. |
||
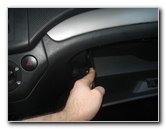
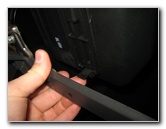
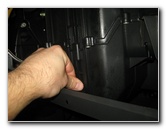
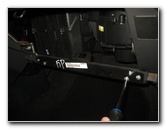
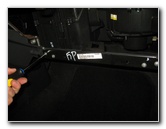
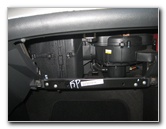 Metal Bar At Bottom |
 Loosen Four Screws |
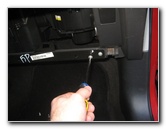 Loosen Counterclockwise |
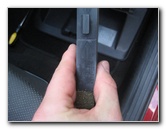
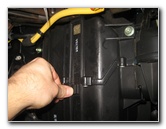
| In order to easily
remove the filter access panel and the old cabin air filter, you'll have to
take off the black metal brace bar at the bottom of the glove box housing. Remove the four screws by turning them counterclockwise with a Phillips head screwdriver. |
||
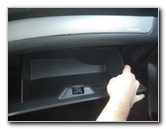
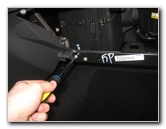
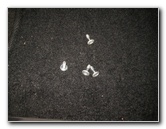 4 Screws Removed |
 Pull Off Metal Bar |
 A/C Filter Access Panel |
| Set the four screws
aside in a safe place. Pull the metal brace bar off the bottom of the glove box housing and set it aside in a safe place. |
||
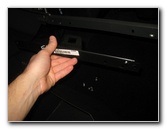
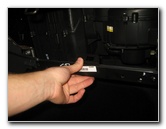
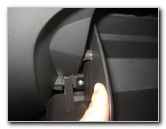
 Push Up Release Tab |
 Remove Filter Cover |
 Back Side of Filter Cover |
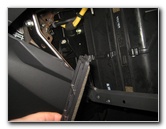
| Gently push up the
release tab on the bottom edge of the filter access cover before swinging it
open. Pull the tab at the top of the access cover out of its slot. Remove the filter access panel and set it aside in a safe place. |
||
 Pull Back Plastic Frame |
 Slide Out Old A/C Filter |
 Old Cabin Filter Removed |
| Gently pull back the black plastic frame before sliding out the old cabin air filter from its slot. | ||
|
|
||
 Inspect Both Sides |
 Filter Cover - Up Arrow |
 Filter Slot - HVAC Blower |
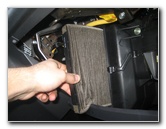
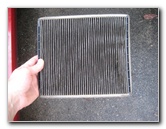
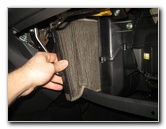
| Inspect both sides
of the old air filter. If the old filter is relatively clean, just tap out the large debris and remove any fine dust with a vacuum cleaner. If the old filter is dark grey or black and clogged with dirt, dust, hair, pollen, insects, twigs, leaves, soot and other debris, it should be replaced with a new element. I recommend buying the Fram CF10546 "Fresh Breeze" cabin air filter since it has excellent reviews on Amazon. I also like how it has Arm & Hammer baking soda and carbon in the filter to keep the A/C system from smelling musty or moldy. |
||
 Slide In New Cabin Filter |
 New Filter Installed |
 Tab On Top of Cover |
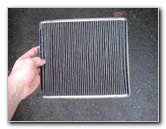
| Make sure that the
"Up" arrow on the new filter is pointing up towards the windshield. Slide the new filter in to the slot. |
||
 Slot - Top of Housing |
 Re-Attach Filter Cover |
 Replace Metal Brace Bar |
| Line up the filter
cover and re-insert the tab at the top in to its corresponding slot on the
HVAC blower motor housing. Push on the bottom edge of the filter access panel to secure the retaining clip. Replace the metal brace bar at the bottom of the glove box housing. |
||
 Tighten Screws Clockwise |
 Replace 4 Phillips Screws |
 Line Up Glove Box Hinges |
| Replace the four
Phillips head screws and tighten them in the clockwise direction until they
are snug. Line up the two plastic hinges on the bottom of the glove box with their corresponding mounting bars. Push the glove back in to place to re-attach the hinges. |
||
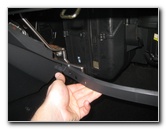
 Push In Side Walls - Stops |
 Replace Contents |
 Close Glove Box |
| Firmly push in the
two side walls of the glove box until the side stoppers can be re-inserted
behind the dashboard. Replace the contents of the glove box and close it to complete the job. Enjoy the fresh air from your air conditioning system! For more,
check out my other
2007-2011 GM Chevrolet Aveo DIY Repair & Maintenance Guides. |
||
| If you found this guide to be helpful,
please consider making a small donation by clicking on the PayPal.com
"Donate" button located to the right of this paragraph. Thank you!
(Note: I am not a registered charity. Donations are not tax deductible.) |