
Ford Focus Headlight Bulbs
Replacement Guide
How to change a low beam, high beam, turn
signal or front side marker light bulb in an MK3 2011-2014 Ford Focus.

By Paul B. Michaels Author & Photographer Auto Mechanic Since 1989 |
||
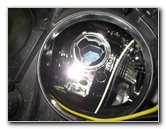
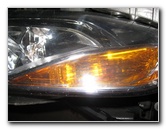
 2012 Focus SEL Headlight |
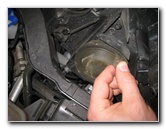
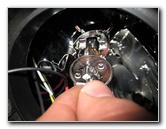
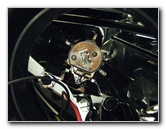
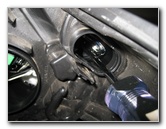
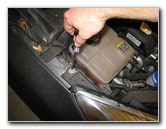
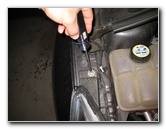 Remove Torx T-30 Screw |
 Outer Screw Removed |
| This
automotive tutorial was specifically written to assist owners of the
MK III third generation (2011, 2012, 2013 & 2014) Ford Focus in
changing a burnt out low beam, high beam, front turn signal or front
side marker light bulb in the headlight assemblies. Owners of other similar Ford sedan or hatchback vehicles such as the Fiesta, Fusion, Taurus and C-Max may also find these DIY instructions to be helpful. Replacement bulbs with their part numbers are as follows: Low Beam # H11, High Beam # H1, Turn Signal # 7440 and Front Side Marker # 168NA ("natural amber" colored glass). The only tool needed to change any of the headlight bulbs in either the driver or passenger side housing is a Torx T-30 star bit screwdriver. |
||
|
|
||
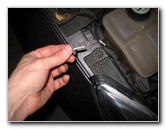
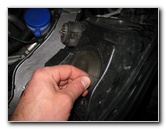
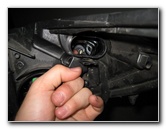
 Remove Inner T30 Screw |
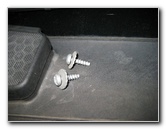 Two Screws Removed |
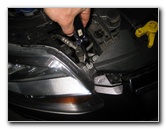
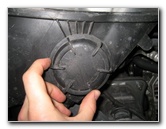
 Pull Off Headlight Assembly |
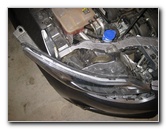
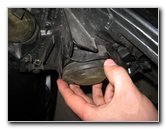
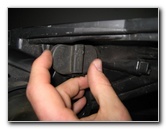
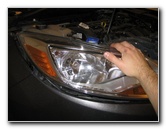
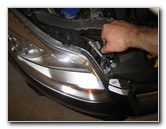
| The first two steps
are to pop open the hood and then move to the side of the vehicle with the
burnt out bulb. Locate the two screws that hold the headlight assembly in place. One screw is near the outer edge and the other is at the inner corner. Remove the two screws by turning them counter clockwise with a Torx T-30 star bit screwdriver. Set the two screws aside in a safe place. |
||
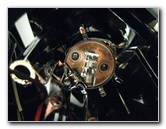
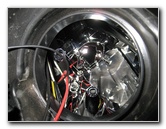
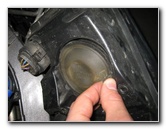
 Turn Over Headlight Housing |
 Low Beam - Center of Housing |
 Pull Off Rubber Dust Cap |
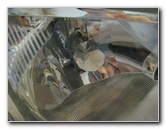
| Gently pull the
headlight housing straight off the front of the car. Turn over the housing and rest it on the bumper. To avoid scratching the plastic lens or the painted bumper, place a towel in between them. |
||
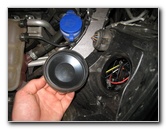
 Rubber Cover Removed |
 Low Beam Bulb Exposed |
 1/4 Turn Counter Clockwise |
| The Low Beam
bulb is located at the center of the headlight assembly. Pull off the rubber dust cap on the rear of the housing to access the base of the old low beam bulb. Rotate the base of the bulb 1/4 turn counter clockwise to unlock it. |
||
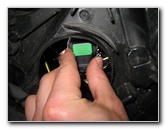
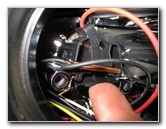
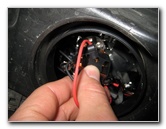
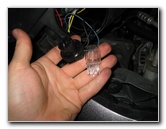
 Remove Low Beam Bulb |
 Disconnect Power Plug |
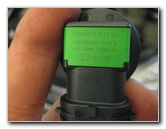 Philips H11 LL 12V 55W |
| Pull the old low
beam bulb straight out of the housing. Pry up the black plastic tab on the electrical connector before sliding it straight off the bottom of the old bulb. |
||
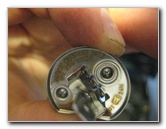
 Low Beam Bulb Socket |
 Insert New H11 Bulb |
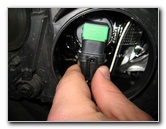 1/4 Turn Clockwise - Lock |
| Try to avoid
touching the glass part of the new halogen bulb with your fingers or
anything greasy in the engine bay. If you do get the new bulb dirty, wipe off the glass with an alcohol moistened paper towel. Insert the new H11 low beam bulb in to the housing and rotate it 1/4 turn clockwise to lock it in place. |
||
 New Low Beam Bulb Installed |
 Push On Rubber Cover |
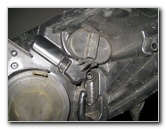
 High Beam - Inner Corner |
|
Push the rubber dust cap back in place over the low beam bulb access opening. The High Beam bulb is located at the inner corner of the headlight housing. |
||
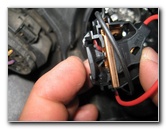
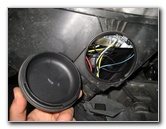
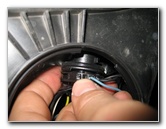
 Pull Off Rubber Dust Cap |
 Rubber Cover Removed |
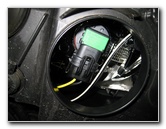
 Press Plug Release Button |
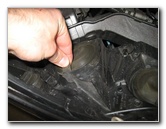
| Pull off the rubber
cover on the back of the headlight behind the high beam bulb. Press in on the black plastic release button before sliding the power connector straight off. |
||
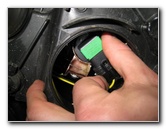
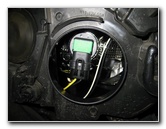
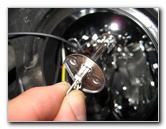
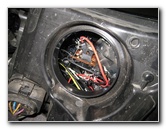
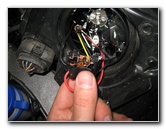 Pull Off Electrical Connector |
 Showing Release Tab |
 Push In To Release Plug |
| The pictures above show a closer view of how the retaining clip on the high beam bulb power plug works. | ||
|
|
||
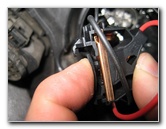
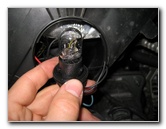
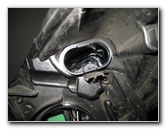
 High Beam Bulb Exposed |
 |
 Pull Out Old High Beam |
| Grasp the metal base of the old high beam bulb and pull it straight out of the housing. | ||
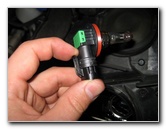
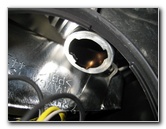
 High Beam Bulb Socket |
 Osram Germany H1 12V 55W |
 Insert New H1 Bulb |
| Insert a new #
H1 bulb straight in to the socket. Due to the round shape with one flat edge, the bulb can only be inserted in one way. |
||
 New High Beam Installed |
 Push On Power Plug |
 New High Beam Installed |
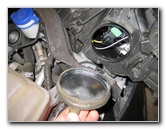
| Gently push the
black plastic electrical connector straight on to the base of the new high
beam bulb. Push the rubber cover back in place over the high beam bulb opening. |
||
 Push On Rubber Cover |
 Underside of Housing |
 Turn Signal Light At Bottom |
| The Turn Signal bulb is located at the lower inner corner of the headlight housing. | ||
 1/4 Turn Counter Clockwise |
 Plastic Dust Cap Removed |
 Turn Signal Bulb Socket |
| Rotate the black
plastic cover 1/4 turn counter clockwise to expose the turn signal bulb
socket. Set the dust cap aside in a safe place. |
||
 1/4 Turn Counter Clockwise |
 Remove Turn Signal Socket |
 Pull Out Turn Signal Bulb |
| Reach in and rotate
the black plastic turn signal bulb socket 1/4 turn counter clockwise before
pulling it straight out. Pull the old turn signal bulb straight out of the socket and push in a new # 7440 or W21W (clear glass) bulb. |
||
 Turn Signal Socket Housing |
 1/4 Turn Clockwise - Lock |
 Replace Cover - 1/4 Turn C |
| Re-insert the
socket in to the housing and rotate it 1/4 turn clockwise to secure it in
place. Replace the black plastic dust cap and rotate it 1/4 turn clockwise to lock it. |
||
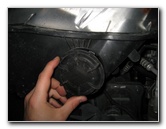
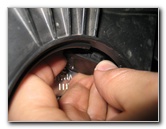
 Side Marker - Outer Corner |
 Small Oval Rubber Cover |
 Pull Off Rubber Dust Cap |
| The Front Side
Marker bulb is located at the upper outer corner of the headlight
assembly. This bulb is the most difficult to replace, especially if you have
large hands. Pull off the rubber dust caps for both the low beam bulb and the smaller oval cap for the side marker bulb. |
||
 Reach In & 1/4 Turn CC |
 Side Marker Socket Removed |
 Pull Out Old Side Marker Bulb |
| Reach in with your
fingers and rotate the small side marker bulb socket 1/4 turn counter
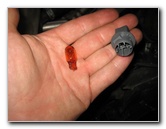
clockwise before pulling it out of the housing. Pull the old bulb straight out of the socket and push in a new amber colored # 168NA bulb. |
||
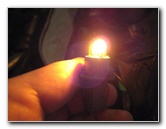 Test New Side Marker Bulb |
 Re-Insert Socket, Difficult |
 1/4 Turn Clockwise |
| Turn on the parking
lights and check that the new bulb works before re-installing it in to the
headlight housing. The most challenging part of this procedure is re-inserting the socket in to the housing. You may need to use a screwdriver or other tools to guide the small socket back in to its mounting location. Then turn the side marker socket 1/4 turn clockwise to lock it in to place. |
||
 Replace Low Beam Cap |
 Push On Side Marker Dust Cap |
 Push On Headlight Housing |
| Replace the rubber
dust caps for the low beam bulb opening and the side marker bulb. Line up the headlight housing and carefully push it back in to place on the front of the car. |
||
 Tighten Inner Torx T-30 |
 Replace Outer T30 Screw |
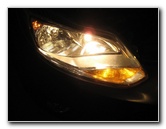 Test New Headlight Bulbs |
| Insert the two
screws and tighten them with the Torx T30 star bit screwdriver. Test the new bulbs by turning on the headlights, flashing the high beams, and activating the hazard signals. For more,
check out my other
Ford Focus Repair & Maintenance
Guides. |
||
| If you found this guide to be helpful,
please consider making a small donation by clicking on the PayPal.com
"Donate" button located to the right of this paragraph. Thank you!
(Note: I am not a registered charity. Donations are not tax deductible.) |