
Ford Focus
Cabin Air Filter Replacement Guide
How to clean or change the HVAC system's
cabin air filter element in a 3rd generation (MK III) 2011-2014 Ford Focus.

By Paul B. Michaels Author & Photographer Auto Mechanic Since 1989 |
||
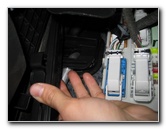
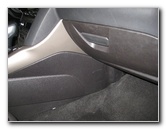 2012 Focus Kick Panel |
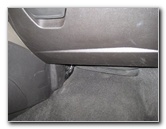 Look Below Glove Box |
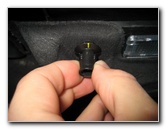 Squeeze & Remove Fastener |
| This
automotive maintenance tutorial was specifically written to assist
owners of the third generation MK III (2011, 2012, 2013 & 2014) Ford
Focus sedan or hatchback in cleaning or replacing the A/C system's
cabin air filter element. Owners of other similar Ford vehicles built upon the "Global C" (C1) compact car platform such as the C-Max, Escape, Kuga and Transit Connect may also find these DIY instructions to be useful. A few compatible replacement cabin air filter elements include the following with their part numbers: Ecogard XC36174, Motorcraft FP70, Wix 24419, TYC 800183P, NPN # 118418-01181745, ACDelco CF2291 and Cleenaire CAF6196. A Torx T-15 star bit screwdriver may be needed to access the OEM air filter. A wet/dry shop vacuum may also be useful for cleaning the existing element if it isn't very dirty and you plan on re-using it. |
||
|
|
||
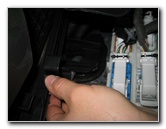
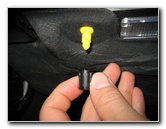 Cap Removed - Yellow Rivet |
 Remove Under Dash Panel |
 Interior Fuse Panel Location |
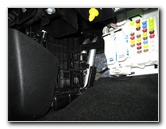
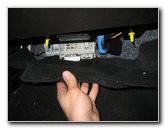
| The first two steps
are to sit in the front passenger seat of the vehicle and then locate the
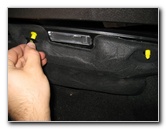
dark grey carpeted panel below the glove box in the foot well. The foot well panel is held in place by two round black plastic friction fasteners that are attached to yellow pop rivets. Edit - A thoughtful person sent an email to inform me that there should have been a Torx T-15 star head screw at the bottom of the filter cover. That screw must have been missing on this 2012 Focus. If your filter cover has a screw on the bottom, loosen it in the counterclockwise direction with a Torx T15 screwdriver. Squeeze the sides of the black plastic fasteners and slide them straight off the yellow pop rivets. Remove the dark grey foot well cover and set it aside in a safe place. Behind the panel, you'll see the passenger compartment interior fuse panel. |
||
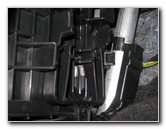
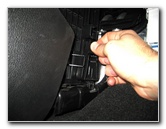 Squeeze Together Tabs |
 Pull Off Filter Cover |
 Filter Access Panel Removed |
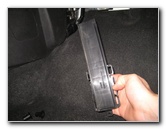
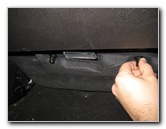
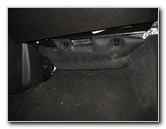
| At the front left
area of the foot well, just in front of the center console, you'll see the
rectangular black plastic filter access cover. Squeeze together the two large black plastic tabs near the bottom of the cover to release the clips and pull the access panel away from the blower motor housing. Set the filter cover aside in a safe place. |
||
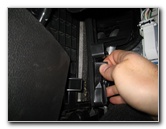
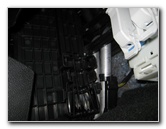
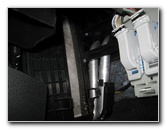 Edge of Old Cabin Filter |
 Begin Sliding Out Filter |
 |
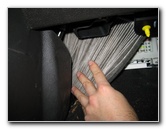
| Once the filter
cover has been removed, you'll see the white or light grey edge of the old
filter. Gently slide the old filter straight out of the slot in the blower motor housing. |
||
|
|
||
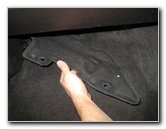
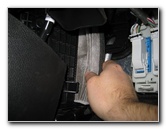
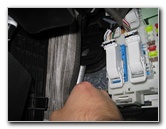
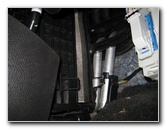
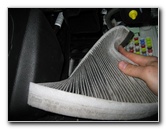 Bend Flexible Filter Out |
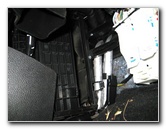 Filter Slot - Blower Housing |
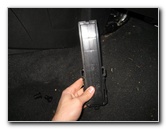
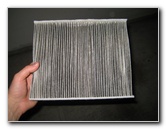 OEM Filter After 30K Miles |
|
You may need to bend the filter to get it around the various tubes, wires, hoses and other plastic panels that are in the way. Don't be afraid to bend the filter since it is flexible and won't be easily damaged. Just be sure to carefully route the filter around the obstructions and don't cause any rips or tears if you plan on re-using it. If the old filter is relatively clean, just tap out any large debris and remove the fine dust with a wet/dry vacuum cleaner. If the old element is dark grey or black and clogged with dirt, dust, hair, insects, leaves, pollen and twigs, it should be replaced with a brand new unit. If you have severe allergies, consider purchasing an activated carbon filter. I recommend buying the Ecogard XC36174 cabin air filter since it has excellent reviews on Amazon. |
||
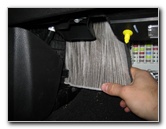
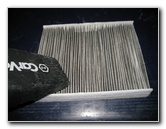 Clean Filter With Vacuum |
 Gently Insert New Filter |
 Slide Filter In Past Fuses |
| Gently insert the
new air filter in to the slot with the "Air Flow" indicator arrow facing
towards the rear of the vehicle. You will need to compress the pleats or bend the filter to get it around the fuse panel and under the bottom of the dash board. Do not use excessive force to avoid tearing or puncturing the filter. |
||
 New Filter Installed In Slot |
 Filter Cover & 2 Clips |
 Insert Top Part In First |
| Make sure that the
new filter is fully seated inside the slot with the "Air Flow" arrow facing
towards the back of the vehicle. Insert the top edge of the rectangular black plastic filter cover in place first. |
||
 Press Tabs & Push In |
 |
 Push Lower End In Place |
| Pinch together the
two tabs at the end of the springy black plastic arms and push the lower
part of the cover in place. If your cabin air filter access panel was equipped with a screw at the bottom of the cover, tighten it in the clockwise direction with the Torx T15 star bit screwdriver. (The screw was missing on this 2012 Focus sedan.) Double check that the filter cover is securely in place before moving on to the next steps. |
||
 Filter Cover Replaced |
 |
 Line Up Foot Well Cover |
| Line up the foot well panel and insert the two yellow pop rivets attached to the bottom of the dashboard through the corresponding holes. | ||
 Push Black Fasteners On |
 Slide Black Cap On Yellow Peg |
 Cabin Air Filter Replaced |
| Push the two black
plastic friction fasteners straight on to the yellow pop rivets to secure
the foot well cover in place. Enjoy the
fresh clean air from your A/C system!
For more,
check out my other
Ford Focus Repair & Maintenance
Guides. |
||
| If you found this guide to be helpful,
please consider making a small donation by clicking on the PayPal.com
"Donate" button located to the right of this paragraph. Thank you!
(Note: I am not a registered charity. Donations are not tax deductible.) |