
Ford Flex Fog Light Bulbs
Replacement Guide
How to change a burnt out fog light bulb
in the front bumper cover of a 1st generation 2009 to 2019 Ford Flex.

By Paul B. Michaels Author & Photographer Auto Mechanic Since 1989 |
||
 2019 Flex Fog Light |
 Turn Front Wheels |
 Wheel Well Liner Screws |
| This automotive
maintenance tutorial was specifically written to assist owners of the first
generation (2009, 2010, 2011, 2012, 2013, 2014, 2015, 2016, 2017, 2018 &
2019) Ford Flex crossover SUV in changing a burnt out fog light bulb located
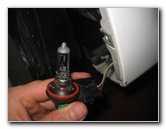
in the front bumper cover. Owners of other Ford or Lincoln vehicle such as the Explorer, Fiesta, Focus, Fusion, C-Max, Mustang, Taurus, EcoSport, Escape, Edge, Expedition, Transit Connect, F-150, Ranger, MKZ, MKC, Navigator, MKX and Continental may also find these DIY instructions to be helpful. The compatible replacement halogen light bulb is part number H11. If you would like to have brighter fog lights, choose H11 LED bulbs. The tools needed to access and replace the bulbs include a 5.5mm socket with a 1/4" drive ratchet and a flathead screwdriver or a plastic pry bar tool. |
||
|
|
||
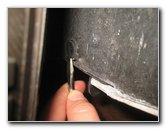
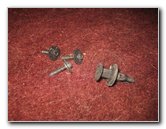
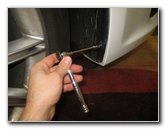
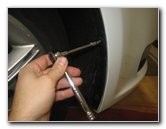
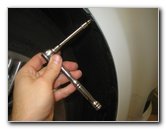
 Remove Black Screw |
 Loosen Counterclockwise |
 Removing 3rd Screw |
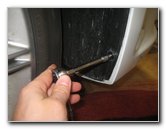
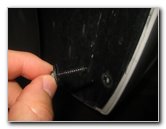
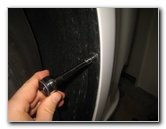
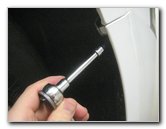
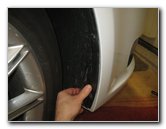
| If you would like
to have additional room to work in the wheel well, turn the steering wheel
all the way in the opposite direction of the burnt out fog light bulb. Move to the front outer area of the wheel well liner. Locate the three black metal screws along the outer edge and the black plastic pop rivet fastener a few inches closer to the engine bay in front of the tire. Remove the three screws by turning them in the counterclockwise direction with a 5.5mm socket and a 1/4" drive ratchet. Set the three screws aside in a safe place. |
||
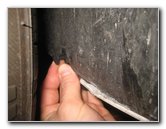
 Pry Out Center of Fastener |
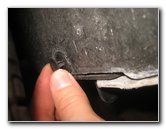 Unlock Pop Rivet |
 Pry Out Base of Pop Rivet |
| Use a flathead
screwdriver or a plastic trim panel removal tool to gently pry up the
smaller center part of the pop rivet fastener. Then pry out the base of the fastener to remove it. Set the pop rivet fastener aside with the three screws. |
||
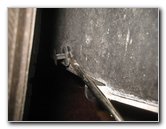
 Pull Back Wheel Well Liner |
 3 Screws & 1 Pop Rivet |
 Washer Fluid Tank |
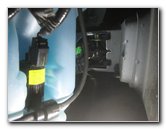
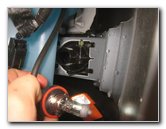
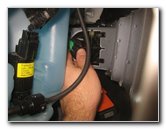
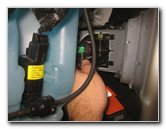
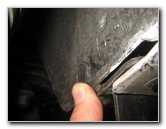
| Carefully pull back
the black plastic wheel well liner. You may choose to wedge the wheel well liner against the tire to hold it open. Look inside the front bumper cover and locate the rear of the fog light housing and the base of the old bulb. On the passenger side of the vehicle, it is located just in front of the windshield washer fluid bottle. |
||
 1/4 Turn Counterclockwise |
 Pull Out Old Light Bulb |
 Old Fog Light Removed |
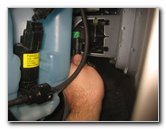
| Rotate the base of the old light bulb 1/4 turn in the counterclockwise direction before pulling it straight out of the housing. | ||
|
|
||
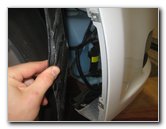
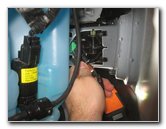
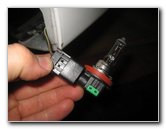 Push In Release Button |
 Disconnect Power Plug |
 Empty Bulb Housing |
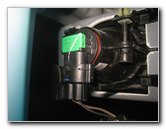
| Push in the release
tab on the electrical connector before sliding it straight off the base of
the old light bulb. Try to avoid touching the glass part of the new halogen bulb with your fingers or anything greasy in the wheel well. |
||
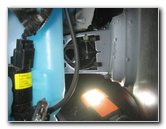
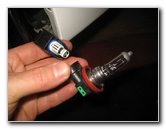
 1/4 Turn Clockwise - Lock |
 New Bulb Installed |
 Push On Power Plug |
| If you do get the
new bulb dirty, wipe it clean with a paper towel and some rubbing alcohol. A dirty or greasy bulb may run hotter and fail prematurely. Insert the new number H11 light bulb into the housing and rotate it 1/4 turn in the clockwise direction to secure it into place. If you would like to have brighter fog lights, install some compatible replacement H11 LED bulbs. Push the power plug straight on to the base of the new light bulb until it clicks securely into place. |
||
 Electrical Connector Secured |
 Replace Wheel Well Liner |
 Re-Insert Pop Rivet |
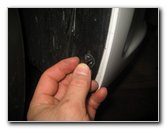
| Push the wheel well
liner back into place.
Make sure that the center part of the pop rivet is in the "unlocked" position which is about half an inch out. Re-insert the pop rivet into the wheel well liner. |
||
 Push In Center of Pop Rivet |
 Replace Metal Screws |
 Tighten Clockwise |
| Push in the round
center of the fastener to secure the pop rivet in place. Replace the three screws in the clockwise direction with the 5.5mm socket and a 1/4" drive ratchet until they are snug. |
||
 Replace 2nd Screw |
 3rd Screw Replaced |
 Fog Light Bulb Replaced |
| To test the new
light bulb, turn on the headlights and then activate the fog light switch. Be sure to record the bulb change in your SUV's service records. Please
check out all of my
Ford Flex DIY Repair & Maintenance Guides. |
||
| If you found this guide to be helpful,
please consider making a small donation by clicking on the PayPal.com
"Donate" button located to the right of this paragraph. Thank you!
(Note: I am not a registered charity. Donations are not tax deductible.) |