
Ford F-150 Tail Light Bulbs
Replacement Guide
How to change the brake, turn signal and
reverse bulbs in the tail lights of a 12th generation 2009-2014 Ford F150.

By Paul B. Michaels Author & Photographer Auto Mechanic Since 1989 |
||
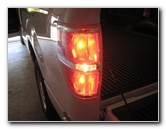
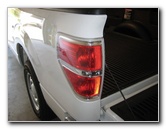 2013 Ford F-150 Tail Light |
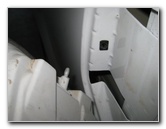
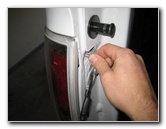
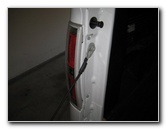 Open Cargo Bed Tailgate |
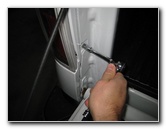
 Remove Upper 8mm Screw |
| This
automotive "how-to" guide was specifically written to assist owners
of the twelfth generation (2009-2014) Ford F-150 truck in changing a
burnt out brake, turn signal, or reverse bulb in the tail light
housings. Owners of other F-Series trucks or other Ford, Lincoln and Mercury vehicles such as the Super Duty F-250, F-350, F-450, Expedition, Explorer, Edge, Escape, E-150, E-250, E-350, Transit Connect, Flex, MKX, MKT, Navigator and Mountaineer may also find these DIY instructions to be helpful. Replacement tail light bulbs for the '09-'14 F150 include the following with their part numbers: Brake Light Bulb # 4057, Rear Turn Signal # 4057 and Reverse Light # 921. The only tools needed to remove the tail light assembly and access all three tail light bulbs is an 8mm socket with a 1/4" drive ratchet. |
||
|
|
||
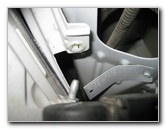
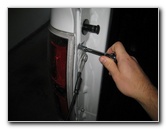
 Remove Lower 8mm Screw |
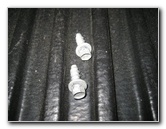 Two 8mm Screws Removed |
 Pull Off Tail Light Housing |
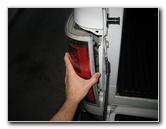
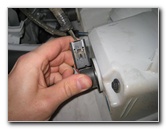
| The first two steps
are to open the cargo bed tailgate and move to the tail light assembly with
the burnt out bulb. Then remove the two screws on the side of the tail light that were hidden by the tailgate with the 8mm socket and ratcheting wrench by turning them counter clockwise. Set aside the two screws in a safe place. |
||
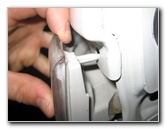
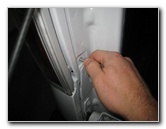
 Turn Over Tail Light |
 1/4 Turn Counter Clockwise |
 Remove Brake Light Socket |
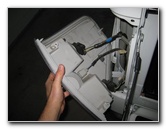
| Gently pull the
tail light assembly off the rear corner of the vehicle and turn it over on
the bumper. If you have trouble removing the tail light, try wiggling it back and forth to disengage the metal and plastic pegs that also hold it in place. |
||
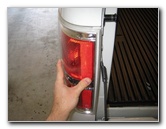
 Brake Socket Removed |
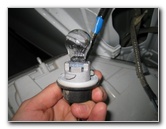
 Brake Light Bulb Removed |
 Push In New # 4057 Bulb |
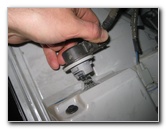
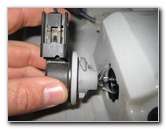
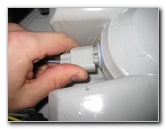
| To remove either of
the brake or turn light bulb sockets, grasp them with your thumb and
forefinger before turning them 1/4 turn counter clockwise and pull them
straight out.
Pull the old bulb straight out of the socket and push in a new # 4057 bulb. I recommend buying the Sylvania 4057 LL long life light bulbs since they tend to last a long time. |
||
|
|
||
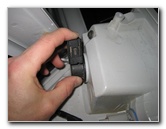
 1/4 Turn Clockwise |
 1/4 Turn Counter Clockwise |
 Remove Reverse Bulb Socket |
| The reverse or "back up" light bulb is located within the smaller light grey socket at the center of the tail light. | ||
 Pull Out Old # 921 Bulb |
 1/4 Turn Clockwise |
 1/4 Turn Counter Clockwise |
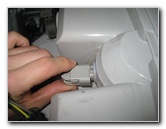
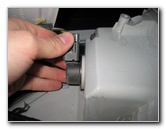
| Rotate the reverse
light bulb socket 1/4 turn counter clockwise and pull it straight out.
Push a new # 921 bulb straight in to the socket, insert the socket back in to the tail light housing, and rotate it 1/4 turn clockwise to lock it in to place. I always buy the Sylvania 921 LL long life light bulbs since they tend to last for a long time. If you would like to have brighter reverse lights, install some compatible 921 LED bulbs. |
||
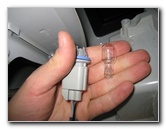
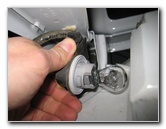 Remove Turn Signal Socket |
 Pull Out Turn Signal Bulb |
 1/4 Turn Clockwise |
 Line Up Pegs & Holes |
 Insert Peg In To Socket |
 Insert Plastic Spike At Top |
| To re-install the tail light assembly, first line up the metal pegs and plastic spike on the rear of the housing with the holes in the corner of the truck. | ||
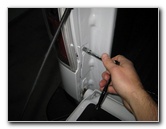
 Push Tail Light In Place |
 Insert Upper 8mm Screw |
 Insert Lower 8mm Screw |
| Gently push the
tail light housing back in to place. Insert the upper and lower 8mm screws in to the side of the tail light. |
||
 Tighten Both Screws |
 |
 Testing New Tail Light Bulbs |
| Tighten the two
screws with the 8mm socket and ratcheting wrench by turning them clockwise
until they are snug. Do not over tighten the screws to avoid cracking the
plastic housing. Test the new tail light bulbs by having someone step on the brake pedal, engage the hazard signals and place the transmission in reverse. For more,
check out my other
Ford F-150 Repair & Maintenance Guides. |
||
| If you found this guide to be helpful,
please consider making a small donation by clicking on the PayPal.com
"Donate" button located to the right of this paragraph. Thank you!
(Note: I am not a registered charity. Donations are not tax deductible.) |