
Ford
Crown Victoria Dome & Map Light Bulbs Replacement Guide
How to replace the overhead dome light bulb
or the map light bulbs in a 2nd generation 1998 to 2011 Ford Crown Victoria.

By Paul B. Michaels Author & Photographer Auto Mechanic Since 1989 |
||
 Crown Victoria Dome Lights |
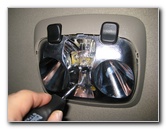
 Pry Out Lens Cover |
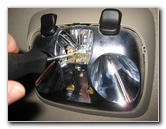
 Lens Cover Removed |
| This
automotive "how-to" guide was specifically written to assist owners
of the 2nd generation 1998-2011 Ford Crown Victoria in replacing
a burnt out overhead dome light bulb or the two smaller map light
bulbs. Owner's of other Ford, Lincoln or Mercury vehicles such as the Grand Marquis, Marauder, Town Car, Edge, Flex, Focus, Taurus, Fusion, Mustang, Fiesta, Five Hundred, Escape, Explorer, Probe, Expedition, Thunderbird, Escort, F-150, F-250 and F-350 may also find these DIY instructions to be helpful. Replacement bulbs include the following with their part numbers: dome light bulb # 906, map light bulbs # 168.You may also choose to install brighter LED bulbs instead. The tools needed to complete this procedure include a small flathead screwdriver and a standard Phillips head screwdriver. |
||
|
|
||
 Single Dome Light Bulb |
 Dome Light Bulb Socket |
 Smaller Map Light Bulb |
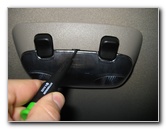
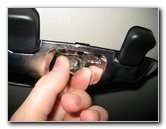
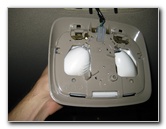
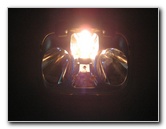
| The first step is
to locate the small notch on the dome light lens cover in the middle of the
rear edge.
Use the blade of the small flathead screwdriver to gently pry out the translucent dome light lens cover. The single overhead dome light bulb is located at the rear of the housing pointing down towards the rear seats. |
||
 Pull Out Dome Light Bulb |
 Old # 906 Dome Bulb |
 Push In New Dome Bulb |
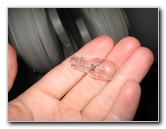
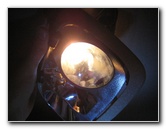
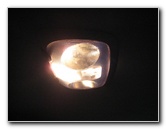
| Grasp the old dome
light bulb with your thumb and forefinger before pulling it straight out of
the socket. Push a new # 906 bulb straight into the dome light socket. If you have the door open, the new dome light bulb should illuminate immediately. |
||
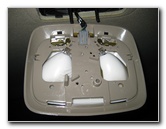
 Testing New Dome Bulb |
 Unscrew Overhead Housing |
 |
|
|
||
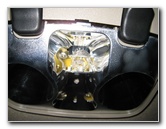
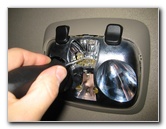
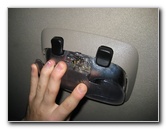
| To replace the two
map light bulbs, the overhead housing will need to be detached from the roof
of the vehicle. Use a standard Phillips head screwdriver to remove the screws holding it in place. |
||
 Pull Down Dome Housing |
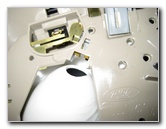
 Gently Pop Out Map Bulbs |
 Old # 168 Map Light Bulb |
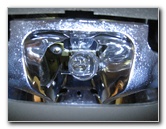
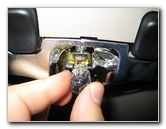
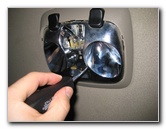
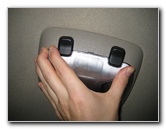
| Pull the overhead
light housing down from the roof. Try to avoid pulling on the electrical
wires. Use the small flathead screwdriver to gently pop out the map light bulbs from the underside of the housing (the side that faces the roof). There is a notch in the plastic just behind the bulb where you can easily push the bulb out with the screwdriver. |
||
 Map Light Bulb Socket |
 Push In New # 168 Bulb |
 Test New Map Light Bulb |
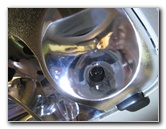
| Push a new #
168 map light bulb straight into the socket from the outside of the housing (the
side that faces the passenger cabin). Test the new map light bulb(s) by flipping the rocker switch to the "On" position. |
||
 Re-attach Dome Housing |
 Tighten Phillips Head Screws |
 Dome Light Bulb Working |
| Line up the
overhead light housing against the headliner of the vehicle with the rocker
switches facing back towards the rear passenger area. Replace the Phillips head screws and tighten them until they are snug. Do not over tighten the screws to avoid cracking the plastic housing. |
||
 Replace Lens Cover |
 Snap Cover In Place |
 Map Light Bulb Working |
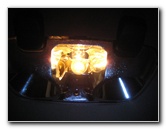
| Insert the front
part of the lens cover in first and then gently snap the back half in place
into the overhead light housing. Test the new dome light bulb by opening the door and test the new map light bulbs by pushing the rocker switches to the "On" position. For more,
check out my other
Ford Crown Victoria Repair & Maintenance Guides. |
||
| If you found this guide to be helpful,
please consider making a small donation by clicking on the PayPal.com
"Donate" button located to the right of this paragraph. Thank you!
(Note: I am not a registered charity. Donations are not tax deductible.) |