
Ford Crown
Victoria 4.6L V8 Engine Oil Change Guide
How to replace the motor oil & change the
filter in a 1998-2011 Ford Crown Victoria with the Modular 4.6 liter V8 SOHC
engine.

By Paul B. Michaels Author & Photographer Auto Mechanic Since 1989 |
||
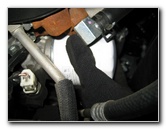
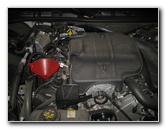
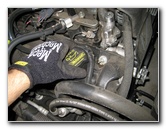
 Ford Modular 4.6L V8 |
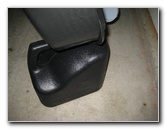
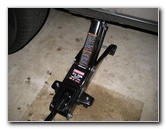
 Raise Front Driver Side |
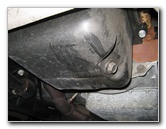 Oil Pan & Drain Bolt |
| This
automotive "how-to" guide was specifically written to assist owners
of the 2nd generation 1998-2011 Ford Crown Victoria equipped with
the Modular 4.6L SOHC 16-valve V8 engine in replacing the motor oil
and changing the oil filter. Owners of other vehicles equipped with the Ford Modular 4.6L V8 engine such as the Lincoln Town Car, Mercury Grand Marquis, Thunderbird, Mercury Cougar, F-150, Expedition, Explorer, Mustang, Rover 75, MG ZT-T, and MV-1 may also find these DIY oil change instructions to be helpful. The items needed to complete this procedure include a floor jack, jack stands, a 16mm socket with ratcheting wrench, a funnel, a used oil catch container, a new oil filter, and 6 quarts of SAE 5W-20 oil. Some compatible oil filters for late model Crown Victoria sedans include the MotorCraft FL820S, Wix 51348, Purolator L10241, K&N HP-1002, Mobil 1 M1-102, Bosch 3330, Mobil 1 M1-210 and Royal Purple 20-820. |
||
|
|
||
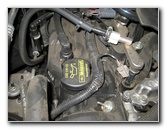
 Old White Oil Filter |
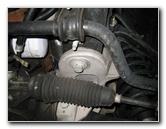 Filter Near Inner CV Joint |
 Remove 16mm Drain Bolt |
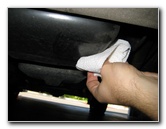
| The first step is
to start the engine and allow it to warm up to operating temperature for a
few minutes. This will help suspend any contaminants within the old oil and
allow it to drain out more quickly. Then engage the parking brake and chock the rear wheels to prevent the vehicle from moving. Pop open the hood of the vehicle and twist off the oil filler cap by turning it 1/4 turn counter clockwise. Removing the oil filler cap will also help the old oil to drain out more quickly by preventing a vacuum from forming. Raise the front driver side of the vehicle with the floor jack and securely support it with at least two jack stands. Look underneath the vehicle and locate the black metal oil pan and oil drain bolt. The oil filter is located near the inner CV joint's rubber boot and CV axle attached to the front driver side wheel. |
||
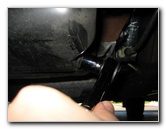
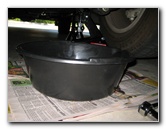
 Drain Out Old Oil |
 Replace Oil Drain Bolt |
 Tighten Drain Bolt |
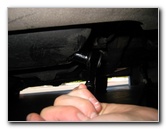
| Move the used oil
catch container to below the oil pan. You may also want to line your garage
floor with newspapers to catch any oil drips or spills. Remove the oil drain bolt with a 16mm socket and ratcheting wrench by turning it counter clockwise.
Allow the old oil to drain out for at least a few minutes until the flow slows to just a drip. Re-insert the oil drain bolt and tighten it by hand a few turns to prevent it from becoming cross threaded. Tighten the oil drain bolt to about 1/8 turn past hand tight. The shop manual specifies 10 ft lbs of torque for the oil drain bolt. |
||
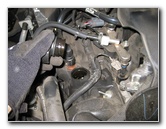
 Dip Finger In New Oil |
 Lubricate New Oil Filter |
 Twist Off Old Oil Filter |
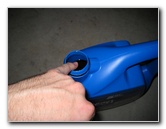
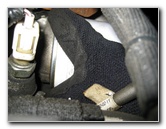
| Dip your pinky
finger in some new oil and lubricate the rubber o-ring on the new oil
filter. Lubricating the new oil filter's rubber o-ring will help it form a better seal, prevent leaks and make it easier to remove during the next oil change. Move the oil catch container to below the oil filter. Grab the old oil filter and twist it off in the counter clockwise direction. |
||
|
|
||
 Drain Oil From Filter |
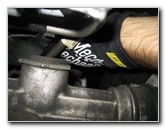 Spin On New Oil Filter |
 Hand Tighten New Filter |
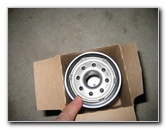
| Allow the oil to
drain from the oil filter receptacle for a minute or two. Double check that the rubber o-ring from the old oil filter is not still attached to the oil filter receptacle. I recommend buying the OEM Ford MotorCraft FL820S oil filter since it has excellent reviews on Amazon. Spin the new oil filter on to the threads by hand. Tighten the new oil filter to about 1/2 to 3/4 turn past hand tight. Do not over tighten the oil filter or use an oil filter wrench to tighten it. Over tightening the oil filter may damage the filter's rubber o-ring and cause an oil leak. |
||
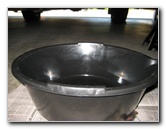
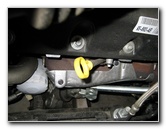
 Pour Out Old Oil |
 Oil Filler Cap |
 1/4 Turn Counter Clockwise |
| Double check that
the oil drain bolt and new oil filter are tight before continuing on to the
next steps. Lower the vehicle from the floor jack and jack stands. |
||
 Insert Automotive Funnel |
 Lower Car From Jack |
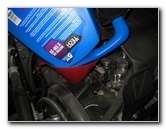 Pour In New SAE 5W-20 |
| Insert a clean
automotive funnel into the oil filler hole and pour in 5 quarts of the
engine's 6 quart (5.7L) total capacity. Replace the oil filler cap and run the engine for a few minutes. |
||
 Yellow Handled Dipstick |
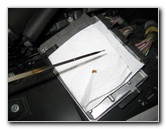 Check Engine Oil Level |
 Replace Oil Filler Cap |
| Turn off the engine
and allow it to rest for at least 5 minutes.
Pull out the yellow handled dipstick and check the engine oil level. Slowly pour in the last quart of SAE 5W-20 oil and repeatedly check the dipstick until the level reaches to just below the upper metal dot. You may not need to use all 6 quarts of new oil depending on how long you allowed the old oil to drain out. Be sure to check the oil level on the dipstick several times over the next week and watch your driveway for oil spots that may indicate a leak from the oil drain bolt or filter. Record the mileage and oil change details in your service record book. For more,
check out my other
Ford Crown Victoria Repair & Maintenance Guides. |
||
| If you found this guide to be helpful,
please consider making a small donation by clicking on the PayPal.com
"Donate" button located to the right of this paragraph. Thank you!
(Note: I am not a registered charity. Donations are not tax deductible.) |