
Dodge Durango
Windshield Wiper Blades Replacement Guide
How to change the front windshield window
wiper blades on a 3rd generation 2011 to 2015 Dodge Durango SUV.

By Paul B. Michaels Author & Photographer Auto Mechanic Since 1989 |
||
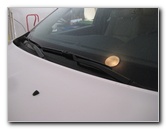
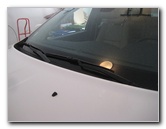 2014 Durango Windshield Wipers |
 Raise Wiper Arm Off Window |
|
| This
automotive maintenance tutorial was specifically written to assist
owners of the third generation (2011, 2012, 2013, 2014, 2015 & also
2016 in Canada) Dodge Durango SUV in changing the front windshield
window wiper blades. Owners of other Chrysler, Dodge and RAM vehicles such as the Town & Country, 300, 200, Avenger, Charger, Journey, Dart, Challenger, Grand Caravan, and Ram C/V Tradesman minivan may also find these DIY instructions to be helpful. The OEM wiper blade sizes in inches are as follows: Driver Side 22" and Passenger Side 21". A few compatible replacement wiper blades with their part numbers include the following: Rain-X RX30222 & Rain-X RX30221, Bosch 22A & Bosch 21A, Anco 31-22 & Anco 31-21, Michelin 8522 & Michelin 8521, Trico 22-1 & Trico 21-1 and ACDelco 8-4422 & ACDelco 8-4421. The only tool needed to replace the wiper blades is a flathead screwdriver or a plastic pry bar tool used to pry open the locking tabs. |
||
|
|
||
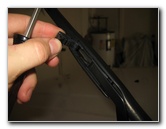
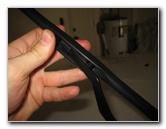
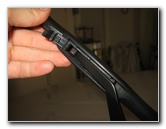
 Plastic Lock Tab |
 Pry Open Locking Tab |
|
| Lift the wiper arm
off the windshield until it remains in the raised position by itself. Gently pry open the black plastic lock tab with a flathead screwdriver. |
||
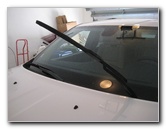
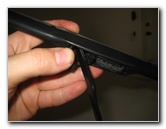
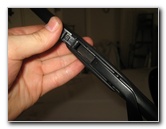
 Swing Lock Tab Up |
 Pull Old Blade Out of Hook |
|
| Swing open the
locking tab. Slide the mounting bracket in the center of the old wiper blade down and out of the metal hook at the end of the wiper arm. |
||
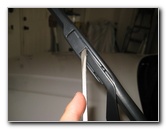
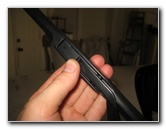
 Rotate Blade Perpendicular |
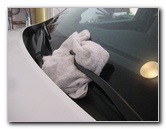 Towel - Protect Glass |
|
| Rotate the old
wiper blade until it is almost perpendicular with the metal wiper arm. Pass the metal hook at the end of the wiper arm through the opening in the old wiper blade. Place a towel on the windshield to protect the glass from being chipped, scratched, cracked or shattered just in case the wiper arm smacks down on to the window while you are replacing the wiper blade. |
||
|
|
||
 Line Up New Wiper Blade |
 Pass Hook Through Opening |
|
| I recommend buying
the Bosch 22A and
Bosch 21A wiper blades since they
have excellent reviews on Amazon. Line up the new wiper blade with the metal wiper arm. The rubber wiper blade should be pointing out away from the windshield. Pass the metal hook at the end of the wiper arm through the opening in the new wiper blade. |
||
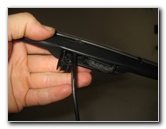
 Slide Bracket Up In To Hook |
 New Blade Secured In Hook |
|
| Rotate the new
wiper blade until it is almost parallel with the wiper arm. Slide the plastic mounting bracket up and in to the metal hook at the end of the wiper arm. |
||
 Flip Locking Tab Closed |
 Lower Wiper Arm To Window |
|
| Flip the locking
tab closed and snap it in to place to secure the new wiper blade. Double check that the new wiper blade is securely attached to the wiper arm. Gently lower the wiper arm down to the windshield. For the best wiper performance, I'd recommend thoroughly cleaning off the windshield and applying a window treatment product such as Rain-X or Zaino Glass Polish. For more,
check out my other
Dodge Durango DIY Repair & Maintenance Guides. |
||
| If you found this guide to be helpful,
please consider making a small donation by clicking on the PayPal.com
"Donate" button located to the right of this paragraph. Thank you!
(Note: I am not a registered charity. Donations are not tax deductible.) |