
Dodge Charger
Headlight Bulbs Replacement Guide
How to replace the low beam, high beam,
turn signal & sidemarker headlight bulbs in a 2006-2010 Dodge Charger.

By Paul B. Michaels Author & Photographer Auto Mechanic Since 1989 |
||
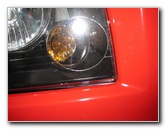
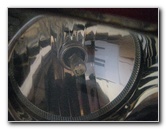
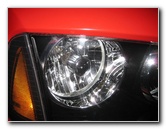
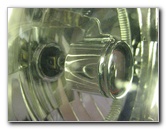
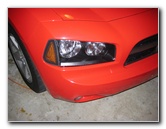 Dodge Charger Headlight |
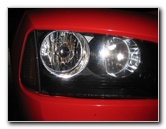 Low Beam - High Beam |
 Turn Signal & High Beam |
| This
automotive "how-to" guide was specifically written to assist owners
of the 2006-2010 Dodge Charger sedan in replacing any of the bulbs
in the headlight assembly. Owners of other Dodge or Chrysler vehicles such as the Magnum, Challenger, 300, Caliber, Journey, Avenger, Nitro, Durango, Grand Caravan, 200 and Town & Country minivan may also find this guide to be useful. The headlight assembly of a 2006 to 2010 Dodge Charger contains the following light bulbs with their respective part numbers: Low Beam Light Bulb # 9006XS or 9006X/S, High Beam Light Bulb # 9005XS or 9005X/S, Front Turn Signal Light Bulb # 3157A, and Front Sidemarker Light Bulb # 194. No tools are needed to access any of the headlight bulbs although a small flathead screwdriver or a plastic pry bar tool is useful for prying off the low beam and high beam power connectors. |
||
|
|
||
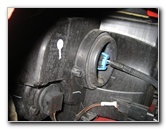
 Rear of Headlight Assembly |
 Turn Signal / Parking Light |
 1/4 Turn Counter Clockwise |
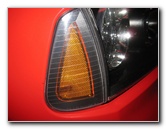
| The turn signal
or "parking" light bulb is located at the edge of the headlight assembly
closest to the center line of the vehicle.
To remove the turn signal bulb, reach behind the headlight and rotate the socket 1/4 turn counter clockwise before pulling it straight out. Separate the bulb from the socket by pulling it straight out. If you have trouble removing it, try gently wiggling the bulb while pulling it out. |
||
 Pull Out Bulb Socket |
 Pull Out Turn Signal Bulb |
 Replace Light Bulb |
| Push in a new # 3157A bulb into the turn signal socket, insert the socket into the headlight and rotate it 1/4 turn clockwise to secure it within the assembly. | ||
 1/4 Turn Clockwise |
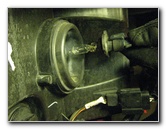
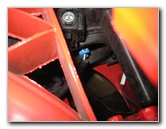
 High Beam Headlight |
 High Beam Bulb Connector |
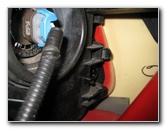
| The high beam
headlight bulb is located in the center of the headlight assembly.
Locate the high beam headlight bulb socket at the rear of the assembly and rotate the base 1/4 turn counter-clockwise to remove it. |
||
 1/4 Turn Counter Clockwise |
 Pull Out High Beam Socket |
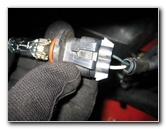 High Beam Power Connector |
 Pry Up Connector Clip |
 Pull Out High Beam Bulb |
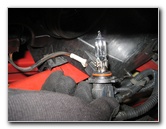
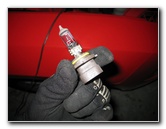
 Sylvania # 9005XS |
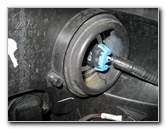
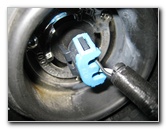
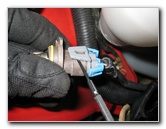
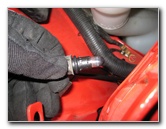
| The power connector
for the high beam bulb is held in place by a grey plastic clip.
Use a small flathead screwdriver or your fingernail to pry up the clip and pull the connector away from the base of the old bulb. |
||
|
|
||
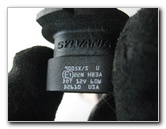 9005X/S DOT 12V 60W |
 Insert New High Beam Bulb |
 Bulb In Headlight Assembly |
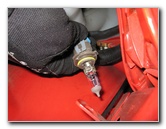
| Snap a new
9005XS high beam bulb into the power connector and try to avoid touching the glass
part of the bulb with your fingers or anything in the engine bay.
If you do get anything on the new halogen bulb, wipe off the glass with a rubbing alcohol moistened paper towel. Insert the new high beam bulb and socket back into the headlight. Rotate the base of the bulb 1/4 turn clockwise to secure it inside the assembly. |
||
 1/4 Turn Clockwise |
 High Beam Bulb Secured |
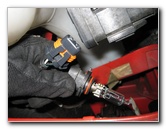
 Low Beam Headlight |
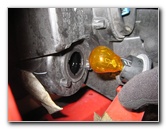
| The low beam headlight bulb is located near the outer edge of the car next to the yellow side marker light. | ||
 Reach In To Low Beam |
 1/4 Turn Counter Clockwise |
 Pry Off Power Connector |
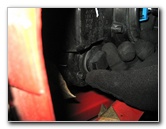
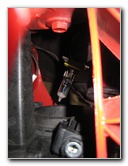
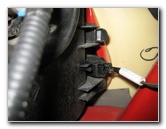
| Reach in behind the
headlight assembly past the turn signal and high beam bulb to the low beam
bulb's socket.
Rotate the low beam bulb socket 1/4 turn counter clockwise and pull it straight out of the headlight. |
||
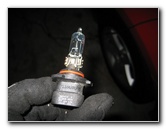
 9006X/S 12V 51W |
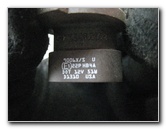 9006XS Low Beam Bulb |
 Insert New Low Beam Bulb |
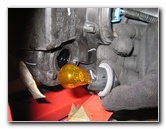
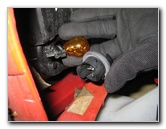
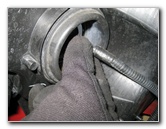
| Pry off the power
connector from the base of the old low beam headlight bulb using a small
flathead screwdriver.
Snap a new # 9006XS low beam bulb on to the power connector. Avoid touching the glass part of the new halogen low beam bulb with your fingers or anything in the engine bay. If you do get the bulb dirty, wipe it off with some papers towels and rubbing alcohol. |
||
 Low Beam In Headlight |
 1/4 Turn Clockwise |
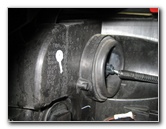
 Side Marker Light |
| Insert the new bulb and the socket into the headlight assembly. Rotate the base of the bulb 1/4 turn clockwise to secure it in place. | ||
 Press Tab On Connector |
 Sidemarker Power Removed |
 1/4 Turn Counter Clockwise |
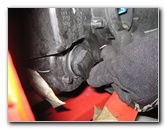
| The sidemarker
light bulb is located at the far edge of the headlight assembly next to the
side of the vehicle.
This is the most difficult of the four bulbs to replace since you have to squeeze your hand into the tight space behind the headlight. Once you do reach the sidemarker bulb, press the tab on the power connector and wiggle it off the base of the bulb. Then turn the sidemarker bulb's socket 1/4 turn counter-clockwise and pull it out of the headlight assembly. |
||
 Install New Sidemarker |
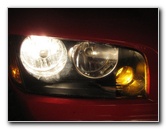 Testing Low Beam |
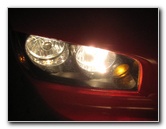 High Beam & Turn Signal |
| Pull the old
sidemarker light bulb straight out of the socket and push in a new #
194 bulb. Insert the new bulb and socket back into the headlight assembly and
turn it 1/4 turn clockwise to secure it in place.
If you would like to have longer lasting and brighter side marker lights, install some compatible replacement 194 LED bulb. Push the side marker power connector back on to the base of the socket. Test the new light bulb(s) by turning on the headlights, flashing the high beams and activating the hazard signals. For more, check out my
Dodge
Charger Maintenance & Repair Guides page. |
||
| If you found this guide to be helpful,
please consider making a small donation by clicking on the PayPal.com
"Donate" button located to the right of this paragraph. Thank you!
(Note: I am not a registered charity. Donations are not tax deductible.) |