
Dodge Avenger
12V Car Battery Replacement Guide
How to change a dead 12 volt automotive
battery in a 2011-2014 Dodge Avenger sedan with photo illustrated steps.

By Paul B. Michaels Author & Photographer Auto Mechanic Since 1989 |
||
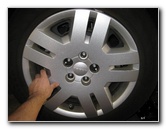
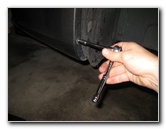
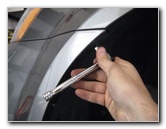
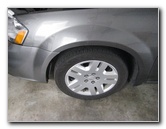 Driver Side Front Wheel |
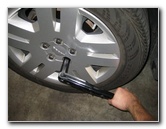
 Loosen 5 Lug Nuts |
 Raise With Floor Jack |
| This
automotive maintenance tutorial was specifically written to assist
owners of the updated (2011, 2012, 2013 and 2014) Dodge Avenger
sedan in changing the 12 volt automotive battery located in the
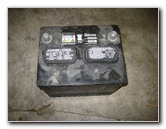
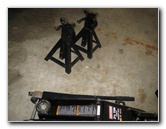
front driver side wheel well. Owners of other Chrysler Group vehicles such as the Dart, Challenger, Durango, Charger, Grand Caravan, 200, 300, RAM C/V Tradesman, Jeep Patriot, Compass and Cherokee may also find these DIY instructions to be helpful. The Chrysler Group LLC brand OEM battery in this 2012 Avenger is part number 56041380AE. A few other compatible Group Size 86 replacement batteries include the EverStart MAXX-86 from Wal-Mart, AutoCraft 86-1, Napa BAT 7586 or BAT 8486, and Duracell SLI86 or SLI86M. The tools needed to replace the 12V battery include a lug nut wrench, a floor jack, two jack stands, a 7mm socket with a 1/4" drive ratcheting wrench, a flathead screwdriver, a 13mm socket with a 3/8" drive ratcheting wrench and a 10mm socket. |
||
|
|
||
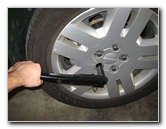
 Spin Off Lug Nuts |
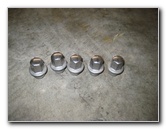 5 Lug Nuts Removed |
 Pull Off Plastic Wheel Cover |
| The first few steps
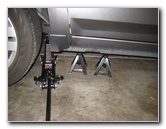
are to park the vehicle on a level surface, engage the emergency / parking
brake and chock the rear wheels to prevent the car from moving. Then slightly loosen the 5 lug nuts on the front driver side wheel with the tire iron. Raise the front driver side of the car with the floor jack and securely support it with two jack stands. Spin off the 5 lug nuts and set them aside in a safe place. Pull off the plastic wheel cover or "hub cap" and set it aside in a safe place. |
||
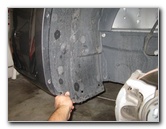
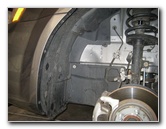
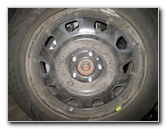 Remove Front Wheel |
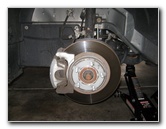 Front Brake Rotor & Caliper |
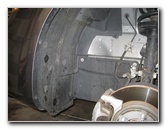 Front Wheel Well Liner |
| Pull off the front wheel. | ||
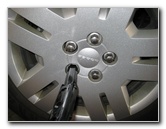
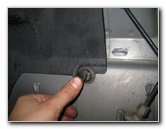
 Remove 7mm Screws |
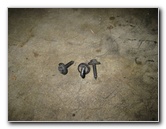 Three 7mm Screws Removed |
 Pry Out Center of Fastener |
| Remove the three screws along the outer edge of the wheel well splash shield by turning them counter clockwise with a 7mm socket and ratcheting wrench. | ||
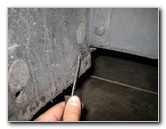
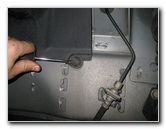
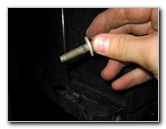
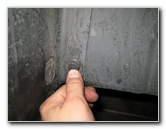
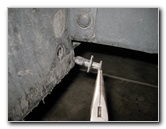 Remove Pop Rivet Fastener |
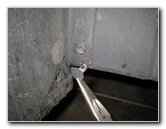 |
 Remove Other Fasteners |
| Then pry out the
center of each black plastic pop rivet fastener with a flathead screwdriver
before pulling out the entire fastener. You may need a pair of needle nose pliers to remove the fasteners. |
||
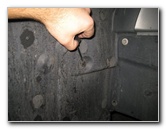
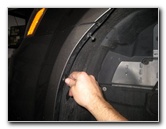
 Pry Out Top Fasteners |
 Inner Pop Rivet Fastener |
 3 Screws - 6 Pop Rivets |
| After you've removed all of the splash shield fasteners, you should have three 7mm screws and six plastic pop rivets. | ||
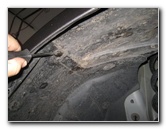
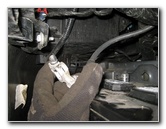
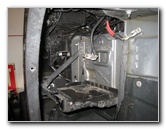
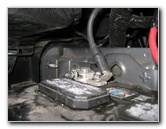
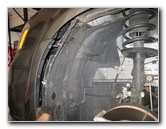
 Pull Out Wheel Well Liner |
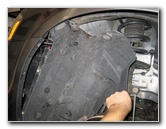 Splash Guard Removed |
 12V Battery In Wheel Well |
|
Pull the splash shield out of the wheel well and set it aside in a safe place. Once the shield is out of the way, you'll see the 12V car battery resting on a shelf in the wheel well. |
||
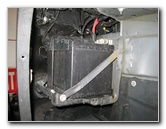
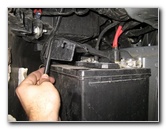
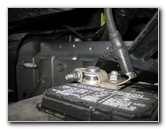
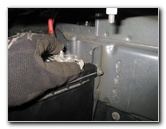
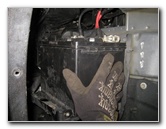
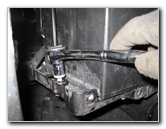
 Loosen 13mm Lower Bolt |
 Remove Cross Brace Bar |
 Battery Clamp Bar Bolt |
| Loosen the two
bolts on the cross brace bar by turning them counter clockwise with a 13mm
socket and 3/8" drive ratcheting wrench. Spin out the two bolts and remove the cross brace bar. |
||
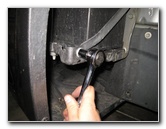
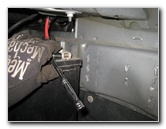
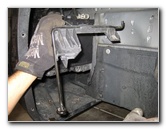
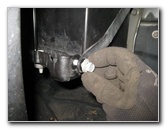
 Loosen 13mm Bolt |
 Remove Battery Clamp Bolt |
 Lift Off Battery Holder Bar |
| Then remove the single 13mm bolt on the left side of the battery that holds the metal clamp bar in place. | ||
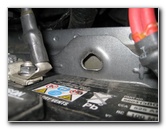
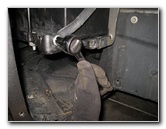
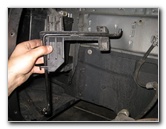 Battery Holder Bracket Removed |
 "+" Positive Battery Terminal |
 "-" Negative Battery Terminal |
| Lift the battery holder bar bracket off the top of the old battery and set it aside. | ||
|
|
||
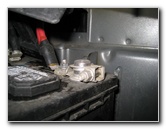
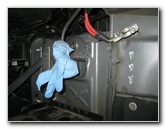
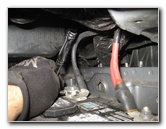
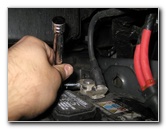 Loosen "-" Terminal First |
 Pull Off Negative Terminal |
 Remove "+" Terminal 2nd |
| Remove the negative
"-" black cable first by loosening the nut on the terminal in the counter
clockwise direction with a 10mm socket and ratcheting wrench. Pull the negative terminal off the battery post and tuck it away behind the battery. You may also choose to cover the negative battery terminal with a rag or a latex glove to prevent accidental contact with the battery post. Then loosen the 10mm nut on the positive "+" (red cable) terminal and pull it off the battery post. |
||
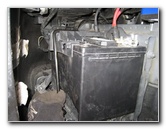
 Pull Out Old OEM 12V |
 Empty Battery Tray |
 Cover Negative Terminal |
| Carefully slide the
old battery off the tray and out of the wheel well. The OEM Group Size 86 battery from Chrysler Group LLC is part number 56041380AE. |
||
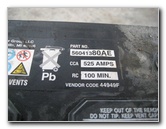 Part # 56041380AE |
 Install New 12V Battery |
 Tighten 10mm Terminal Nut |
| Carefully lower the
new 12V battery on to the tray with the negative terminal closer to the
front of the car and the "+" positive terminal closer to the wheel well. Lower the "+" positive terminal (the red cable) on to the positive battery post first. Tighten the nut on the positive battery terminal in the clockwise direction with the 10mm socket and ratcheting wrench. |
||
 Attach Negative Terminal |
 Tighten 10mm Clockwise |
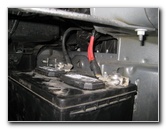 Both Terminals Attached |
| Attach the negative
terminal (black cable) to the "-" negative battery post and tighten the 10mm
nut in the clockwise direction. Double check that both of the battery terminals are tight before moving on to the next steps. |
||
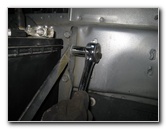
 Push Battery Back On Tray |
 Hole For Battery Bar Hook |
 Line Up Battery Holder Bracket |
| Push the battery
all the way forward on the tray. Insert the metal hook at the inner end of the battery clamp bar in to the mounting hole above the battery. |
||
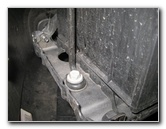
 Re-Attach Battery Clamp Bar |
 Tighten 13mm Battery Bar Bolt |
 Re-Attach Cross Brace Bar |
| Lower the battery
clamp bracket down on to the top of the battery and spin in the bolt on the
left side of the tray. Tighten the battery bar bolt in the clockwise direction with the 13mm socket and ratcheting wrench. Re-install the cross brace bar and spin in the two bolts by hand to prevent them from becoming cross threaded. |
||
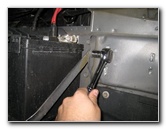
 Re-Insert 13mm Bolts |
 Tighten Bolt Clockwise |
 Tighten Upper 13mm Bolt |
| Tighten the two bolts on the cross brace bar in the clockwise direction with the 13mm socket and ratcheting wrench. | ||
 Replace Wheel Well Liner |
 Push In Pop Rivet Fasteners |
 Replace 6 Pop Rivets |
| Replace the black
plastic splash shield in to the wheel well and push in the pop rivet
fasteners. Re-insert the larger outer part of each fastener first before pushing in the center piece to secure it in place. |
||
 Re-Insert 3 7mm Screws |
 Tighten 7mm Clockwise |
 Wheel Well Liner Replaced |
| Re-insert the three
7mm screws in to the outer edge of the wheel well liner and tighten them in
the clockwise direction. Double check that all 6 of the pop rivets and the 3 screws are securely in place on the wheel well splash guard before moving on to the next steps. |
||
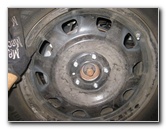 Replace Front Wheel |
 Push On Plastic Hub Cap |
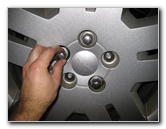 Spin On 5 Lug Nuts |
| Replace the front
wheel and push on the plastic wheel cover with the cut out for the tire
valve in the correct position. Spin on the 5 lug nuts in the clockwise direction by hand to prevent them from becoming cross threaded. |
||
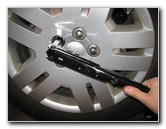 Slightly Tighten Clockwise |
 Lower Car From Stands |
 Torque To 100 ft-lbs |
| Slightly tighten
the lug nuts in a "criss cross" or "star" pattern with the tire iron. Lower the car from the jack stands and the floor jack. Continue progressively tightening the lug nuts in the clockwise direction in a star pattern to about 1/4 turn past hand tight or 100 ft-lbs of torque. It would be best to use a torque wrench or an impact wrench with a torque stick to properly tighten the lug nuts. Test the new 12V automotive battery by starting the engine and turning on the headlights. It would be a good idea to check that the lug nuts are still tight after your next trip. For more, check out my other
Dodge Avenger Repair & Maintenance Guides. |
||
| If you found this guide to be helpful,
please consider making a small donation by clicking on the PayPal.com
"Donate" button located to the right of this paragraph. Thank you!
(Note: I am not a registered charity. Donations are not tax deductible.) |