
Comfortmaker
HVAC Condenser Capacitor Replacement Guide
How to replace a dual run/start capacitor
in a Comfortmaker condenser outside A/C unit with picture illustrated steps.

|
|
||
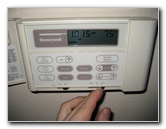
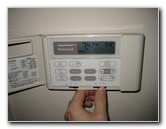 Turn Off Honeywell Thermostat |
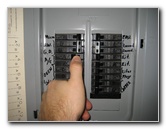 Turn Off A/C Circuit Breaker |
 A/C Disconnect Switch |
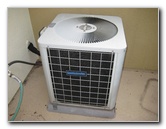
| This
residential air conditioning repair guide was specifically written
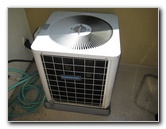
to assist homeowners with the Comfortmaker HVAC condenser model #
AG030GB2 in replacing the round dual run/start capacitor for the
compressor and fan. Owners of other HVAC brands such as Rheem, Goodman, Trane, Carrier, Tempstar, Lennox, Reznor, Amana, Bryant, American Standard, York, Luxaire, Ruud, Tappan, and Gibson may also find these DIY instructions to be helpful. The most obvious indication of a faulty condenser capacitor is when the air handler (inside A/C unit) blows room temperature air out of the vents (AKA "registers"). You will also notice that the condenser (outside A/C unit) fan may not begin spinning and/or the compressor may not start. Other symptoms include the fan making a buzzing or humming sound, overheating and running erratically. If you have a digital multimeter tool, you can test the old capacitor. It may be possible to get the condenser fan spinning by pushing it with a stick. |
||
|
|
||
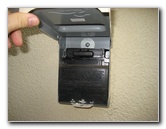
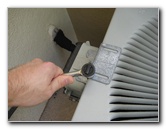
 Pull Out "Fuse Block" |
 Midwest U065P 60A 240V |
 Comfortmaker AG030GB2 |
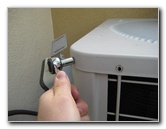
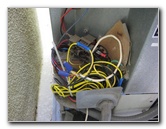
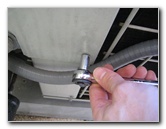
| The first two steps
are to turn off the A/C system at the thermostat and turn off the A/C system
at the home's breaker box. Then go outside and locate the disconnect switch or breaker box for the condenser (outside A/C unit). This Comfortmaker condenser has a Midwest model # U065P 60Am 240V disconnect switch with a black plastic pullout "fuse block". Either pull out the condenser fuse block or flip the breaker switch to the "Off" position.
|
||
 Power Company Control Box |
 Remove Two 8mm Screws |
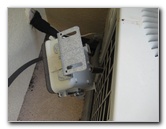 Control Box Removed |
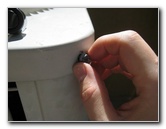
| Our condenser is
equipped with a "high demand remote shutoff device" from the power company
that allows them to cycle the unit off during times of peak demand which
gives us a small discount on our bill. If your condenser doesn't have one of these devices, just skip ahead. Use an 8mm wrench or an 8mm socket with a ratcheting wrench to remove the two screws that hold the shutoff device to the top of the condenser and set it off to the side. |
||
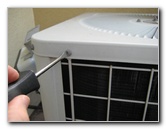 Remove 8mm Screws |
 Screwdriver or Socket |
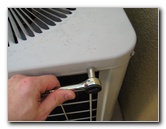 |
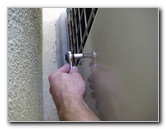
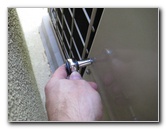
| To remove the top cover of the condenser, use a flathead screwdriver or an 8mm socket with ratcheting wrench to remove all the screws on the sides and corners. | ||
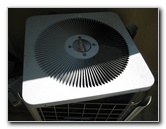
 Lift Top Cover & Fan Off |
 Set Top Cover Aside |
 Do Not Stress Wires |
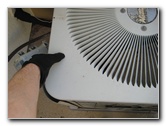
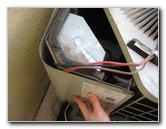
| For the next step,
I'd recommend wearing gloves to prevent cutting your hands and/or have an
assistant help you. Carefully lift the top cover of the condenser off the unit and either gently rest it to the side or on the top of the unit. Be sure to not stress or pull on the wires hooked up to the fan. |
||
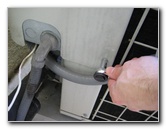 Remove Two 8mm Screws |
 2nd Screw - Access Panel |
 Remove Corner Panel |
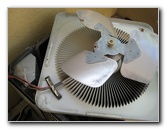
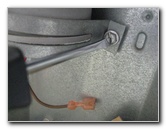
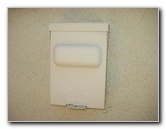
| Follow the fan
wires to the electrical access panel located at one corner of the condenser.
Remove the two 8mm screws with a socket or screwdriver and pull the panel off the condenser. |
||
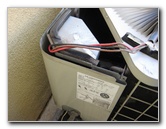
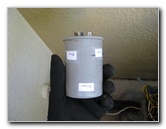
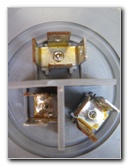
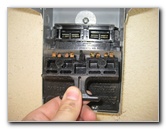
 HVAC Relay & Wires |
 Dual Run/Start Capacitor |
 Three Wires Attached |
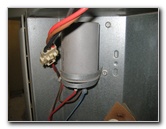
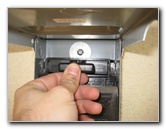
| Behind the
condenser's access panel, you'll see the electrical relay and the round or
oval dual run/start capacitor for the fan and compressor. If your condenser's capacitor is faulty, it may appear to bulge out, be misshapen or be leaking an oily or greasy substance. To purchase a new A/C capacitor, take the old one to an HVAC supply warehouse or appliance repair parts store. You might also try buying one from a local A/C repair company. If you can wait a day or two, try looking on Amazon. |
||
|
|
||
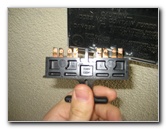
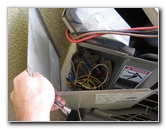
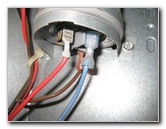
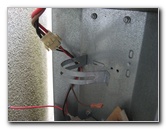
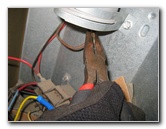
 Pull Off Capacitor Wires |
 Wires Off Terminals |
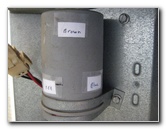 Wire Colors Locations |
| Many modern HVAC
condensers have a built in bleed resistor so the capacitor will not contain
a charge in the "Off" phase of the cycle.
Wear rubber soled shoes and also rubber gloves if available while using a rubber handled pair of needle nose pliers to pull off the wires from the capacitor. Do not rest your idle hand on the top of the condenser. I chose to place small labels on the capacitor indicating where each colored wire was installed on the old capacitor to help when installing the new unit. |
||
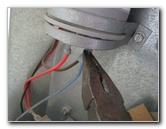
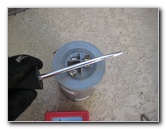
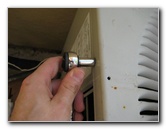
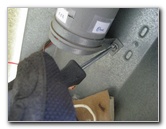 Loosen Capacitor Strap |
 Old Capacitor Removed |
 |
| Use a screwdriver
to loosen the metal strap that holds the old capacitor to the condenser. Carefully remove the capacitor without touching the electrical terminals or the loose wire ends. |
||
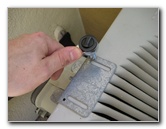
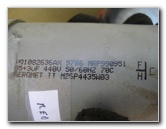 35+3uF 440 50/60 Hz 70c |
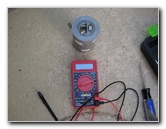 Centech Multimeter |
 Discharge A/C Capacitor |
| The old capacitor
was rated at 35+3 microfarads (also indicated as "MFD" or "uF"), 440 volts,
50/60Hz and 70 degrees celsius. The safest way to discharge an A/C capacitor is with a large value resistor attached to two wires and then placed on the terminals. The alternate way to discharge a capacitor is to place a metal screwdriver with a rubber insulated handle across the terminals. This capacitor was already completely discharged due to the bleed resistor, so I didn't see a spark. |
||
 Check With Multimeter "1" |
 Terminals - Fan, Herm, Common |
 Install New Capacitor |
| Just to be extra
safe, I checked the capacitor with an electronic multimeter to ensure that
it was discharged.
I set the multimeter to the Ohms setting and touched the probes to each of the three terminals two at a time. It read "1" which stands for "infinity" on my multimeter and indicates that the capacitor is good. If the multi-meter goes to "0" Ohms or higher and remains there, the capacitor is bad or "shorted". |
||
 Slide Wires On Terminals |
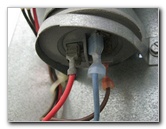 Wires Attached |
 Replace Access Panel |
| Install the new
capacitor and tighten the metal strap with the screwdriver. Use the rubber handled needle nose pliers to slide the wires on to the capacitor terminals. On this Comfortmaker condenser, the Red wire was connected to the "C" (Common) terminal, the Blue wire was connected to the "Herm" (Compressor) terminal, and the Brown wire was connected to the "Fan" terminal. |
||
 Tighten Two 8mm Screws |
 |
 Lower Top Cover & Fan |
| Replace the corner
electrical access panel and tighten the two 8mm screws. Carefully lower the top cover of the condenser over the unit. Ensure that the side panels and corner panels are inside the top cover. |
||
 Replace Top Cover Screws |
 Tighten 8mm Screws |
 Replace High Demand Box |
| Insert and tighten
the screws that hold the top cover of the condenser in place. You may have
to shift around the top cover and corner panels to get the screw holes to
line up properly. Re-attach the utility company's high demand shutoff device if your condenser is equipped with one. |
||
 Comfortmaker Condenser Fixed |
 Replace Pullout Disconnect |
 Fuse Block Disconnect |
| Push the disconnect switch's pull out handle or "fuse block" back in place and close the cover. | ||
 Close Protective Cover |
 Turn On Power Breaker |
 Turn On A/C Thermostat |
| Restore power to
the air conditioning system at your home's power breaker box and turn on the
A/C at the thermostat.
If a bad capacitor was your condenser's only issue, both the compressor and fan should start working. For more, check out my other
Home Repair & Maintenance Guides. |
||
| If you found this guide to be helpful,
please consider making a small donation by clicking on the PayPal.com
"Donate" button located to the right of this paragraph. Thank you!
(Note: I am not a registered charity. Donations are not tax deductible.) |