
Chrysler
Pacifica Cabin Air Filter Replacement Guide
How to change the A/C system's cabin air
filter element in a 2017, 2018 or 2019 Chrysler Pacifica with the part numbers.

By Paul B. Michaels Author & Photographer Auto Mechanic Since 1989 |
||
 2017 Pacifica Glove Box |
 Open & Empty Out |
 Glove Box Damper String |
|
This automotive maintenance tutorial was specifically written to assist owners of the first generation (2017, 2018, 2019 and possibly also the 2020 and 2021 model years) Chrysler Pacifica minivan in cleaning or changing the A/C system's cabin air filter element located in the HVAC blower motor housing. Owners of other FCA (Fiat Chrysler America) vehicles from Chrysler, Dodge, Jeep, RAM or Fiat such as the Town & Country, 300, 200, Charger, Challenger, Durango, Journey, Grand Caravan, Wrangler, Grand Cherokee, Compass, Renegade, Patriot, RAM 1500, RAM ProMaster City, Fiat 500 and Fiat 124 may also find these DIY instructions to be helpful. A few compatible replacement cabin air filters with their part numbers are as follows: EcoGard XC25870, Premium Guard PC99238C and Original Engine Management CAF228P. The only tool needed to access and replace the cabin air filter is a flathead screwdriver or a plastic pry bar tool. |
||
|
|
||
 Slide Down & Pull Out Mount |
 Push In Both Side Walls |
 Release Side Stoppers |
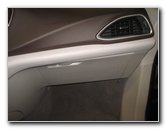
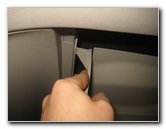
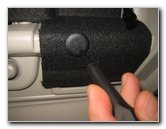
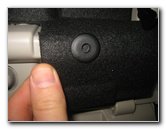
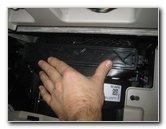
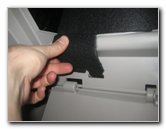
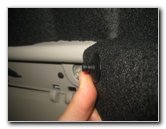
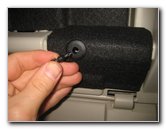
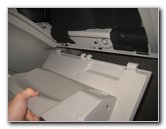
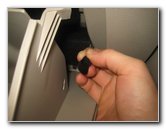
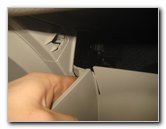
| The first few steps
are to sit in the front passenger seat, open the glove box and empty out the
contents. Move to the right outer side wall of the glove box and locate the damper arm string. Slide the black plastic mounting piece for the damper string down and towards the rear of the vehicle. Once the round plastic button on the inside of the glove box is in the larger hole, pull the damper string mounting piece out of the right side wall. Gently release the damper string and allow it to retract back behind the glove box. Firmly push in the two side walls of the glove until the side stops can be removed from behind the glove box. |
||
 Screwdriver For Leverage |
 Lower Glove Box |
 Fabric Cover |
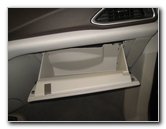
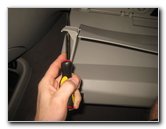
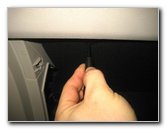
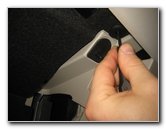
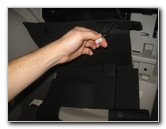
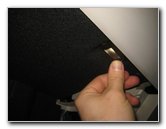
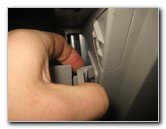
| You may need to use
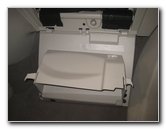
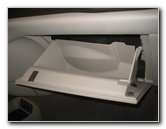
a flathead screwdriver for extra leverage to release the side stops. Gently lower the glove box down to the floor mat. The plastic hinges on the bottom rear corner of the glove box may come apart. They can easily be re-attached later on. Once the glove box is out of the way, you'll see the black fabric insulation and noise reduction cover. |
||
 Push In Center Button |
 Fastener Released |
 Pry Out Pop Rivet |
| The fabric cover is
held in place by three round black plastic pop rivets. One pop rivet is located at the bottom right side of the cover. The other two pop rivets are located at the top two corners of the cover. Push in the small round pin in the center of the pop rivet to unlock the fastener. Then you can either pry out the pop rivet or just pull out the fabric cover and leave the pop rivet attached to the cover. |
||
 Remove Other Pop Rivet |
 Pull Out Bottom Flap |
 Pry Out Light Housing |
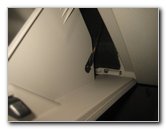
| Release the two
other pop rivets by pushing in the pins with the small flathead screwdriver. Pull out the flap at the bottom left of the cover. Pry out the glove box light housing with the small flathead screwdriver or a plastic pry bar tool. |
||
 Disconnect Light Housing |
 Fabric Cover Removed |
 HVAC Blower Motor |
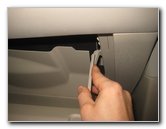
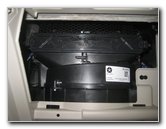
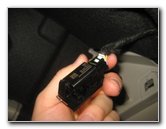
| Push in the release
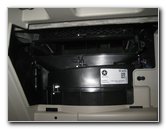
tab on the glove box light housing before disconnecting the power plug. Set the fabric cover aside in a safe place. Finally, you'll be able to see the HVAC blower motor housing and the rectangular shaped filter access cover. |
||
 Right Side Retaining Clip |
 Gently Pull Out Tab --> |
 Pull To Release Clip <-- |
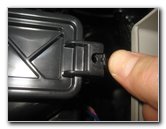
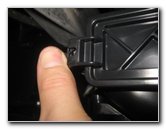
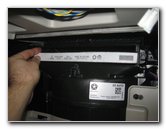
| There are two
retaining clips on the filter cover. One is located on the left and the
other on the right side. Gently pull the release tabs out away from the center of the filter cover to release the retaining clips. |
||
 Pull Off Filter Access Cover |
 Filter Cover Removed |
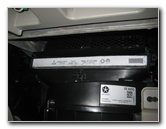 Old Filter Visible |
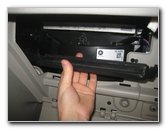
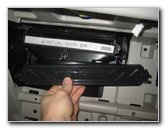
| Pull off the filter
access cover and set it aside in a safe place. You should now be able to see the white outer edge of the old filter. |
||
|
|
||
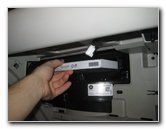 Slide Out Old Filter |
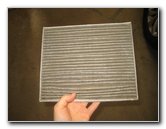 Inspect Both Sides |
 Clean With Vacuum |
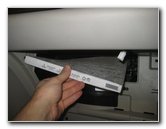
| Slide the old
filter straight out of the slot in the HVAC blower motor housing. Inspect both sides of the old filter. If the old filter is relatively clean, just tap out the large debris and remove any fine dust with a vacuum cleaner. If the old filter is dark grey or black and clogged with dirt, dust, leaves, soot, pollen, insects, twigs, hair and other debris, it should be replaced with a new element. I recommend buying the EcoGard XC25870 filter since it has excellent reviews on Amazon. |
||
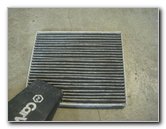
 Empty Filter Slot |
 "Down" Air Flow Arrow |
 Slide In New Air Filter |
|
If you see any leaves or other large debris in the filter slot, remove it with your fingers or use a crevice tool attachment with your vacuum cleaner. Orientate the new filter with the "Air Flow" arrow pointing down towards the floor mat. Slide the new filter straight into the slot until it is fully seated. |
||
 Line Up Filter Cover |
 Push To Secure Clips |
 Filter Cover Replaced |
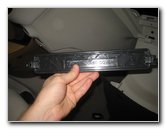
| Line up the cover
with the words "FILTER ACCESS COVER" orientated in the correct position so
that it can be read. Gently push on the filter cover until you hear or feel the two retaining clips "click" into place. Double check that the filter cover is secure before moving on to the next steps. |
||
 Pull Plug Through Cover |
 Re-Insert Bottom Flap |
 Re-Insert Pop Rivet |
| Hold the fabric
cover up near the HVAC blower motor housing. Pass the electrical connector for the glove box light housing through the opening in the cover. Push the cover back into place. Re-insert the tabs on the flap at the bottom left into the corresponding slots. Pull out the small round pins from the center of the pop rivets to reset them for re-installation. |
||
 Push In Center Pin |
 Secure Pop Rivet |
 Plug In Light Housing |
| Re-insert the three
pop rivets. Push in the pins until they click into place to secure the pop rivets. Push the electrical connector for the glove box light housing back into its socket. |
||
 Replace Light Housing |
 Re-Attach Hinges |
 Pull Out Damper String |
| Push the glove box
light housing back into its opening on the fabric cover. Raise the glove box towards the dashboard. Line up the hinges with their mounting bars and push them back together. Pull the glove box damper string and mounting piece out from behind the right side of the glove box. |
||
 Two Small Openings |
 Snap In Button To Secure |
 Push In Side Walls |
| Re-insert the
button on the mounting piece into the larger opening in the right side wall
of the glove box. Slide the mounting piece towards the front of the car until the round button snaps into the smaller hole. Double check that the glove box damper string mounting piece is secured. Firmly push in the two side walls of the glove box until the side stops can be re-inserted behind the dashboard. |
||
 Re-Insert Side Stops |
 Glove Box Re-Installed |
 Replace Contents & Close |
| Replace the
contents of the glove box and then close it to complete the job. Enjoy the fresh clean air from your A/C system! Be sure to record the filter change in your vehicle's service records. For more,
check out all of my
Chrysler Pacifica Minivan DIY
Repair & Maintenance Guides. |
||
| If you found this guide to be helpful,
please consider making a small donation by clicking on the PayPal.com
"Donate" button located to the right of this paragraph. Thank you!
(Note: I am not a registered charity. Donations are not tax deductible.) |