
Chevrolet
Colorado Hood Lift Support Struts Replacement Guide
How to change weak or failing hood lift
support struts on a 2nd generation 2015 to 2022 GM Chevy Colorado truck.

By Paul B. Michaels Author & Photographer Auto Mechanic Since 1989 |
||
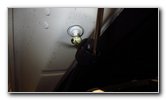
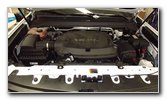 2019 Colorado Engine Bay |
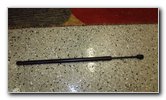
 Two Hood Lift Struts |
 Top of Hood Support |
| This automotive
maintenance tutorial was specifically written to assist owners of the second
generation (2015, 2016, 2017, 2018, 2019, 2020, 2021 and 2022) GM Chevrolet Colorado truck in changing weak, worn out or
defective hood lift support struts (also known as shocks or spring dampers). Owners of other General Motors vehicles from Chevrolet, GMC, Cadillac, Buick and Holden such as the Trax, Equinox, Traverse, Blazer, Tahoe, Suburban, Sonic, Cruze, Trailblazer, Spark, Malibu, Impala, Volt, Bolt, Corvette, Camaro, Silverado, Express, Regal, LaCrosse, Cascada, Encore, Enclave, Envision, Canyon, Sierra, Terrain, Acadia, Yukon, XT4, XT5, XT6, Escalade, CT5, CTS, XTS, CT6, ATS, Astra and Commodore may also find these DIY instructions to be helpful. Some compatible replacement aftermarket hood lift support struts with their part numbers include the following: Tuff Support 612064 and Lift Supports Depot PM3866. The OEM (original equipment manufacturer) General Motors part numbers are GM 23167779 and GM 23167780. The only tool needed to remove and replace the struts is a small flat head screwdriver or a plastic pry bar tool. The first two steps are to open the hood and then wedge it open with some large towels or folded cardboard boxes. Alternatively, you could have a trusted assistant hold open the hood for you. |
||
|
|
||
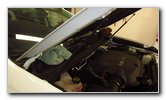
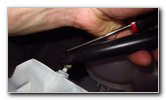
 Pry Out Retaining Clip |
 Pull Socket Off Ball |
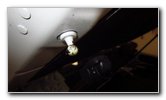 Ball Socket Mount Point |
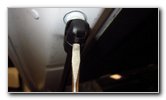
| Locate the black
metal "C" shaped retaining clips situated at the top and bottom of each
support strut.
Use a small flat head screwdriver or a plastic pry bar tool to gently pull back the center of the retaining clip to release it from the outside of the ball socket. Carefully pull the socket off the ball mount attached to the hood. |
||
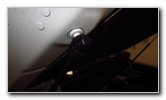
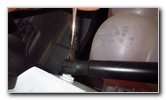
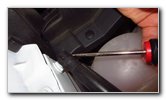 Pry Out Bottom Clip |
 Pull Off Bottom Socket |
 Old Strut Shock Removed |
| Repeat the process
to release the ball and socket at the bottom of the strut.
Set the old strut aside. |
||
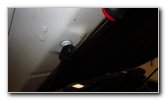
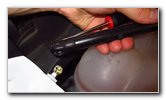
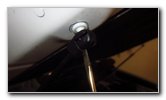
 Push On Lower Socket |
 Pop In Retaining Clip |
 Line Up Top Ball & Socket |
| Orientate the new
strut so that the gas charged shock part is at the bottom near the engine
bay. The silver metal extendable bar should be located at the top closer to the hood. Make sure that the two retaining clips on the new strut are in the out (released) position. |
||
 Snap In Retaining Clip |
 Metal Clip Secured |
 Two Struts Replaced |
| If necessary,
carefully pry out the retaining clips until the sockets can be popped back
into place over the ball mounts. Firmly push the retaining clips back in towards the ball mount to secure them in place. Double check that the strut is securely attached before moving on to replace the other strut. To test the new struts, push down the hood and then let go of it. If the new struts are working properly the hood should raise by itself in a slow controlled manner. Be sure to record the procedure in your vehicle's service records. Please check out all of my
2015-2019 GM Chevrolet Colorado DIY Repair & Maintenance Guides. |
||
| If you found this guide to be helpful,
please consider making a small donation by clicking on the PayPal.com
"Donate" button located to the right of this paragraph. Thank you!
(Note: I am not a registered charity. Donations are not tax deductible.) |