
Chevrolet
Colorado Dome Light Bulbs Replacement Guide
How to change a burnt out dome or "rear
passenger reading light" bulb in a 2015 to 2022 GM Chevy Colorado truck.

By Paul B. Michaels Author & Photographer Auto Mechanic Since 1989 |
||
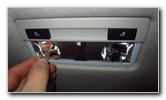
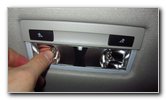
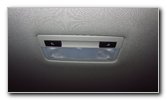 2019 Colorado Dome Lights |
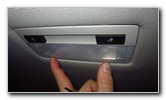
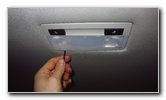 Insert Screwdriver |
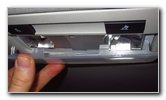
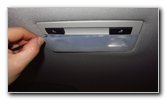 Pry Out Lens Cover |
| This automotive
maintenance tutorial was specifically written to assist owners of the second
generation (2015, 2016, 2017, 2018, 2019, 2020, 2021 & 2022) GM Chevrolet Colorado truck in changing a burnt out dome (also
known as the "room lamps" or rear passenger reading) light bulb in the
housing attached to the headliner above the second row of seats. Owners of other General Motors vehicles from Chevrolet, GMC, Cadillac, Buick and Holden such as the Trax, Equinox, Traverse, Blazer, Tahoe, Suburban, Sonic, Cruze, Trailblazer, Spark, Malibu, Impala, Volt, Bolt, Corvette, Camaro, Silverado, Express, Regal, LaCrosse, Cascada, Encore, Enclave, Envision, Canyon, Sierra, Terrain, Acadia, Yukon, XT4, XT5, XT6, Escalade, CT5, CTS, XTS, CT6, ATS, Astra and Commodore may also find these DIY instructions to be helpful. The compatible replacement miniature wedge base light bulb part number is 2825 (also known as W5W). If you would like to have brighter dome lights, install some 2825 LED bulbs. The only tool needed to access and replace the light bulbs is a small plastic pry bar tool or a small flat head screwdriver. To prevent from scratching the plastic surfaces, either use a plastic pry bar tool or cover the tip of your screwdriver with a thin micro fiber cloth. Insert the screwdriver or small plastic pry bar tool in between the lens cover and the headliner or the plastic light housing. |
||
|
|
||
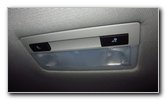
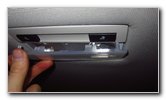 Gently Pull Out Cover |
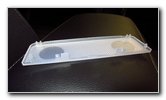 Lens Cover Removed |
 Pull Out Old Light Bulb |
| Gently pry the lens
cover out of the light housing. You may need to re-insert the screwdriver or plastic pry bar tool into several locations around the lens cover to fully remove it. The lens cover is held in place by a variety of barbed plastic tabs and two "C" shaped retaining clips. Set the lens cover aside in a safe place. If the old light bulbs were recently turned on, it might still be hot enough to burn your fingers. Please be careful when you remove it. Pull the old light bulb straight out of the socket. |
||
 Old Light Bulb Removed |
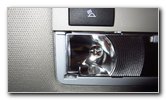 Empty Bulb Socket |
 Push In New Light Bulb |
| The OEM light bulb
was a number W5W which is the same as the 2825 bulb. Push a new number 2825 light bulb straight into the socket. If you would like to have brighter dome lights, install some compatible replacement 2825 LED bulbs. |
||
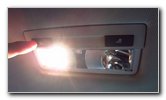 Test New Light Bulb |
 Line Up Lens Cover |
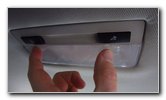 Gently Pop In Lens Cover |
| I recommend testing
the new light bulbs before re-installing the lens cover. If you installed LED bulbs and they don't work, try removing them from the sockets, rotating them 180 degrees and pushing them back into the sockets. Some LED bulbs only work when the "+" positive and "-" negative electrical contacts are in the correct orientation. Line up the lens cover with the light housing. The "C" shaped retaining clips should be situated closer to the front of the truck. |
||
 Secure Retaining Clips |
 Lens Cover Secured |
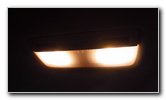 Testing New Light Bulbs |
| Gently snap the
lens cover back into place. To test the new light bulbs, press the "On/Off" switches. Be sure to record the bulb change in your vehicle's service records. Please check out all of my
2015-2019 GM Chevrolet Colorado DIY Repair & Maintenance Guides. |
||
| If you found this guide to be helpful,
please consider making a small donation by clicking on the PayPal.com
"Donate" button located to the right of this paragraph. Thank you!
(Note: I am not a registered charity. Donations are not tax deductible.) |