
Cheap eBay
CCTV & DVR Security System Installation Guide
Instructions for installing an
inexpensive "Made In China" CCTV & DVR security system with generic parts
purchased on eBay.

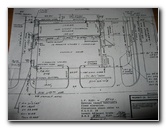 Strip Mall Survey Map |
 Cameras From Hong Kong |
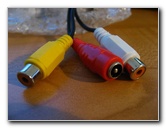 RCA Video & Power Plug |
| A friend
asked me to help him install a CCTV security system with a DVR at a
small shopping plaza.
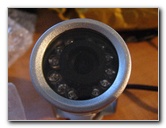
Neither of us had ever previously attempted an installation of this kind so we chose the cheapest components available on eBay. We already had an old desktop computer so all we needed was a 4 camera DVR capture board, 4 CCTV cameras, an internet connection, siamese video/power wires, and a cable modem. All of these "Made In China" cameras were about $25 each with shipping included. Three of them are day/night IR (infrared) CMOS cameras with 380 lines of resolution and a 6mm lens. The fourth camera is a "dome" type CMOS CCTV color camera also with 380 TVL and a 6mm lens. The PC DVR (PCI slot) computer capture board we chose was only $8.00 with Windows software and shipping included. |
||
|
|
||
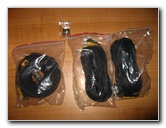
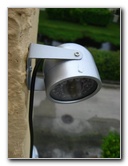
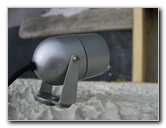
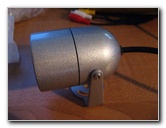 Silver "Bullet" Camera |
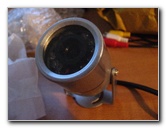 6 MM Lens CMOS Sensor |
 IR Night Vision Camera |
| It took about two weeks for the first camera to arrive from Hong Kong. I tested the camera's quality by hooking it up to a 32" HDTV LCD flat screen television. The generic CMOS sensor with 380 lines of resolution seemed to have a decent enough picture quality for this "proof of concept" security system installation. I went ahead and ordered two more of the generic "Color Day/Night IR Night Vision CMOS CCTV" cameras from an eBay seller in Hong Kong. I also ordered a "dome" type camera just to see if we would prefer that type of casing. The total amount spent on all four cameras was less than $100. | ||
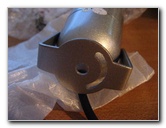 Mounting Bracket |
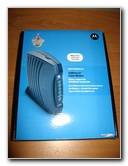 Motorola SB5120 |
 Surfboard Modem |
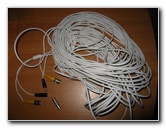
| While I waited for the other three cameras to make their way from China to Florida, I purchased a Motorola Surfboard SB5120 cable modem and ordered a business class internet connection with a static IP address from the cable company for $99 a month. This used but in "like new" condition broadband cable modem added $30 to our total cost. The last hardware components we needed were the "Siamese" CCTV extension cables that carry the video signal and electricity. First I made some calculations of the approximate distances between my planned camera mounting points and the computer location by using a property survey map. Then, once again, I turned to eBay for the parts. I purchased three 100' power/video combo wires and one 150 foot cable for a total cost of about $75.00. | ||
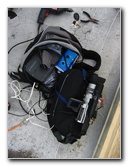
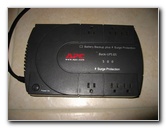 APC UPS Portable Power |
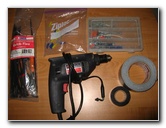 Drill, Tape, Screws, Zip Ties |
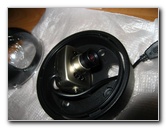
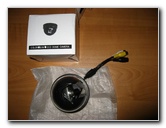 CMOS Dome Camera |
| I knew that during the actual installation of the cameras, we were going to need a source of electricity to test the cameras and aim them properly. Using long extension cords was going to be too cumbersome so I instead opted to use an APC UPS (uninterruptible power supply) surge protector as a portable power supply. This APC UPS has a powerful enough battery to operate my wired drill and the CCTV camera power supplies for at least 30 minutes of continuous use. | ||
 Generic CCTV Camera |
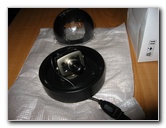 6mm CCTV Lens |
 Outdoor IR CCTV Camera |
| I didn't want to spend any extra money on a small CCTV installer's test monitor so I decided to use my old Sony VX-2000 video camera, which has standard RCA video/audio inputs/output connections, to help properly aim the CCTV cameras. To complete my installation tool kit, I gathered up a power drill, black electrical tape, plastic cable zip ties, drill bits, plastic screw anchors, and an assortment of self threading screws. | ||
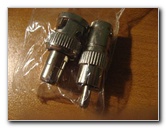
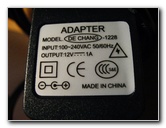 12V 1A Power Supply |
 BNC CCTV Connections |
 100 Feet Siamese Wire |
| Before
heading out to perform the installation, I double checked all my components,
plugs and wires to make sure that there wouldn't be any surprises once I got
out into the hot South Florida sun. The CCTV camera power supplies (12 volt
1 amp output) were all equipped with the standard male 2.1mm plugs that mate
up with the female plugs on the siamese extension cables.
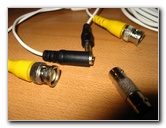
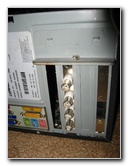
Luckily an RCA to BNC and BNC to RCA adaptor had been included with each of the CCTV cables. These were needed to make a connection to the BNC plugs on the back of the DVR capture card. |
||
 Power/Video CCTV Wires |
 BNC & RCA Adapters |
 Video Camera Test Monitor |
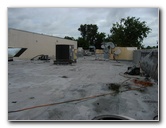
| The installation process of mounting the cameras and running the cables is pretty self explanatory. I drilled holes into the concrete sides of the building, inserted plastic screw anchors, attached the mounting bracket with a screw, and secured the camera to the bracket. I used the video camera and the APC UPS to verify the camera's line of sight. While laying down the Siamese CCTV power/video wires, I tried to steer clear of the air conditioners. The high voltage electrical current feeding into the roof mounted air conditioning units can cause distortions of the CCTV camera's video signal. | ||
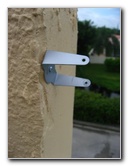 Bracket Mounted |
 Camera Mounted To Building |
 Plaza Building Roof |
| I mounted two cameras in the front of the plaza to monitor the foot traffic by the stores and the parking lot. Another camera was mounted overlooking the trash dumpster to help discourage illegal dumping. The last camera was mounted on the rear of the building to keep an eye on the rear service entrances of each storefront. | ||
 Running CCTV Cables |
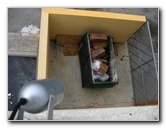 Monitoring Trash Dumpster |
 Aimed At Garbage Container |
| Before I went inside the building to set up the DVR computer, I applied small CCTV system warning stickers in both English and Spanish to each of the rear doors. I also mounted a larger warning sign and a "No Illegal Dumping Violators Will Be Prosecuted" sign on the side of the plaza near the garbage dumpster. | ||
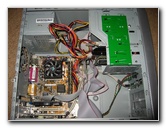 Old Dell Desktop Computer |
 DVR 4 Camera BNC Plugs |
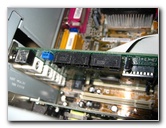 30 FPS DVR PCI Card Inserted |
| The
computer we used is an old Dell desktop PC running Windows XP SP2.
It only has a 60gb hard drive but from what I read online at the CCTV Forums, it would be enough for at least a few weeks of continuous recording at 7.5 FPS. The software that came with the generic DVR capture didn't include any documentation but I eventually figured out how to view the video feeds on a remote computer. It required enabling the Windows XP web server and opening up a few ports in the Windows XP firewall. Unfortunately, the software requires that a "client" application be installed on any computer that you wish to use for remote viewing of the cameras. |
||
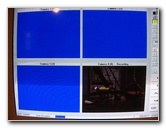 DVR Software Test |
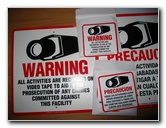 CCTV Warning Signs |
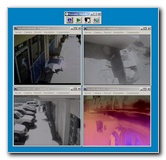 Remote Video Monitoring |
| This
CCTV & DVR system has been in place for two weeks now but we're not too
happy with the functionality of the software or the picture quality of the
generic Chinese CCTV CMOS cameras. The entire cost of this system was about
$180. Now that we feel much more confident about installing a CCTV security system, we're going to upgrade the cameras and the DVR. We purchased an EverFocus EDSR400H dedicated DVR unit for $450 to replace the computer. We upgraded the generic cameras with a four pack of Sony Color CCD 480 TVL 3.6mm Lens IR Day/Night dome cameras with metal weather/vandal proof casings. The cameras, which I bought on eBay, were $189 total or about $47 each. I'll post the results of the upgrade once we perform the installation. Check back soon! To view the sample pictures and installation process of the new upgraded system, click on the link below.
Sony Color CCD IR CCTV Security Cameras & EverFocus DVR System Installation
Guide & Sample Images |
||
| If you found this guide to be helpful,
please consider making a small donation by clicking on the PayPal.com
"Donate" button located to the right of this paragraph. Thank you!
(Note: I am not a registered charity. Donations are not tax deductible.) |