
Acura MDX
Transfer Case Fluid Replacement Guide
How to drain and refill the transfer case
gear oil for the AWD transmission of a 1st generation 2001 to 2006 Acura MDX

By Paul B. Michaels Author & Photographer Auto Mechanic Since 1989 |
||
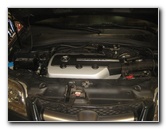 2006 MDX 3.5L V6 Engine |
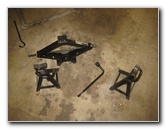
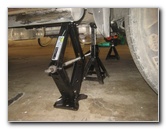 Raise Front of SUV |
 Under Engine Bay |
|
This automotive maintenance tutorial was specifically created to assist owners of the first generation (2001, 2002, 2003, 2004, 2005 & 2006) Acura MDX in draining out and refilling the hypoid gear oil in the transfer case for the SH-AWD (super handling all wheel drive) transmission. Owners of other Acura or Honda vehicles such as the RDX, ILX, TLX, RLX, TL, CL, RSX, RL, TSX, ZDX, NSX, Integra, Pilot, Accord, Civic, Fit, Clarity, CR-V, CR-Z, HR-V, Odyssey, Element and Ridgeline with the VTEC 3.5L V6 engine may also find these DIY instructions to be helpful. To complete this transfer case fluid change, you'll need a 1 quart bottle of SAE 90 or SAE 80W-90 viscosity hypoid gear lube oil (API classified GL4 or GL5 standards only) such as Mobil 1 75W-90 full synthetic, Lucas SAE 80W-90, Royal Purple 75W-90 or Pennzoil 80W-90. The other required items include a 3/8" drive ratchet with a short extension bar, a used oil catch basin and two 20mm crush washers for the transfer case drain and fill bolts which are part number Honda 94109-20000. (These are the same washers for the VTM-4 rear differential as well.) An optional but very useful item to have is an automotive fluid pump for a quart sized container such as the Pennzoil 36670. |
||
|
|
||
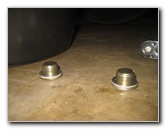
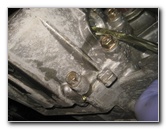
 Silver Metal Transfer Case |
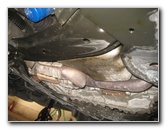
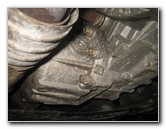 Front of Transfer Case |
 Filler Bolt - Front Edge |
| The first step is
to bring the transmission up to operating temperature by driving the vehicle
until the radiator fan turns on.
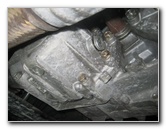
I drove my MDX to a gas station a few miles away to fill the tank and then back to my garage. Warming up the transfer case will help suspend any contaminants or fine metal shavings in the old gear oil and also allow it to drain out more quickly. Park the SUV on a level surface, engage the emergency / parking brake and place wheel chocks on both sides of the rear tires to prevent the vehicle from moving. There is plenty of room under the SUV to access the transfer case drain and fill bolts. I chose to raise the front of the vehicle for easier access. If you do raise the front of the SUV with the floor jack, be sure to use at least two jack stands to securely support it. The silver metal transfer case is situated on the driver side of the engine bay attached to the rear of the transmission. The transfer case is on the opposite side of the exhaust pipe from the silver metal oil pan. (Note - If you have a newer 2007, 2009, 2010, 2011, 2012 or 2013 Acura MDX, you may need to remove a few plastic pop rivet fasteners and two bolts in order to remove the plastic access cover for the transfer case.) |
||
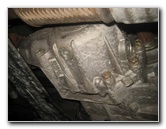
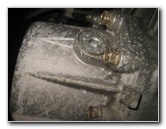
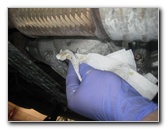
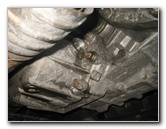
 Drain Bolt - Bottom Edge |
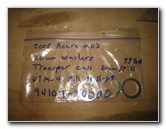 20mm Metal Washers |
 Loosen Fill Bolt First! |
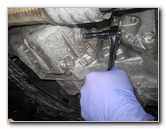
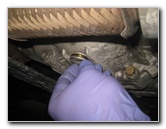
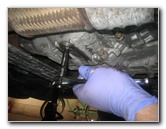
| Locate the drain
bolt on the bottom edge and the fill bolt on the front edge. I highly recommend that you first loosen the filler bolt before draining out the old transfer case fluid. If the fill bolt is stuck, you will be unable to re-fill the transfer case with oil after it has been drained. Attach the short extension bar to a 3/8" drive ratchet. Carefully loosen the fill bolt on the front side of the transfer case by turning it in the counterclockwise direction with the 3/8" drive extension bar. |
||
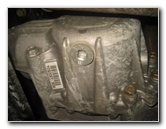
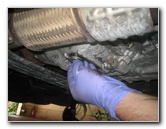
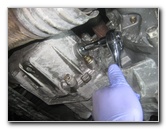
 Fill Bolt Loosened |
 Loosen Drain Bolt |
 Position Used Oil Basin |
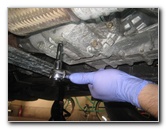
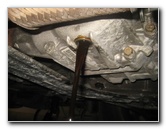
| You don't need to
fully remove the fill bolt. Just loosen it a turn or two to make sure that
it can be removed for re-filling the transfer case. Move to the bottom of the transfer case. Slide the used oil catch container to just below the drain bolt. Use the 3/8" drive extension and ratchet to loosen the drain bolt in the counterclockwise direction. |
||
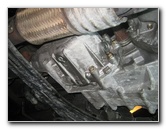
 Spin Out Counterclockwise |
 Drain Out Old Gear Oil |
 Old Gasket In Basin |
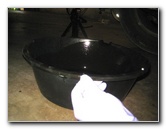
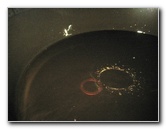
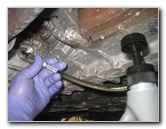
| Spin out the drain
bolt by hand in the counterclockwise direction.
Allow the old hypoid gear oil to drain out for at least a few minutes or until the flow slows down to just an occasional drip. My old drain bolt washer remained attached to the transfer case and then fell off into the used oil catch basin. Make sure that your old drain bolt washer is not still attached to the transfer case. |
||
|
|
||
 Remove Filler Bolt |
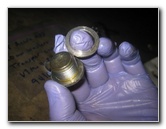 Pull Off Old Washer |
 Replace Both Washers |
| While the old oil
is draining out, spin out the fill bolt the rest of the way. Remove the old crush washers from the fill and drain bolts and discard them. Replace the washers with two new Honda 94109-20000 20mm washers. |
||
 Clean Drain Hole |
 Spin In Drain Bolt |
 Tighten Clockwise |
| Wipe away any old
gear oil or debris from the drain and fill holes. Spin in the drain bolt a few turns by hand in the clockwise direction to prevent it from becoming cross threaded. Then tighten the drain bolt in the clockwise direction with the 3/8" drive extension bar and ratchet to just past hand tight. If you have a torque wrench, the drain bolt should be tightened to 33 lb-ft (44 Nm) of torque. Double check that the drain bolt is tight before moving on to the next steps. |
||
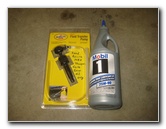 Fluid Pump & Gear Oil |
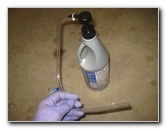 Attach Pump To Bottle |
 Insert Plastic Hose |
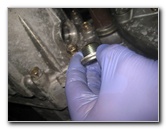
| Attach an
automotive fluid pump to the top of the bottle of gear lube. I chose to buy Mobil 1 75W-90 full synthetic gear oil and a Pennzoil 36670 quart sized bottle fluid pump. Insert the vinyl rubber hose into the filler hole on the front side of the transfer case. Gently push down the pump mechanism until the new gear oil starts to flow through the tube. |
||
 Pump In New Oil |
 New Oil Dripping Out |
 Tighten Clockwise |
| Continue pumping in
the new gear oil until it starts leaking out of the fill hole.
According to the service manual, the transfer case's fluid capacity is 0.45 U.S. quart (0.43 liter). Make sure that a new crush washer is attached to the fill bolt. Also make sure that the old crush washer is not still attached to the transfer case. Spin in the fill bolt a few turns in the clockwise direction to prevent it from becoming cross threaded. |
||
 Clean Off Transfer Case |
 Transfer Fluid Replaced |
 Lower SUV From Stands |
| Tighten the fill
bolt in the clockwise direction with the 3/8" drive extension bar and
ratchet to just past hand tight. The torque specification for the fill bolt is also 33 lb-ft (45 Nm) of torque. Double check that the fill and drain bolts are both tight. Use a paper towel to clean off the transfer case so that it will be easier to spot leaks in the future. If you raised the SUV, carefully lower it from the jack stands by using the floor jack. Don't forget to record the transfer case oil change in your vehicle's service records. The transfer case gear oil should be changed for the first time at 45,000 miles and then every 30,000 miles. For more,
please check out all of my
2001-2006 Acura MDX DIY Repair & Maintenance Guides. |
||
| If you found this guide to be helpful,
please consider making a small donation by clicking on the PayPal.com
"Donate" button located to the right of this paragraph. Thank you!
(Note: I am not a registered charity. Donations are not tax deductible.) |