
Acura MDX
Rear Interior Door Panels Removal Guide
How to take off the plastic interior
panels on the rear doors of a 1st generation 2001 to 2006 Acura MDX SUV.

By Paul B. Michaels Author & Photographer Auto Mechanic Since 1989 |
||
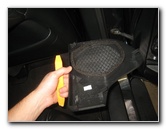
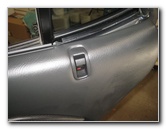
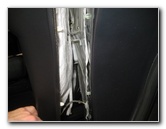
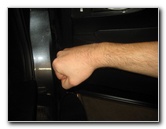
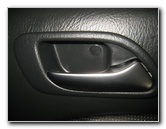
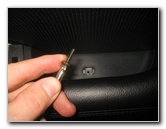
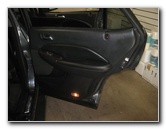
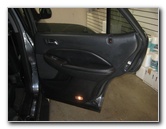 2006 MDX Rear Door |
 Rear Door Speaker Cover |
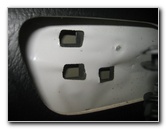
 Small Notch - Bottom Inner |
| This
automotive maintenance tutorial was specifically created to assist
owners of the first generation (2001, 2002, 2003, 2004, 2005 & 2006)
Acura MDX in taking off the plastic interior panels on the rear
driver side door or rear passenger side door in order to add
soundproofing material or replace a broken power window motor. Owners of other Acura or Honda vehicles such as the RDX, ILX, TLX, RLX, TL, CL, RSX, RL, TSX, ZDX, NSX, Integra, Pilot, Accord, Civic, Fit, Clarity, CR-V, CR-Z, HR-V, Odyssey, Element and Ridgeline may also find these DIY instructions to be helpful. The tools needed to remove the rear door panels include a small plastic automotive trim panel removal tool, a small flathead screwdriver and a Phillips head screwdriver. |
||
|
|
||
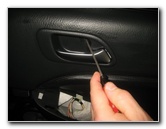
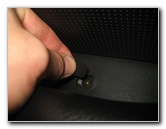
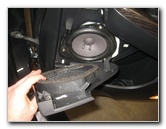
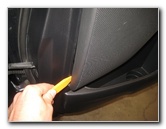 Pry Off Speaker Grille |
 Pull Out Front Edge |
 Speaker Cover Removed |
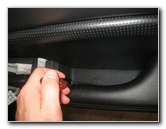
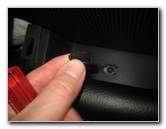
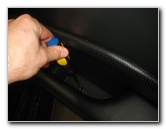
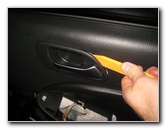
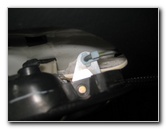
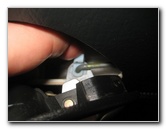
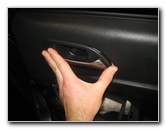
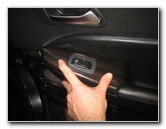
| The first two steps
are to lower the power window all the way down and fully open the rear door. Then move to the bottom inner corner of the door panel. Locate the small notch at the bottom inner corner of the speaker cover. Use a small plastic pry bar tool to gently pull the speaker grille off the door panel. Set the speaker cover aside in a safe place. |
||
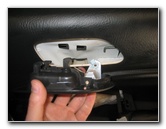
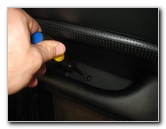
 Pry Up Rear of Panel |
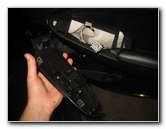
 Pull Out Switch Panel |
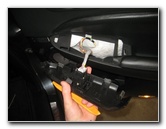 Switch Panel Removed |
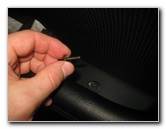
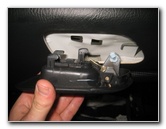
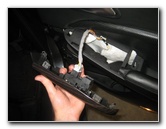
| Move to the rear
edge of the electrical switch panel. Use the plastic pry bar tool to gently lift the rear edge of the switch panel. Pull out the switch panel and turn it over to access the electrical connector. |
||
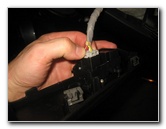 Push In Release Tab |
 Power Plug Disconnected |
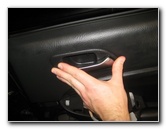
 Door Opener Handle |
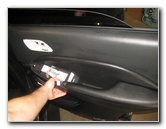
| Push in the release
tab on the electrical connector before sliding it straight out of its
socket. Set the switch panel aside in a safe place. |
||
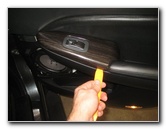
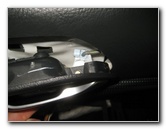
 Pry Open Screw Cover |
 Open Hinged Screw Cover |
 Armrest Screw Cover |
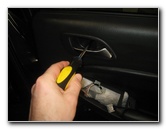
| Move to the door
opener handle. Gently pry open the rear edge of the hinged screw cover with a small flathead screwdriver. Then pry open the hinged plastic screw cover at the bottom of the door pull well in the center of the armrest. (The armrest screw cover on our 2006 MDX was broken off. It should be hinged on your SUV.) |
||
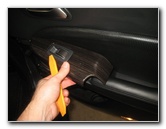
 Screw Cover Removed |
 Loosen Counterclockwise |
 Phillips Screw Removed |
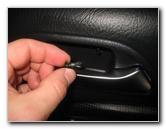
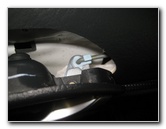
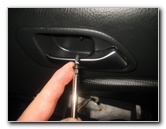
| Remove the screw
behind the door opener handle by turning it counterclockwise with a Phillips
head screwdriver. Set the screw aside in a safe place. |
||
 Remove Armrest Screw |
 Armrest Screw Removed |
 Trim Panels & Screws |
| Remove the screw in
the bottom of the well on the armrest by turning it counterclockwise with
the Phillips head screwdriver. Set the armrest screw aside with the other screw. At this point, you should have removed the speaker cover, electrical panel and two Phillips head screws. |
||
 Pry Out Bottom Edge |
 Pull Out Plastic Pop Rivets |
 1/4 Turn Counterclockwise |
| Edit - I
recommend that you remove the door opener handle assembly before pulling out
the bottom edge of the panel. This would be a slightly more logical and
easier procedure.
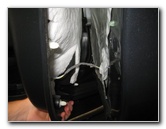
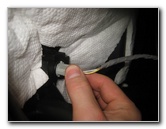
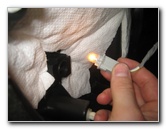
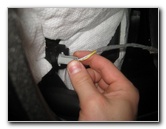
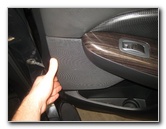
Move to the bottom edge of the door panel. Insert the plastic pry bar tool in between the bottom edge of the door panel and the metal door frame. Firmly pull out the bottom edge of the door panel to release the plastic pop rivet friction fasteners. Do NOT pull off the top of the door panel, you still need to remove the door opener handle assembly. Locate the bulb socket for the courtesy step light on the back side of the door panel. Rotate the bulb socket 1/4 turn counterclockwise before pulling it straight out of the door panel. |
||
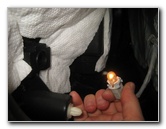 Remove Step Light |
 Push Door Handle Forward |
 Pull Out Door Handle |
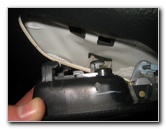
| Move to the door opener handle
near the top of the door panel. Use the plastic pry bar tool to gently push the door opener handle assembly forward. There are three hooks on the back side of the door opener handle assembly. By sliding the assembly forward, you will disengage the three hooks from their slots. Gently pull the door opener handle assembly out of the door panel. |
||
 Door Handle Metal Bar |
 Pull Off Plastic "C" Collar |
 Lift Bar Out of Socket |
| Gently pull the
light blue plastic "C" shaped collar off the metal bar. Then lift the metal elbow at the end of the bar out of the socket in the door opener handle lever. Set the door opener handle assembly aside in a safe place. |
||
|
|
||
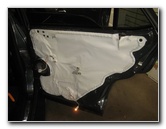
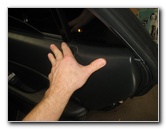
 Lift Door Panel Off Frame |
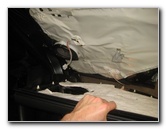 Pull Away From Door Frame |
 Plastic Door Panel Removed |
|
Gently lift the door panel off the top of the metal door frame. Set the plastic door panel aside in a safe place. |
||
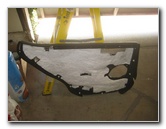
 Metal Door Frame |
 Hold Door Panel Near Frame |
 Re-Insert Door Lock Stalk |
| If you would like
to stop rattles or vibrations and allow your speaker to sound their best, I
highly recommend applying some sound deadening material such as
Dynamat to the metal door frame
and also the plastic door panel. If you need to replace a broken power window motor and regulator, you'll need to peel off the plastic cover. To replace the plastic door panel, hold it near the door frame. Guide the door lock stalk through its opening at the top rear corner of the panel. |
||
 Lower Door Panel On Frame |
 Push Down In Place |
 Courtesy Step Light |
| Make sure that the
top edge of the door panel is securely attached to the upper lip on the
metal door frame. Pull the electrical connector and wires for the switch panel through the opening in the armrest. Re-insert the courtesy step light bulb socket into its housing. (If you need to replace a burnt out courtesy step light bulb, the part number is 194.) |
||
 1/4 Turn Clockwise - Lock |
 Line Up Plastic Pop Rivets |
 Firmly Tap In Fasteners |
| Rotate the bulb
socket 1/4 turn clockwise to secure it in place. Line up the white plastic pop rivets on the back side of the door panel with their corresponding holes in the metal door frame. Firmly tap in the friction fasteners all along the bottom edge and both sides of the door panel. |
||
 Line Up Door Handle |
 Lower Elbow Into Socket |
 Snap Collar Over Bar |
| Line up the door
handle assembly with the opening in the plastic door panel. Lower the elbow at the end of the metal bar into its socket. Swing the light blue plastic "C" shaped collar over the metal bar to secure it in place. |
||
 Line Up 3 Hooks & Slots |
 Three Slots On Frame |
 Push In Door Handle |
| Line up the three
plastic hooks on the back side of the door opener handle assembly with their
corresponding slots. Push the door opener handle assembly back into the door panel. |
||
 Slide To Rear - Secure Hooks |
 Phillips Head Screw |
 Tighten Clockwise |
| Slide the door
opener handle assembly back and towards the rear of the door panel. By sliding the door opener handle assembly back, the three hooks will be secured into their slots. Replace the screw behind the door handle by turning it clockwise with the Phillips head screwdriver until it is snug. |
||
 Pop In Screw Cap |
 Screw Cover Replaced |
 Armrest Screw |
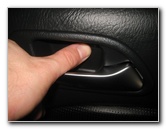
| Close the screw cover and gently snap it back into place. | ||
 Tighten Clockwise |
 Close Screw Cover |
 Screw Cover Replaced |
| Replace the screw
into the armrest by turning it clockwise with the Phillips head screwdriver
until it is snug. Swing the hinged plastic cover closed over the screw. |
||
 Push In Switch Panel Plug |
 Re-Insert Front Edge First |
 Hooks - Rear Edge |
| Push the electrical
connector for the switch panel straight into its socket. Lower the plastic hook at the front end of the switch panel back into the armrest. Then push down on the rear of the switch panel to secure the friction fasteners. Line up the plastic hooks on the rear edge of the plastic speaker cover with their slots. |
||
 Re-Insert Rear First |
 Push On Speaker Cover |
 Door Panel Replaced |
| Re-insert the
plastic hooks on the rear of the speaker cover in first. Then push in the front edge of the speaker grille to secure it into place. Sit inside the SUV on the second row of passenger seats, close the door and verify that the speaker, door opener handle, door lock stalk and power window switch all still work properly. For more,
please check out all of my
2001-2006 Acura MDX DIY Repair & Maintenance Guides. |
||
| If you found this guide to be helpful,
please consider making a small donation by clicking on the PayPal.com
"Donate" button located to the right of this paragraph. Thank you!
(Note: I am not a registered charity. Donations are not tax deductible.) |