
Acura MDX Rear Differential
Fluid Change Guide
How to replace the VTM-4 fluid in the
rear differential of an all wheel drive 1st generation 2001 to 2006 Acura MDX.

By Paul B. Michaels Author & Photographer Auto Mechanic Since 1989 |
||
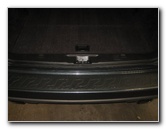 2006 MDX Cargo Area |
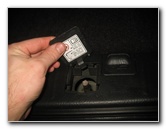
 "Spare Tire" Plastic Cover |
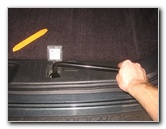
 Pry Open "Spare Tire" Flap |
| This
automotive maintenance tutorial was specifically created to assist
owners of the first generation (2001, 2002, 2003, 2004, 2005 & 2006)
Acura MDX with the SH-AWD system in changing the VTM-4 fluid in the
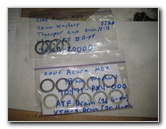
rear differential. Owners of other Acura or Honda vehicles such as the RDX, ILX, TLX, RLX, TL, CL, RSX, RL, TSX, ZDX, NSX, Integra, Pilot, Accord, Civic, Fit, Clarity, CR-V, CR-Z, HR-V, Odyssey, Element and Ridgeline may also find these DIY instructions to be helpful. The only fluid that can be used is genuine Honda or Acura VTM-4 which is part number 08200-9003 or 08200-9003A. The replacement crush washer (or "gasket") sizes and part numbers are as follows: Drain Plug 18mm 90471-PX4-000 and Fill Plug 20mm 94109-20000. The tools needed to complete the procedure include a small plastic pry bar tool, a 3/8" drive ratchet, a rubber mallet, a new automotive fluid pump, a torque wrench and a used oil catch container. |
||
|
|
||
The maintenance schedule for changing the VTM-4 fluid in the rear differential is every 30,000 miles under "normal" driving conditions or every 15,000 miles for "severe" driving such as towing, frequent short stop-and-go trips, mountain driving or driving off road. Some of the symptoms that indicate the VTM-4 fluid should be changed include a judder, shudder, shake or vibration noises from the rear end of the SUV while turning. This is caused by the fluid being contaminated with worn away clutch material. |
||
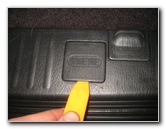
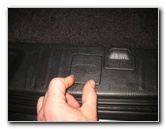
 Flip Open Hinged Cover |
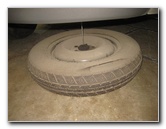
 Spare Tire Under Cargo Area |
 Rotate Counterclockwise |
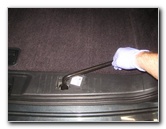
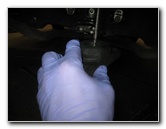
| Park the SUV on a
level surface, turn off the ignition, engage the emergency / parking brake
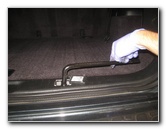
and chock the front wheels to prevent the vehicle from moving. For the easiest access to the rear differential, I recommend lowering the spare tire. Open the tailgate door for the cargo area. Locate the small plastic access cover for the hoist mechanism that lowers and raises the spare spire. Lift open the rear edge of the cover with a plastic pry bar tool or a flathead screwdriver. Remove the lug nut wrench (or "tire iron") from the storage compartment on the left side of the plastic cargo area panel. Place the socket on the lug nut wrench over the hoist shaft. Rotate the tire iron in the counterclockwise direction to slowly lower the spare tire. |
||
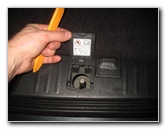
 Lower Spare Tire |
 Pull Out Retaining Block |
 Slide Away Spare Tire |
| Once the spare tire
is on the ground, carefully pull the black plastic retaining block out
through the hole in the center of the spare tire. Slide the spare tire over out of the way where you won't trip on it. Now would also be a good time to check the condition and air pressure of the spare tire. If necessary, inflate it to 60 PSI. (I didn't want the spare tire cable and block in my way, so I raised it by turning the hoist shaft in the clockwise direction.) |
||
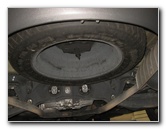
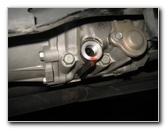
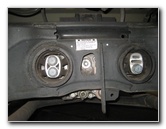 VTM-4 Rear Diff |
 Tools, Pump & Fluid |
 Electric Impact Wrench |
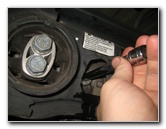
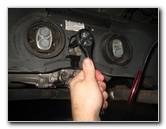
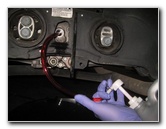
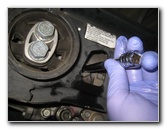
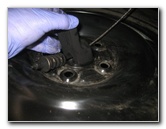
| With the spare tire
removed, you'll easily be able to see the VTM-4 warning sticker, the fill
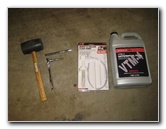
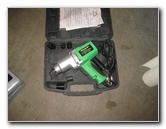
plug and the drain plug below it. The rear differential's total fluid capacity is 3.0 U.S. quarts. For a drain and fill, the differential requires 2.9 quarts. So you'll only need one gallon bottle of Honda 08200-9003 VTM-4 fluid. After three rear diff fluid changes, you'll have enough left over fluid to complete the fourth one. Just be sure to keep the left over fluid in one bottle with the cap tightly sealed. Slide under the rear of the SUV with the 3/8" ratchet, a rubber mallet, a fluid pump, the used oil catch basin and the gallon jug of VTM-4 fluid. If you are unable to loosen the fill and/or drain plugs that have been over tightened in the past or have corroded from salt water exposure, you can use an electric impact wrench with a 1/2" to 3/8" drive socket adapter. |
||
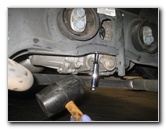
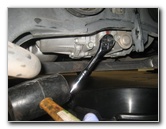
 Loosen Fill Bolt First |
 Tap With Rubber Mallet |
 Filler Plug Removed |
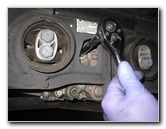
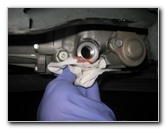
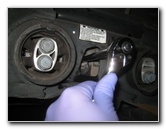
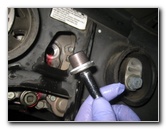
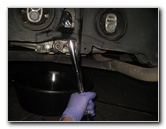
| I highly recommend
that you first remove the fill bolt at the top of the rear differential. If you first remove the drain bolt and then are unable to remove the fill bolt, you won't be able to drive the SUV until the fill bolt can be removed to replace the VTM-4 fluid. Both the fill and drain bolts have "square" holes which are to be loosened or tightened with a 3/8" drive ratchet. Securely attach the 3/8" drive ratchet to the fill bolt. Loosen it in the counterclockwise direction. If you are unable to loosen the bolt, carefully tap on the end of the ratchet with a rubber mallet while holding the top of the ratchet in place. Set the filler bolt and washer aside in a safe place. We will be temporarily re-using the old washer in the future. |
||
 Fill Plug & Washer |
 Loosen Drain Plug |
 Tap with Rubber Mallet |
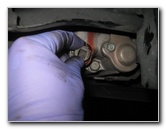
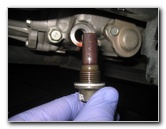
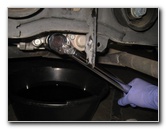
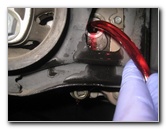
| Slide the used oil
catch container to just below the rear differential drain bolt. Loosen the drain bolt by turning it counterclockwise with the 3/8" drive ratchet. |
||
 Spin Out Drain Bolt |
 Magnetic Drain Bolt |
 Draining Out Old Fluid |
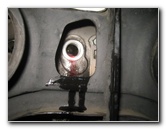
| Slowly spin out the
drain bolt to allow some of the old fluid to spill out.
Once it seems like the pressure has decreased, fully remove the drain bolt. |
||
 Fill Plug - Drain Plug |
 Both Plugs Removed |
 Draining Out Old VTM-4 |
| Allow the old fluid to drain out for at least five to ten minutes or until it slows down to just an occasional drip. | ||
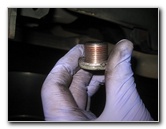
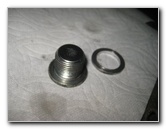
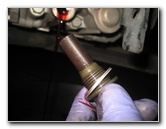
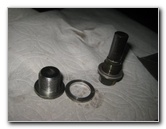
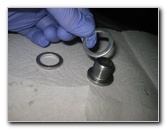
 New Washers / Gaskets |
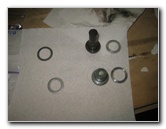 18mm Drain - 20mm Fill |
 Replace Drain Plug Washer |
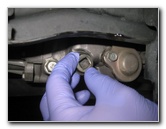
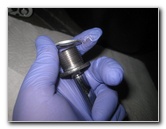
| To help prevent
fluid leaks, both the crush washers or "gaskets" for the fill and drain
bolts should be replaced. The part numbers are as follows: Drain Plug 18mm 90471-PX4-000 and Fill Plug 20mm 94109-20000. Replace the 18mm washer on the drain bolt. Inspect the magnetic shaft on the drain bolt for any metal shavings or other metal debris. It is normal to see a light coating of fine metal shavings on the magnet. Clean the drain bolt with a paper towel. |
||
|
|
||
 Done Draining Old Fluid |
 Wipe Area Clean |
 Clean Magnetic Plug |
| Clean the underside of the rear differential with a paper towel or a shop rag. | ||
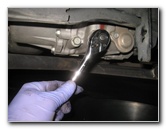
 Spin In Clockwise |
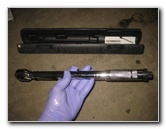 Torque Wrench |
 Torque To 35 lb-ft |
| Spin in the drain
bolt a few turns by hand in the clockwise direction to prevent it from
becoming cross threaded. Set your torque wrench to 35 lb-ft and tighten the drain bolt. |
||
 New Car Fluid Pump |
 Insert Rubber Hose |
 Pumping In New Fluid |
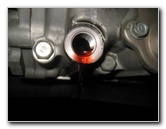
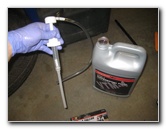
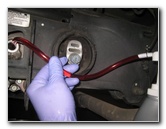
| Attach the new
automotive fluid pump to the top of the gallon VTM-4 bottle. The VTM-4 rear differential is known to be sensitive to fluid contaminations. So avoid re-using an old fluid pump that has been used for the transfer case gear oil or the rear differential on a different vehicle. Insert the hose into the filler hole at the top of the differential. Continue pumping in the new fluid until you see it start dripping out of the filler hole. |
||
 Fluid Dripping Out - Full |
 2.9 Quarts Pumped In |
 Re-Use Old Washer |
| The rear
differential fluid capacity specification for a drain and refill is 2.9
quarts according to the service manual. Many DIY'ers choose to replace the fill bolt, drive the vehicle a very short distance and pump in some more fluid. Temporarily replace the oil fill bolt with the old washer by turning it in the clockwise direction. |
||
 Slightly Tighten Fill Plug |
 Take SUV For Short Drive |
 Loosen Fill Plug |
| Slightly tighten
the fill bolt with the 3/8" drive ratchet. Move any tools, the used oil catch container and other items away from the underside of the SUV. If you placed wheel chocks on the front tires, remove them and release the parking brake. Take the SUV for a very short drive such as up and down your driveway or around the parking lot. Remove the fill bolt by turning it in the counterclockwise direction. |
||
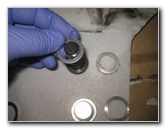
 Spin Out Counterclockwise |
 Pull Off Old Washer |
 Install New 20mm Washer |
| Remove the old
washer from the fill plug. Install a new 20mm washer over the fill plug. |
||
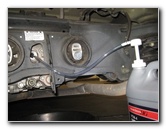
 Pump In Extra Fluid |
 Fluid Dribbling Out |
 Line Up Fill Plug |
| Re-insert the fluid
pump hose into the filler hole. You should be able to pump in another 8 to 10 pumps. |
||
 Spin In Clockwise |
 Tighten To 35 lb-ft |
 Double Check Both Bolts |
| Spin in the fill
bolt in the clockwise direction. Tighten the fill bolt to 35 lb-ft of torque. Double check that both the drain and fill bolts are tight before moving on to the next steps. |
||
 Lower Spare Tire Cable |
 Pull Down Retainer Block |
 Slip Block Through Hole |
| If you raised the
spare tire block and cable out of the way, lower them again by turning the
hoist shaft in the counterclockwise direction. You may need to pull on the
block while turning the shaft to lower the cable. Slide the retaining block through the hole in the middle of the spare tire. |
||
 |
 Rotate Tire Iron Clockwise |
 Raise Spare Tire |
| Rotate the tire iron in the clockwise direction on the hoist shaft to raise the spare tire. | ||
 Check - Spare Tire Secure |
 Close Hinged Cover |
 Snap In Plastic Cover |
| Check to see if the
spare tire can be moved, slid or rocked around the underside of the SUV. If it can be moved, slowly tighten the hoist shaft until the spare tire feels secure. Swing the hoist shaft access panel closed and pop it back into place. Be sure to record the rear differential fluid change in your SUV's service records. Take the SUV for a short test drive with some slow speed turns. You shouldn't be hearing any strange sounds from the rear of the vehicle. For more,
please check out all of my
2001-2006 Acura MDX DIY Repair & Maintenance Guides. |
||
| If you found this guide to be helpful,
please consider making a small donation by clicking on the PayPal.com
"Donate" button located to the right of this paragraph. Thank you!
(Note: I am not a registered charity. Donations are not tax deductible.) |