
Acura MDX Engine Air Filter
Replacement Guide
How to change the engine air filter
element for the 3.5L V6 VTEC motor in a 1st generation 2001 to 2006 Acura MDX.

By Paul B. Michaels Author & Photographer Auto Mechanic Since 1989 |
||
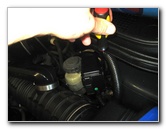
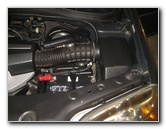 2006 MDX 3.5L V6 Engine |
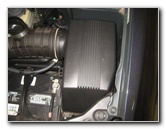 Engine Air Filter Box |
 Loosen Counterclockwise |
| This
automotive maintenance tutorial was specifically created to assist
owners of the first generation (2001, 2002, 2003, 2004, 2005 & 2006)
Acura MDX in cleaning or changing the engine air filter element for
the 3.5 liter V6 VTEC J35A3 or J35A5 motor. Owners of other Acura or Honda vehicles such as the RDX, ILX, TLX, RLX, TL, CL, RSX, RL, TSX, ZDX, NSX, Integra, Pilot, Accord, Civic, Fit, Clarity, CR-V, CR-Z, HR-V, Odyssey, Element and Ridgeline may also find these DIY instructions to be helpful. A few compatible replacement engine air filters with their part numbers include the following: FRAM CA9361, Bosch 5326WS, Purolator A35403, PT Auto AF9361, K&N 33-2200, Spectre HPR9361, Hastings AF1160 & Champion CAP9361. The tools needed to access and replace the engine air filter include a long Phillips head screwdriver or an 8mm socket with a long extension bar and a 1/4" drive ratchet. |
||
|
|
||
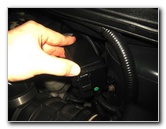
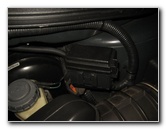
 Loosen Left Rear Screw |
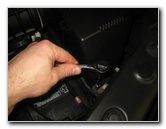
 Pry Back Retaining Clip |
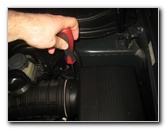
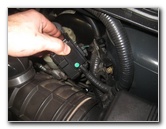 Lift Out Small Fuse Box |
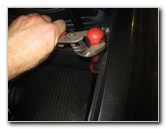
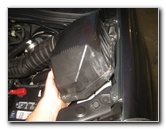
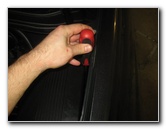
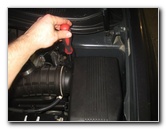
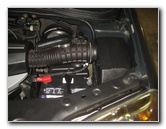
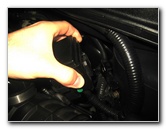
| The first two steps
are to open the hood and then move to the right (driver) side of the engine
bay. The black plastic engine air filter housing is located just behind the driver side headlight assembly and to the right of the 12V automotive battery. There are four fasteners that secure the top half of the air box to the bottom half. You can use either a long Phillips head screwdriver or an 8mm socket with a long 9", 10" or 12" extension bar (or a combination of smaller extension bars) and a 1/4" drive ratchet. I highly recommend using an 8mm socket with a long extension bar and a 1/4" drive ratchet. If the screws were previously over tightened, they can be relatively easy to strip with a standard Phillips head screwdriver. Loosen the four screws by turning them in the counterclockwise direction. I was only able to loosen one of the screws with my Phillips head screwdriver. The other three were way too tight from the last time the service technician at the dealership replaced the engine air filter for the previous owner. For better access to the left rear screw, I lifted out the small square black plastic fuse box that was in the way. Gently pry back the tab with a flathead screwdriver to release the retaining clip before pulling the fuse box straight off its mounting bracket. Move the small fuse box out of the way. |
||
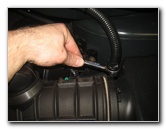 Tight Screw - 8mm Socket |
 Loosen Front Right Screw |
 Stripped Phillips Screw |
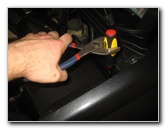
| Continue loosening
the other three screws.
There is one screw at each corner of the air box. The fasteners are "captured screws" that will remain attached to the air box cover. |
||
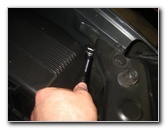
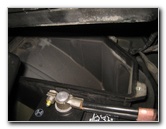
 8mm Socket & Extension |
 Attached With Tape |
 Loosen Stuck Screw |
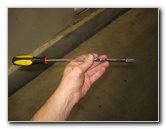
| Since I didn't have
a long enough extension bar for my 1/4" drive ratchet, I attached the 8mm
socket to a short extension bar and a long flathead screwdriver. I secured the 8mm socket and extension bar to the flathead screwdriver with some painter's tape. It isn't the most glamorous tool, but it worked to get this one over tightened screw loose. |
||
 Four Screws Loosened |
 Lift Off Air Box Cover |
 Pull Out Old Air Filter |
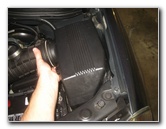
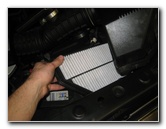
| Gently lift the top
half of the air box to access the old filter. Pull the old air filter out of the bottom half of the air box. |
||
|
|
||
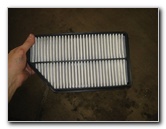 Old Air Filter Removed |
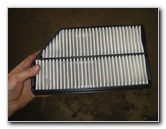 Inspect Both Sides |
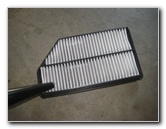 Clean With Vacuum |
| Inspect both sides
of the old air filter. If the old filter is dark grey or black and clogged with dirt, dust, sand, leaves, soot, pollen, hair, insects, leaves, twigs and other debris, it should be replaced with a new element. I recommend buying the FRAM CA9361 engine air filter since it has excellent reviews on Amazon. If the old filter is relatively clean, just tap out the large debris and remove any fine dust with a vacuum cleaner or blow it out with an air compressor. |
||
 Clean Out Bottom Half |
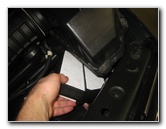 Lower In New Air Filter |
 New Air Filter Installed |
| If your vacuum has
a crevice attachment, clean out any sand or debris in the bottom half of the
air box. Lower the new air filter into the bottom half of the air box. The shape of the filter will only allow it to be installed in the correct orientation with the slanted corner located at the front right (driver) side of the housing. |
||
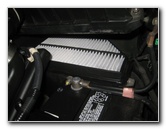
 Lower Air Box Cover |
 Tighten Screws Clockwise |
 Do Not Over Tighten! |
| Carefully lower the
cover over the new filter and the bottom half of the air box. Tighten the four screws by turning them in the clockwise direction with the long Phillips head screwdriver. |
||
 Tighten Front Right Screw |
 Tighten Left Rear Screw |
 Engine Air Filter Replaced |
| Do not over tighten
the screws.
They only need to be slightly snug in order to seal the two halves of the air box together. Double check that the two halves of the air box are flush together at every edge with no part of the filter visible. |
||
 Slide On Small Fuse Box |
 Fuse Box Secured To Mount |
 Small Fuse Box Replaced |
| If you removed the
small fuse box, slide it back on to its mounting bracket. It should "click" securely into place. Double check that the small fuse box is securely attached. Be sure to record the engine air filter change in your SUV's service records. For more,
please check out all of my
2001-2006 Acura MDX DIY Repair & Maintenance Guides. |
||
| If you found this guide to be helpful,
please consider making a small donation by clicking on the PayPal.com
"Donate" button located to the right of this paragraph. Thank you!
(Note: I am not a registered charity. Donations are not tax deductible.) |