
Acura MDX
Brake Fluid Bleeding Guide
How to flush out air bubbles and moisture
from the brake lines of a 1st generation 2001 to 2006 Acura MDX SUV.
By Paul B. Michaels Author & Photographer Auto Mechanic Since 1989 |
||
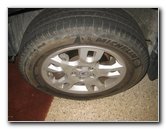
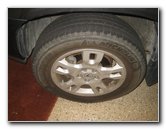 Front Driver Wheel / Tire |
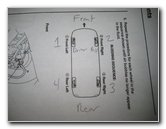 Brake Line Bleeding Order |
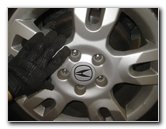
 Slightly Loosen Lug Nuts |
| This
automotive maintenance tutorial was specifically created to assist
owners of the first generation (2001, 2002, 2003, 2004, 2005 & 2006)
Acura MDX in bleeding the brake lines in order to change the brake
fluid and remove any moisture or air bubbles which have caused a reduction
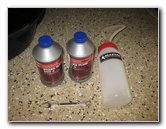
in braking performance and a soft feeling brake pedal. Owners of other Acura or Honda vehicles such as the RDX, ILX, TLX, RLX, TL, CL, RSX, RL, TSX, ZDX, NSX, Integra, Pilot, Accord, Civic, Fit, Clarity, CR-V, CR-Z, HR-V, Odyssey, Element and Ridgeline with the VTEC 3.5L V6 engine may also find these DIY instructions to be helpful. In order to complete this procedure, you will need at least two 12 ounce bottles of genuine Honda DOT 3 brake fluid. If you haven't flushed out the brake fluid in many years, you may need at least four 12 ounce bottles to remove the majority of the old fluid. I highly recommend buying the Allstar Performance ALL11017 Bleeder Bottle to make this an easy one-person job since it has a magnet to keep it attached to the caliper and also a one-way check valve to prevent old fluid or air from entering the brake lines while the valve is open. If you don't have a bleeder bottle, you'll need a rubber hose, a catch container and an assistant to press down on the brake pedal to pump out the old fluid. The other tools required include a lug nut wrench, a floor jack, two jack stands, a 10mm wrench and an automotive funnel.
|
||
|
|
||
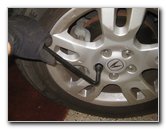
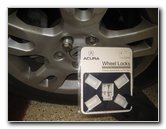 Locking Lug Nut Key |
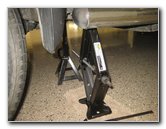 Raise Front of SUV |
 Floor Jack Point |
| The first few steps
are to drive the SUV on to a level surface, place the transmission in park
and turn off the ignition. Engage the emergency / parking brake and place wheel chocks on both sides of the rear tires to prevent the SUV from moving. Please see Picture # 2 above to view the brake line bleeding order as specified in the service manual. The order is as follows: 1. Front Driver Side, 2. Front Passenger Side, 3. Rear Passenger Side and 4. Rear Driver Side. This tutorial only shows the procedure for the front driver side. Just repeat the steps for the other three calipers. Slightly loosen the five lug nuts on the front left (driver) side wheel by turning them 1/4 to 1/3 turn in the counterclockwise direction with the tire iron. Carefully raise the front of the SUV with the floor jack and securely support it with at least two jack stands. |
||
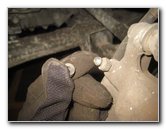
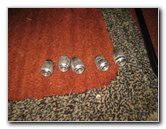 Five Lug Nuts Removed |
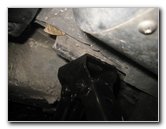
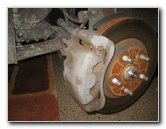 Front Left Brake Caliper |
 Rubber Valve Cap |
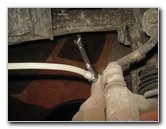
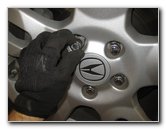
| Spin off the five
lug nuts and set them aside in a safe place. Carefully remove the wheel and set it aside. The brake fluid bleeder valve or "screw" is situated on the back side of the caliper. It is located just below the top caliper bolt and is covered by rubber cap. |
||
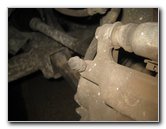
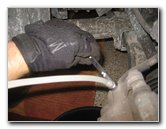
 Brake Fluid Bleeder Screw |
 Honda Fluid & Bleeder Bottle |
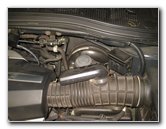 Right Rear Engine Bay |
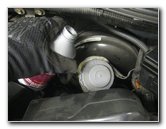
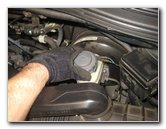
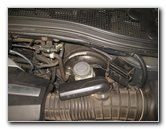
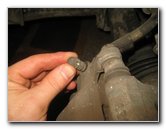
| Pull the rubber cap
off the bleeder valve and set it aside in a safe place. Clean off the valve with a paper towel to help prevent from having dirt, soot or other debris from entering the valve. Move to the right rear corner of the engine bay and locate the reservoir tank. |
||
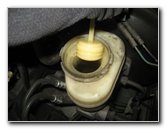
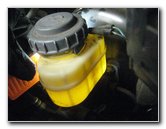
 Reservoir Tank |
 Top Off Brake Fluid |
 Clean Bleeder Valve |
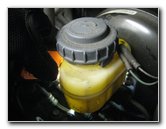
| Twist off the grey
plastic cap by rotating it 1/4 turn in the counterclockwise direction. There are two wires for fluid level sensor attached to the cap. So just leave the cap slightly off to the side with the plunger still partially in the fluid. If the level in the reservoir is below the "MAX" (maximum) line, pour in some fresh Honda DOT3 fluid from a new bottle until it reaches at or just above the max line. |
||
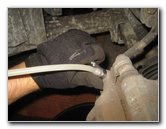
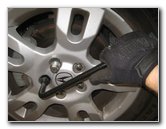
 Attach 10mm Wrench |
 Attach Rubber Tube |
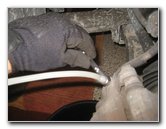 Crack Open Valve |
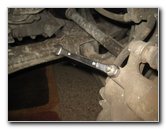
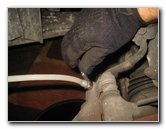
| Lower the closed
("box") end of the wrench over the bleeder screw valve. Push the rubber tube over the nipple on the bleeder valve. Make sure the hose fits snugly and will not allow air to enter or allow the brake fluid to leak out. This job is much easier to do by yourself with a bleeder bottle that has a one-way check valve. If your bleeder bottle has a magnet or wire loop, securely attach it to the caliper, rotor or lug stud. Carefully crack open the valve by turning it about 1/4 to 1/2 the counterclockwise direction ("lefty loosy", "righty tighty"). If you have trouble loosening the valve, do not use excessive force! After years of being exposed to the elements including rain or snow, the valve might be rusted closed. Spray some penetrating oil such as Liquid Wrench or PB Blaster and wait about 10 to 15 minutes before attempting to loosen the valve again. |
||
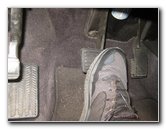
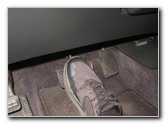 Push Down Brake Pedal |
 Close Bleeder Valve |
 Check Fluid Level |
| With the valve
opened, move to the driver seat of the car. Slowly and firmly push the brake pedal down until it almost reaches the floor. Then slowly release the brake pedal. The one-way check valve in the bleeder bottle will prevent the fluid from being sucked back into the brake line. If you are using an assistant to pump the brake pedal, ask them to verbally indicate when the pedal is down and when it is being released. You will need to open the valve before they push it down and then close the valve before they release the pedal. Double check that the valve has been securely closed. I would recommend checking the fluid level in the reservoir after every 3 to 4 pumps of the brake pedal. You don't want to let the fluid level get below the "MIN" (minimum) line. The last thing you want to have happen is to introduce air into the braking system by letting the reservoir become completely empty. It would take a lot of new fluid and pumping to bleed out all of the air bubbles if you make that mistake. |
||
|
|
||
 Old Dirty Brake Fluid |
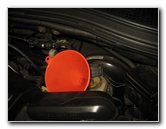 Insert Funnel |
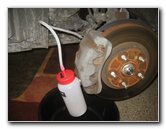
 Open Valve Again |
| Move back to the
engine bay and insert the automotive funnel into the reservoir tank. Pour in some fresh DOT 3 fluid until the level reaches at or just above the MAX line. |
||
 Pump Brake Pedal |
 Close Valve |
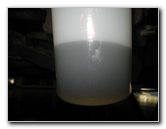 More Old Brake Fluid |
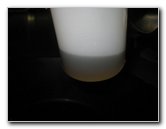
| Repeat the
procedure of opening the valve, pumping the brake pedal a few times and
closing the valve again. You should repeat these steps until the fluid coming out of the rubber hose attached to the bleeder valve looks like clean new fluid. You may even see a layer of clean mostly translucent fluid floating on the top of the old dark grey or black fluid in the bleeder bottle. |
||
 Check Fluid Level |
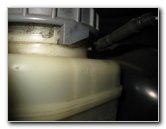 "MAX" & "MIN" Lines |
 Replace Reservoir Cap |
| Check the fluid
level in the reservoir again and top it off to reach the MAX line.
Try to avoid having the reservoir cap for any longer than necessary since brake fluid is hygroscopic. It readily absorbs moisture from the air which can lead to reduced braking performance. Replace the grey plastic cap by twisting it 1/4 turn in the clockwise direction. Try to avoid pulling on or stressing the wires attached to the fluid level sensor. |
||
 Reservoir Cap Secured |
 Brake Bleeder Screw |
 Double Check - Valve Tight |
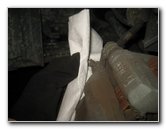
| Make sure you clean
up any spilled brake fluid around the reservoir.
Brake fluid can easily damage painted surfaces. Clean off any brake fluid with a paper towel and thoroughly flush the area with clean water. Double check that the brake fluid bleeder valve is tight. Try to avoid over tightening the valve to prevent from having it break off or damaging the threads which could lead to a leak. The shop manual torque specification for the bleeder screw is only 6 lb-ft. |
||
 Remove 10mm Wrench |
 Push On Rubber Cap |
 Replace Wheel |
| Pull the rubber
tube off the bleeder valve. Clean off any brake fluid from the valve with a paper towel. Replace the rubber valve cap. Push the wheel back into place over the lug studs. |
||
 Spin On Five Lug Nuts |
 Lower Car - Tighten |
 Front Left Complete |
| Spin on the five
lug nuts a few turns by hand in the clockwise direction to prevent from
having them become cross threaded. Slightly tighten the five lug nuts in the clockwise direction in a star or criss-cross pattern with the tire iron. Carefully lower the SUV from the jack stands by using the floor jack. Continue tightening the five lug nuts in a star or criss-cross pattern to about 1/4 turn past hand tight. It would be best to use a torque wrench to tighten the lug nuts to the 80 lb-ft specification in the owner's manual. Double check that the lug nuts are tight and also check them again after your first few trips. Now repeat the process for the other three calipers as follows: 2. Front Right (Passenger Side) 3. Rear Right (Passenger Side) and 4. Rear Left (Driver Side). Once you have completed flushing all the brake lines and replacing the fluid with new fluid, sit in the driver's seat and firmly push down the brake pedal a few times to restore brake line pressure. If the pedal is still very soft or sinks to the floor, you may need to repeat the procedure to clear out any remaining air bubbles or use a bi-directional OBD2 Scanner that is specifically listed as having ABS bleeding capability for your vehicle. Take the vehicle for a short and cautious test drive around your neighborhood. Be prepared to activate the emergency brake if you feel as if the brake pedal is very soft and you are having trouble slowing or stopping the vehicle. Be sure to record the brake fluid change in your vehicle's service records.
For more,
please check out all of my
2001-2006 Acura MDX DIY Repair & Maintenance Guides. |
||
| If you found this guide to be helpful,
please consider making a small donation by clicking on the PayPal.com
"Donate" button located to the right of this paragraph. Thank you!
(Note: I am not a registered charity. Donations are not tax deductible.) |

|