
Acura MDX
Add-A-Circuit Installation Guide
How to install an Add-A-Circuit
electrical fuse holder to hardwire an accessory in a 2001 to 2006 Acura MDX SUV.

By Paul B. Michaels Author & Photographer Auto Mechanic Since 1989 |
||
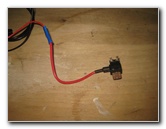 Add-A-Circuit Fuse Holder |
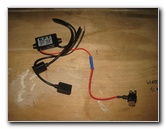 USB 12V To 5V Adapter |
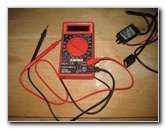 Cen-Tech Digital Multimeter |
| This
automotive maintenance tutorial was specifically created to assist
owners of the first generation (2001, 2002, 2003, 2004, 2005 & 2006)
Acura MDX in installing an Add-A-Circuit electrical fuse holder (or
"Piggyback Fuse Tap") in order to hardwire an automotive accessory
such as a radar detector, GPS, dashcam (dash camera), Bluetooth
adapter, gauge, power inverter or a smartphone or tablet charger. Owners of other Acura or Honda vehicles such as the RDX, ILX, TLX, RLX, TL, CL, RSX, RL, TSX, ZDX, NSX, Integra, Pilot, Accord, Civic, Fit, Clarity, CR-V, CR-Z, HR-V, Odyssey, Element and Ridgeline may also find these DIY instructions to be helpful. To complete this procedure, you'll need an Add-A-Circuit fuse holder and a USB 12V-5V Adapter (optional). The tools required include a digital multimeter, a fuse puller tool, some new mini blade fuses and a socket set. |
||
|
|
||
 Bluetooth Phone Adapter |
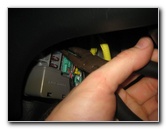
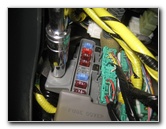
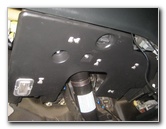
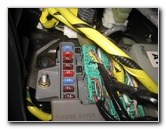 Driver Side Fuse Panel |
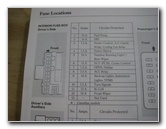 Fuse Location Diagram |
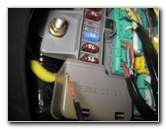
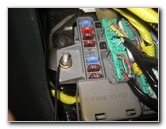
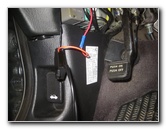
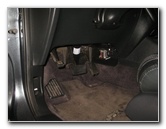
| The first step is
to consult your owner's manual and review the section on fuse panel
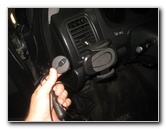
locations. Locate the electrical panel situated closest to the intended installation location for your automotive accessory. In my 2006 MDX, there is a fuse block located just below the driver side of the dashboard near the emergency / parking brake foot lever. I plan on attaching a Besign BK01 Bluetooth audio adapter for my Blitzsafe AUX input adapter to the side of the steering wheel column. (If you'd like an AUX input for the Bose stereo in your MDX, check out my Blitzsafe AUX Input Installation Guide.) I also have an A/C vent mount for my Samsung Galaxy S5 Android smartphone on the far left driver's air vent. Decided if you want a circuit that is always on / hot / active such as for an alarm system, or a circuit that is only when the ignition is "On" such as for a dash camera. I decided to use the 10 amp number five fuse socket which is for the DRL lights (on Canadian models) and the rear window wiper. This circuit is only "hot" when the ignition switch is turned to the "On" position. Avoid installing an Add-A-Circuit fuse holder to any electrical socket for an "essential" electrical feature such as the airbags, brake lights, ABS (anti-lock braking), turn signals, fuel pump or even the windshield wipers. I chose the # 5 fuse socket since it would not be a big deal for me to lose the ability to use the rear window wiper if the Add-A-Circuit adapter malfunctions or blows the fuse while I am driving. You would not want something like the headlights, reverse lights or the horn to stop working while driving since that could impair your ability to drive safely during certain conditions. |
||
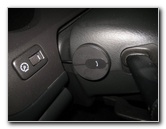
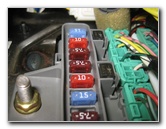 Bolt On Left - For Ground |
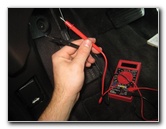 Digital Multimeter Tool |
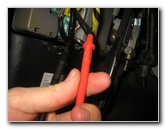
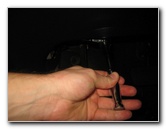
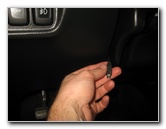
 Pull Out # 5 Fuse |
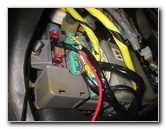
| After you have chosen an appropriate fuse socket, you'll have to test it with your multimeter tool to see which side is the "Hot" 12 volt power supply and the "Load" or "Ground" side. | ||
 10A - DRL & Rear Wiper |
 Multimeter Probes |
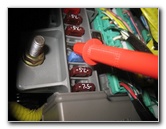 Test For "Hot" 12V Side |
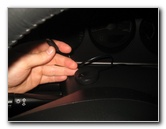
| Pull the old fuse
straight out of the socket with a pair of needle nose pliers. Set it aside
in a safe place. Turn the key until the ignition switch is in the "On" position. Set your multimeter to measure DC volts. Touch the black ('-" negative) probe to a metal part of the car, such as the bolt end next to the fuse panel. Then touch the red ("+" positive) probe to one side of the socket. If the multimeter LCD display reads 0.00 volts, that is the load / ground side of the socket. If the multimeter indicates about 12 volts, that is the hot / active side of the socket. |
||
 "Load" Side - Front |
 Loosen Counterclockwise |
 10mm Nut - Ground Wire |
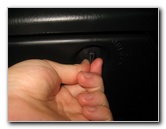
| On this 2006 MDX
Touring, on the electrical panel under the driver side of the dashboard, the
right / front side of the socket (closest to the front of the SUV) was the
load / ground side. The rear / left side of the socket (closest to the rear of the SUV) was the hot 12V side. Loosen the nut on the bolt end on the left side of the electrical panel by turning it counterclockwise with a 10mm socket, an extension bar and a 1/4" drive ratchet. This is where I will attach my black ground wire. |
||
|
|
||
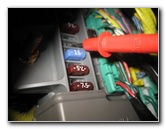
 Push In Original Fuse |
 12V Left Side of Tap |
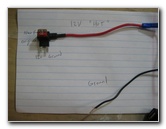 12V & Ground Diagram |
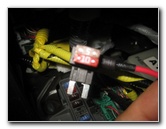
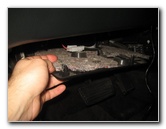
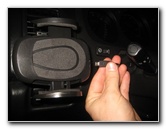
| Push the original
fuse into the bottom socket on the Add-A-Circuit adapter.
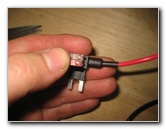
So for my application, I pushed the red 10A rear wiper fuse into the socket closest to the metal electrical contact blades. The brown 5A fuse was included with my Add-A-Circuit adapter and should be plenty for my dual USB 12V-5V adapter which is supposed to only draw no more than 3 amps. Take a look at my simple diagram in the picture above. I used a small felt marker pen to label the 12V hot side of the Add-A-Circuit adapter. The 12V hot metal blade is the one on the left and the load / ground is the metal blade on the right (closest to the red wire). |
||
 Route USB Cables |
 Strip Insulation - Ground |
 Tighten 10mm Nut - Ground |
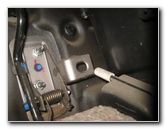
| I recommend routing
the USB cable or cables that you'll need for your accessory items at this
point to avoid any surprises later on. I slipped the USB cable for my Besign BK01 Bluetooth audio / hands-free telephone adapter and the USB power cord for my cell phone down between the steering column and the gauges on the dashboard. Strip some of the insulation away from the black ground wire. You may choose to use a spade terminal ("U" shaped) connector to attach the ground wire to your vehicle. I just wrapped the bare wire around the bolt end. Tighten the 10mm nut to secure the ground wire in place. Insert the red wire from your USB adapter into the connector on the Add-A-Circuit. Crimp the connection to secure the two red wires together. |
||
 New Fuse Top By Red Wire |
 Dual USB Adapter Wired |
 Push In Add-A-Circuit |
| Line up the
Add-A-Circuit adapter with the empty fuse socket. Make sure that the hot 12V blade is inserted into the hot 12v side of the fuse socket. Carefully push the Add-A-Circuit into the socket until is fully seated. |
||
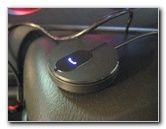 Testing Bluetooth Adapter |
 Dual Female USB Sockets |
 Plastic Cover Under Dash |
| Plug in your
accessory to one of the two USB sockets. Turn the ignition switch to the "On" position. Test the accessory to make sure it works properly. I plugged my Bluetooth adapter into the 3.5mm headphone jack on the Blitzsafe AUX input, turned on the Bose radio and pressed the XM / AUX button until the display read "CDC". I was able to play music from my phone via the Bluetooth adapter while also charging it with the micro USB wire. Then turn off the ignition switch. To complete the installation, you'll need to neatly route all of the wires and possibly secure them with small cable (zip) ties. |
||
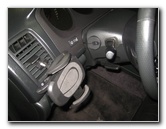
 1/4 Turn Counterclockwise |
 Plastic Cover Unlocked |
 Organize Wires Above Cover |
| There is a plastic
cover under the dashboard of the first generation Acura MDX. Rotate the knob in the center of the cover 1/4 turn counterclockwise to unlock the fastener. Gently pull out the cover. |
||
 Line Up Peg & Hole |
 Mount Bluetooth Adapter |
 Double Sided Tape |
| Securely attach the
cables to the underside of the dashboard so that they won't fall down and
impair your ability to use the brake or accelerator (gas) pedal. Replace the cover under the dashboard and secure it by rotating the fastener 1/4 turn clockwise. |
||
 Micro USB Phone Charger |
 Phone Vent Holder |
 Clean Install - No Wires |
| I also recommend
that you occasionally test the electrical component on the original circuit
which would be the rear window wiper on my SUV. Be sure to record the Add-A-Circuit installation in your SUV's service records just in case the next owner has any issues with that fuse panel or the electrical component that is sharing the circuit. For more,
please check out all of my
2001-2006 Acura MDX DIY Repair & Maintenance Guides. |
||
| If you found this guide to be helpful,
please consider making a small donation by clicking on the PayPal.com
"Donate" button located to the right of this paragraph. Thank you!
(Note: I am not a registered charity. Donations are not tax deductible.) |