
Nissan Altima
Cabin Air Filter Replacement Guide
How to change the A/C system's cabin air
filter in a 6th generation 2019 to 2024 Nissan Altima sedan.

By Paul B. Michaels Author & Photographer Auto Mechanic Since 1989 |
||
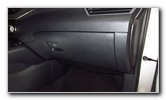
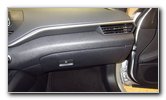 2020 Altima Glove Box |
 Bottom Edge Right Screw |
 Bottom Edge Left Screw |
|
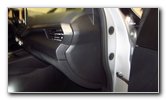
This automotive maintenance tutorial was specifically written to assist
owners of the sixth generation 2019, 2020, 2021, 2022 and the revised or "facelifted"
2023 and 2024 Nissan Altima sedan in cleaning or changing the A/C system's
cabin air filter element located in the HVAC blower motor housing. Owners of other Nissan, Infiniti or related Renault vehicles such as the Rogue, X-Trail, Note, Versa, Rogue Sport / Qashqai, Maxima, Sentra, Juke, Kicks, Murano, Pathfinder, Armada, Frontier, Titan, Quest, NV200, Q50, Q60, QX50, QX60 and QX80 may also find these DIY instructions to be helpful. A few compatible replacement cabin air filters with their part numbers are as follows: K&N VF2076, Beck/Arnley 0422256 and TYC 800226C. The tools needed to complete this procedure include a Phillips head screwdriver and a plastic pry bar tool. The first step is to locate the two screws at the bottom edge of the glove box. |
||
|
|
||
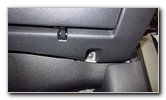
 Loosen Counterclockwise |
 Phillips Head Screw |
 Loosen Right Side Screw |
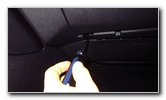
| There is one screw
on the left side and another on the right side just below the glove box. Remove the two screws by turning them in the counterclockwise direction with a Phillips head screwdriver. |
||
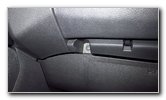
 Screw Removed |
 Open Glove Box |
 Top Edge Three Screws |
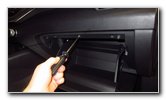
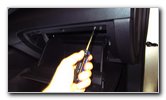
| Open the glove box
and locate the three Phillips head screws along the top edge. Loosen the three screws by turning them in the counterclockwise direction. |
||
 Loosen Counterclockwise |
 Remove Third Screw |
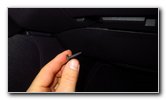
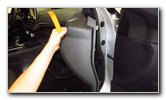
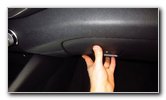
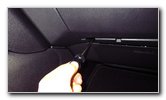
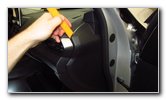 Pry Off Side Trim Cover |
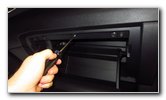
| Set the three top
edge screws aside with the other screws. Move to the outside edge of the dashboard. Gently pry off the outer trim cover with a plastic pry bar tool. |
||
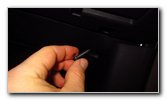
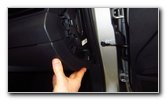
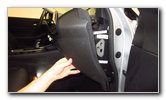
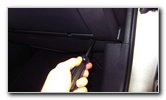
 Loosen Clips |
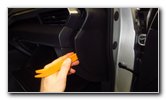
 Trim Panel Removed |
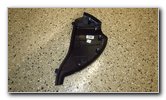 Dashboard Side Panel |
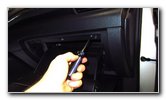
| You may need to
remove and reinsert the plastic pry bar tool in several locations to fully
release all of the retaining clips. Set the dashboard side panel aside in a safe place. |
||
 Right Side of Dashboard |
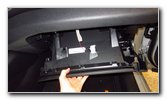 Pull Out Glove Box |
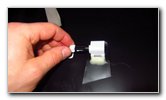
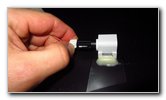 Disconnect Power Plug |
| Carefully and
gently pull the entire glove box out of the dashboard. You'll still need to disconnect the electrical connector for the glove box light bulb. Push in the release tab on the small white power plug and slide it straight out of its socket. |
||
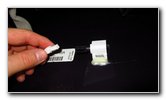 Glove Box Light Plug |
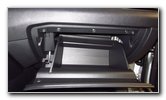
 Glove Box Removed |
 Underside of Glove Box |
| Set the glove box aside in a safe place. | ||
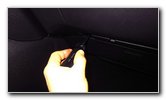
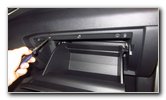
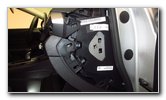
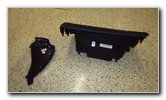
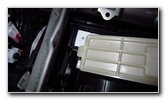
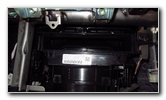
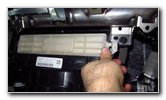
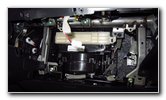 Move Plug Out of Way |
 Filter Access Cover |
 Release Retaining Clip |
| Move the power plug
for the glove box light bulb out of the way. Locate the release tab for the retaining clip on the right side of the white plastic filter cover. Push in the release tab and swing open the right side of the filter cover. |
||
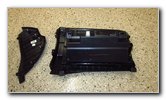
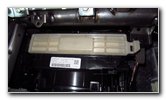
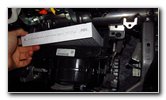
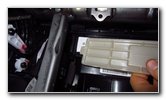
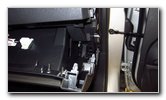
 Swing Open Right Side |
 Remove Tab - Left Side |
 Old Filter Exposed |
| Pull the tab on the
left side of the filter cover out of its slot. Set the filter access cover aside in safe place. |
||
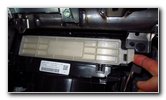
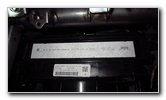
 Slide Out Old Air Filter |
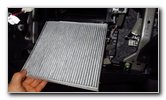 Old Filter Removed |
 Inspect Both Sides |
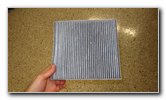
| Slide the old cabin
air filter straight out of the slot. Inspect both sides of the old filter. The OEM (original equipment manufacturer) cabin air filter in this 2020 Altima was a Mann Filter part number CUK 22 034 or 27277 6CA1A (also known as CUK22034 or 272776CA1A). If the old filter is relatively clean, just tap out any large debris and remove any fine dust with a vacuum cleaner. If the old filter is dark gray or black and clogged with dirt, dust, sand, pollen, soot, insects, leaves, hair and other debris, it should be replaced with a new filter. The compatible replacement part numbers are as follows: K&N VF2076, Beck/Arnley 0422256 and TYC 800226C. |
||
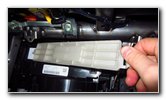
 Clean - Or Replace |
 Check Slot For Debris |
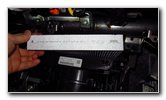 "Air Flow" Arrow DOWN |
| Check the filter
slot for any large debris such as leaves, twigs or dragonflies. Orientate the "Air Flow" arrow on the new air filter with the arrow pointing down towards the floor mat. Slide the new filter into the slot. |
||
 New Filter Installed |
 Reinsert Tab - Left Side |
 Swing Right Side Closed |
| Line up the filter
cover and reinsert the tab on the left side into its slot. Swing the right side of the filter cover closed. |
||
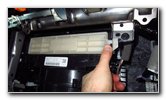 Push To Secure Clip |
 Push In Power Plug |
 Line Up Fasteners |
| Push on the right
side of the filter cover to secure the retaining clip. You should feel or hear the clip "click" securely into place. Raise the glove box close to the dashboard. Plug in the power plug for the glove box light bulb. Line up the metal friction fasteners on the back side of the glove box with their corresponding slots in the dashboard. |
||
 Push In Glove Box |
 Secure Friction Fasteners |
 Line Up Side Cover |
| Push the glove back
into place. Make sure the glove box is flush with the dashboard at every edge. Line up the trim cover on the side of the dashboard. |
||
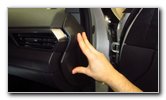 Push To Secure Panel |
 Side Panel Secured |
 Tighten Clockwise |
| Push the panel back
into place. Replace the two screws at the bottom edge of the glove box by turning them in the clockwise direction with the Phillips head screwdriver. |
||
 Replace Top 3 Screws |
 Phillips Head Screwdriver |
 Tighten Clockwise |
| Replace the three screws at the top edge of the glove box. | ||
 Tighten Bottom Screws |
 |
 Cabin Filter Changed! |
| Make sure that all
five screws are tight before moving on to the next steps. Replace the contents of the glove box and close it to complete the job. Be sure to write down the filter change in your vehicle's service records. According to the maintenance schedule in the owner's manual, the service interval for changing the cabin air filter is every 15,000 miles (24,000 km) or at least every 18 months. Please
take a look at all of my
2019-2024 Nissan Altima DIY Repair & Maintenance Guides. |
||
| If you found this guide to be helpful,
please consider making a small donation by clicking on the PayPal.com
"Donate" button located to the right of this paragraph. Thank you!
(Note: I am not a registered charity. Donations are not tax deductible.) |