
Ford
Expedition Cabin Air Filter Replacement Guide
How to clean or change the A/C system's
cabin air filter in a 4th generation 2018, 2019 and 2020 Ford Expedition.

By Paul B. Michaels Author & Photographer Auto Mechanic Since 1989 |
||
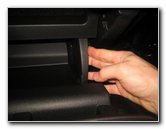
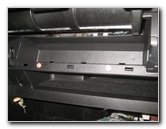
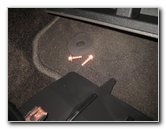
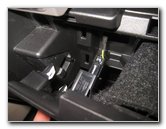
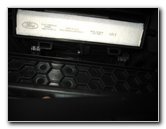
 2018 Expedition Glove Box |
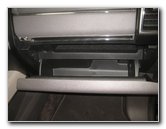 Open Glove Box |
 Damper Arm On Right |
| This automotive
maintenance tutorial was specifically written to assist owners of the 4th
generation (2018, 2019, 2020 and most likely also the 2021, 2022 and 2023 model
years) Ford Expedition SUV in cleaning or changing the A/C system's cabin
air filter element located in the HVAC blower motor housing. Owners of other Ford or Lincoln vehicles such as the Explorer, F-150, Escape, EcoSport, Transit, F-350, F-250, Edge, Flex, Ranger, Fiesta, Focus, Fusion, Mustang, Bronco, Super Duty, Navigator, Continental, MKZ, MKX, MKC, MKT, Aviator, Corsair and Nautilus may also find these DIY instructions to be helpful. A few compatible replacement cabin air filters with their part numbers include the following: Spearhead BE-150, Fram CF12150, Premium Guard PC8214X, EcoGard XC10491, K&N VF2049 and TYC 800198P. The tools needed to access and replace the filter include a 7mm socket and a 1/4" drive ratchet. The first two steps are to open the glove box and empty out the contents. Locate the damper arm on the right outer side wall of the glove box. |
||
|
|
||
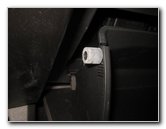
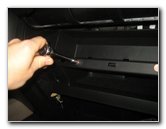
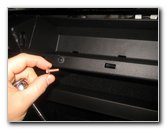
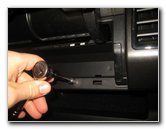
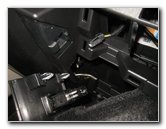
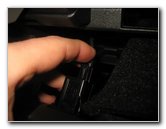
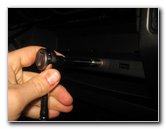
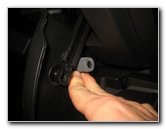
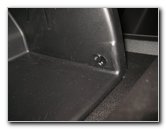 Button - Damper Mount |
 Pop Button Forward |
 Release Damper Arm |
| Pull the damper arm
back towards yourself until the mounting button pops out of the smaller hole
and into the larger hole. Then pull the damper arm's mounting button out of the right side wall of the glove box. |
||
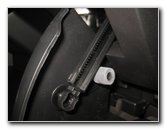
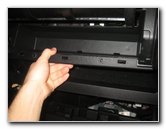
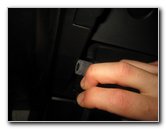
 Push In Side Walls |
 Release Side Stoppers |
 Rubber Side Stop |
| Firmly push in the two side walls of the glove box until the rubber side stops can be released from behind the dashboard. | ||
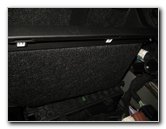
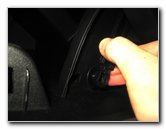
 Right Side Rubber Stop |
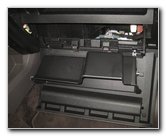 Lower Glove Box |
 Open Door - Top Storage |
| Gently lower the
glove box down to the floor mat. Push the chrome silver button to open the top storage compartment. Empty out any contents of the storage drawer. |
||
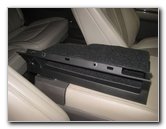
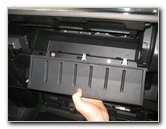
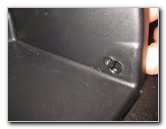
 Pull Out Rubber Trim |
 Pull Out Compartment |
 Storage Shelf Removed |
| Carefully pull the
rubber trim piece at the bottom of the top storage compartment out of the
dashboard. Firmly pull the top storage compartment out of the dashboard. It is held in place by a few metal friction fastener clips. Set the top storage compartment aside in a safe place. |
||
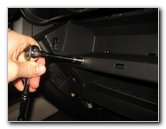
 Two Screws Exposed |
 Loosen Counterclockwise |
 Brass Screw Removed |
| Remove the two brass screws located in between the upper and lower storage compartments by turning them in the counterclockwise direction with a 7mm socket and a 1/4" drive ratchet. | ||
 Remove Second Screw |
 Two Screws Removed |
 Pull Out Compartment |
| Set the two screws
aside in a safe place. Pull the lower storage compartment out of the glove box. |
||
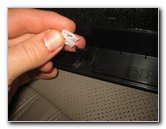
 Plastic Friction Fasteners |
 Clips Released |
 Glove Box Light Bulb |
| There are a few
plastic friction fastener clips that secure the lower storage drawer in
place. You may need to wiggle the compartment and use some force to remove it from the dashboard. Locate the electrical connector for the glove box light bulb. |
||
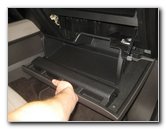
 Disconnect Power Plug |
 Lower Storage Shelf |
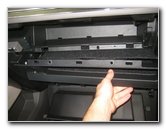
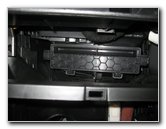 HVAC Filter Cover |
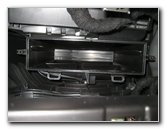
| Push in the release
tab on the electrical connector and slide it straight off the rear of the
storage compartment. Set the lower storage compartment aside in a safe place. Once the glove box, upper storage compartment and lower storage drawer have all been removed, you'll be able to see the HVAC blower motor housing and the filter access cover. |
||
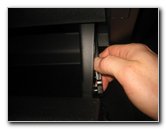
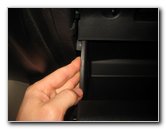
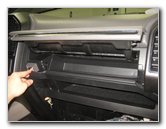
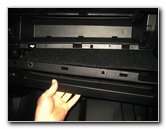
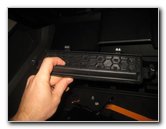
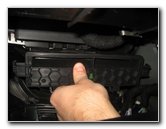
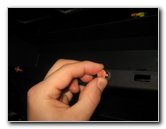
 Pull Out Left Side Clip |
 Release Right Side Clip |
 Open Filter Cover |
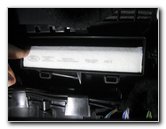
| Gently pull out the
tab on the left side of the cover to release the retaining clip. Then release the retaining clip on the right side of the filter cover. Try to avoid bending the retaining clips out too far to prevent from breaking them. Swing open the top of the filter cover and then lift out the two tabs on the bottom edge. |
||
|
|
||
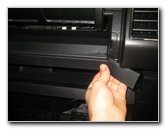
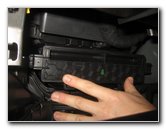
 Two Tabs - Bottom Edge |
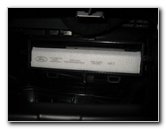 Old Filter Exposed |
 Slide Out Old Filter |
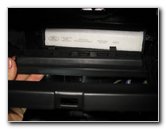
| Set the filter
access cover aside in a safe place. Slide the old filter straight out of the slot in the HVAC blower motor housing. |
||
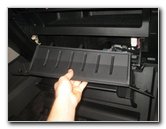
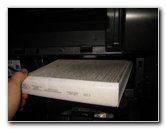
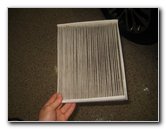 Old Filter Removed |
 Inspect Both Sides |
 Clean Out Filter Slot |
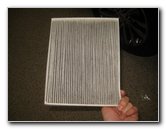
| Inspect both sides
of the old filter. If the old filter is dark grey or black and clogged with dirt, dust, sand, hair, pollen, insects, leaves, twigs, soot and other debris, it should be replaced with a new element. I recommend buying the Spearhead BE-150 cabin air filter since it has excellent reviews on Amazon. If you would like to have a more environmentally friendly washable and re-usable filter, choose the K&N VF2049 filter. Check the filter slot in the HVAC blower motor housing for any large debris. Clean out any debris in the slot with a crevice attachment on your vacuum cleaner. |
||
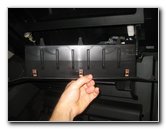
 "AIR" Arrow Down |
 Install New Air Filter |
 New Filter Installed |
| Orientate the new
air filter with the "AIR" (air flow) direction arrow pointing down towards
the floor mat. Make sure the new filter is fully seated in the slot. |
||
 Insert Tabs Bottom Edge |
 Push To Secure Clips |
 Replace Plastic Clip |
| Line up the filter
access panel with the slot. First, re-insert the two tabs on the bottom edge into their corresponding slots. Then push on the top edge to secure the two retaining clips. You should feel and/or hear the clips "click" securely into place. If any of the friction fasteners from the two storage compartments remained attached to the dashboard, pull them out and re-attach them to the back of the storage compartments. |
||
 Push In Power Plug |
 Re-Insert Lower Drawer |
 Spin In Two Screws |
| Hold the lower
storage drawer near the dashboard. Push the electrical connector for the glove box light bulb back into its socket. You should feel or hear the connector "click" securely into place. Carefully push the lower storage drawer back into the dashboard to secure the friction fasteners. |
||
 Two Brass Screws |
 Tighten Clockwise |
 Two Screws Secured |
| Replace the two
screws by turning them in the clockwise direction with the 7mm socket and a
1/4" drive ratchet until they are snug. Try to avoid over tightening the screws to prevent from cracking the plastic storage compartment assembly. |
||
 Top Storage Drawer |
 Replace Top Drawer Trim |
 Re-Insert Rubber Trim |
| Then slide the top
storage drawer back into the dashboard. Push on the compartment to secure the friction fasteners. Re-insert the rubber trim pieces on each side of the storage drawer back into place. |
||
 Raise Glove Box |
 Push In Side Walls |
 Re-Insert Side Stoppers |
| Raise the glove box
up towards the dashboard.
Firmly push in the two side walls until the rubber side stops can be re-inserted behind the dashboard. |
||
 Re-Attach Damper Arm |
 Button In Smaller Hole |
 Close Glove Box |
| Move to the right
outer side wall of the glove box. Re-insert the mounting button on the damper arm into the larger hole on the right side of the glove box. Then push the arm forward (towards the front of the car) to pop the button into the smaller hole. Double check that the damper arm is securely attached to the glove box. Replace the contents of the glove box and close it to complete the procedure. Enjoy the fresh clean air from your A/C system! The service interval specification in the owner's manual for the cabin air filter is to replace it at least every 20,000 miles. I also recommending checking and cleaning the filter at every oil change (every 10,000 miles or 1 year). Be sure to write down the filter change in your vehicle's service records. Please
check out all of my
2018-2020 Ford Expedition DIY Repair & Maintenance Guides. |
||
| If you found this guide to be helpful,
please consider making a small donation by clicking on the PayPal.com
"Donate" button located to the right of this paragraph. Thank you!
(Note: I am not a registered charity. Donations are not tax deductible.) |