
Kia Sportage
12V Automotive Battery Replacement Guide
How to change a weak or dead 12 volt car
battery in a 4th generation 2017 to 2022 Kia Sportage with the part numbers.

By Paul B. Michaels Author & Photographer Auto Mechanic Since 1989 |
||
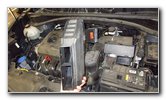
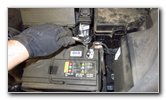
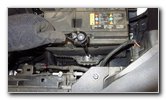
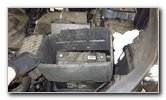
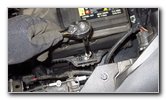
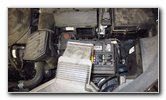
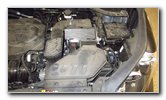
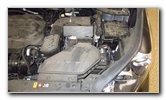 2018 Sportage Engine Bay |
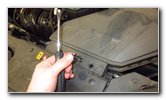
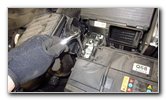
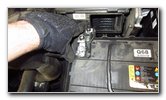
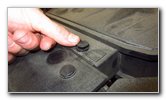
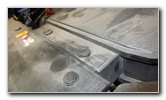
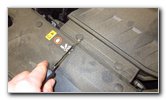 Pry Out Center of Fastener |
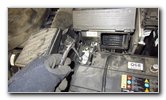
 Pull Out Pop Rivet |
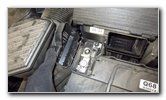
| This automotive
maintenance tutorial was specifically written to assist owners of the fourth
generation (2017, 2018, 2019 and probably also the refreshed 2020, 2021 and
2022) Kia Sportage SUV in changing a weak or dead 12V automotive battery for
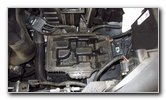
the Theta II 2.4 liter inline four cylinder engine. Owners of other Kia, Hyundai and Genesis vehicles such as the Niro, Optima, Soul, Forte, Rio, Stinger, Cadenza, K900, Sorento, Telluride, Sedona, Kona, Santa Fe, Tucson, Elantra, Sonata, Accent, Rondo, Carens, Veloster, Ioniq, Nexo, Palisade, G70, G80 and G90 may also find these DIY instructions to be helpful. A few symptoms of a weak 12V battery include slow starting, slow cranking, swelling / bloating or a battery icon warning light on the gauge cluster. The original OEM battery's "Group Size" is 124R and the part number is Rocket Battery CMF68L-DIN (or CMF68LDIN or CMF68L DIN). A few other compatible replacement group size 124R or the very similar "48" group size 12 volt car batteries with their part numbers include the following: DieHard 50748, Delphi BU9048 and EverStart MAXX-124R (at Walmart). The tools needed to complete this procedure include a small flathead screwdriver or a plastic pry bar tool, a 10mm socket with a 1/4" drive ratchet, a 12mm socket with a long extension bar and a 3/8" drive ratchet. The first two steps are to open the hood and then move to the right (driver) side of the engine bay. The 12V battery is mostly hidden by the black plastic air intake assembly that is attached to the front of the engine bay. |
||
|
|
||
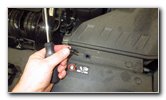
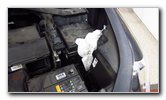
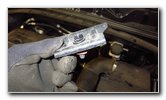
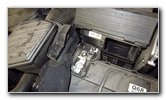
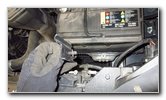
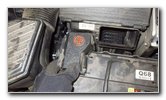
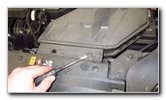 Release Second Fastener |
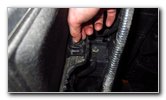
 Remove 2nd Pop Rivet |
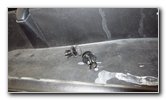 Two Pop Rivets Removed |
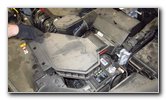
| Locate the two
round black plastic pop rivet fasteners on the front edge of the air intake
housing that secure it to the radiator cover at the front of the engine bay. Use a small flathead screwdriver or a plastic pry bar tool to gently pull up the smaller round plastic pin or "button" head in the center of the two pop rivet fasteners. Once the fastener has been unlocked, you can pry out the base of the pop rivet. Set the two pop rivets aside in a safe place. |
||
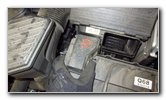
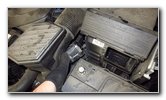
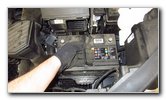
 Pull Off Air Intake |
 Air Intake Removed |
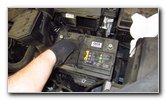
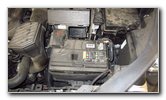 Old Battery Exposed |
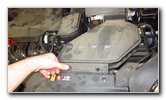
| Lift the front edge
of the air intake assembly and then pull the rear of the housing out of the
opening in the engine air filter box. Set the air intake aside in a safe place. Once the air intake is out of the way, you'll be able to easily access the old 12V battery. |
||
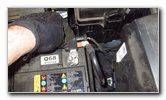
 Loosen Negative Terminal |
 Cover & Tuck Away |
 Socket & Extension Bar |
| Loosen the nut on
the "-" negative terminal by rotating it a few turns in the counterclockwise
direction with the 10mm socket and a 1/4" drive ratchet or a 10mm wrench. You do not need to fully remove the nut. Pull the negative terminal off the "-" battery post, wrap it in a small towel and tuck it away on the right side of the battery to help prevent accidental electrical contact. Attach the 12mm socket to a long extension bar and a 3/8" drive ratchet. |
||
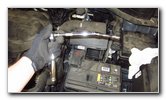
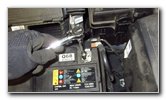
 Hold Down Bar |
 Loosen Counterclockwise |
 Hold Down Bracket |
| Locate the black
metal hold down bracket at the front bottom edge of the battery tray. Loosen the single bolt on the hold down bar by turning it in the counterclockwise direction with the 12mm socket, extension bar and the 3/8" drive ratchet. There is a red plastic washer on the underside of the bracket that holds the bolt in place. Once the bracket is free, lift it off the battery tray and set it aside in a safe place. |
||
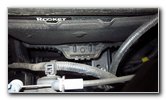
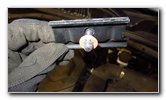 Bolt Retaining Washer |
 Squeeze Release Tab |
 Open Plastic Cover |
| Push in the release
tab on the black plastic cover for the "+" positive terminal. Swing open the hinged terminal cover. |
||
 Loosen Counterclockwise |
 Pull Off Positive Terminal |
 Tuck Away On Side |
| Loosen the "+"
positive terminal nut a few turns in the counterclockwise direction. Pull the positive terminal off the "+" post, close the plastic cover and tuck it away on the left side of the old battery. |
||
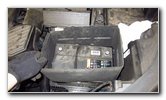
 Remove Heat Shield Box |
 Lift Out Old Battery |
 Old Battery Removed |
| Pull the black
fabric and foam battery heat shield cover off the old battery. Save it for re-installation later on. Raise the two handles on the old battery. Carefully lift the old battery off the tray and out of the engine bay. Gently place the old battery on the ground. Try to avoid dropping or tipping over the old battery to prevent from having acid leak out. Be sure to take the old battery with you to the auto parts store or Walmart to prevent from having to pay a "core", "recycling", "disposal" or "environmental" fee. |
||
|
|
||
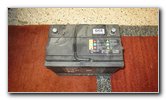
 OEM Rocket Battery |
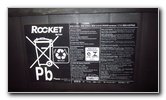 |
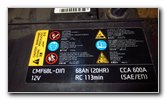 CMF68L-DIN Battery |
| The original OEM
Hyundai / Kia 12V battery was marked as part number CMF68L-DIN.
The specifications are as follows: 68Ah (20HR) CCA 600A 12V RC 113min (SAE/EN). |
||
 Clean Off Battery Tray |
 Lower In New Battery |
 Replace Battery Cover |
| Clean off any
debris from the black plastic battery tray in the engine bay so that the new
battery will rest evenly on it. Carefully lower the new battery down on to the tray. The positive "+" post should be situated on the left side of the battery and the "-" negative post should on the right side. Lower the heat shield cover over the new battery. If you've had a problem with corrosion (white or blue powder) building up on the battery terminals or posts, consider installing some felt anti-corrosion washers over the battery posts. They are very cheap insurance against having to replace your terminals or battery cables that have been severely damaged by corrosion and left you stranded. |
||
 Push On Positive Terminal |
 Tighten Positive Terminal |
 Battery Hold Down Bar |
| Push the positive
terminal over the "+" battery post. Tighten the nut on the positive terminal in the clockwise direction with the 10mm socket and a 1/4" drive ratchet until it is snug. Try to avoid over tightening the terminal nut to prevent from damaging the battery post which could result in an acid leak. Close the plastic cover over the positive terminal. Lower the hold down clamp to the front bottom edge of the battery tray. |
||
 Spin In Bolt Clockwise |
 Tighten Bolt Clockwise |
 Close Plastic Cover |
| Spin in the bolt a
few turns by hand in the clockwise direction to make sure it doesn't become
cross threaded. Tighten the hold down bracket's bolt in the clockwise direction with the 12mm socket, extension bar and 3/8" drive ratchet until it is snug. Try to move the new battery. If the new battery can be moved, slid or rocked on the tray, tighten the hold down bar's bolt an extra turn or two. |
||
 Push On Negative Terminal |
 Tighten Nut Clockwise |
 Line Up Air Intake |
| Then push the
negative terminal on to the "-" battery post. Tighten the terminal nut in the clockwise direction with the 10mm socket and a 1/4" drive ratchet. Double check that the two terminals are securely attached to the posts on the new battery. Lower the air intake assembly down towards the engine air filter box. |
||
 Re-Insert Air Intake |
 Push In Two Pop Rivets |
 |
| Push the rear of
the air intake into the opening in the front of the air filter box. Lower the front edge of the air intake assembly towards the radiator cover. Line up the two holes in the front of the air intake with their corresponding holes in the radiator cover. |
||
 Push In Center To Secure |
 Air Intake Secured |
 12V Battery Replaced |
| Make sure the pins
in the center of the two pop rivets are in the up and released position. Re-insert the two pop rivets and push in the smaller pin in the middle to secure the fasteners in place. To test the new battery, start the engine and turn on the headlights. If you suspect that the alternator is failing, use a digital multimeter tool to check the voltage when the engine is running. An alternator that is working properly should output anywhere from at least 13.8V to as much as 14.5 volts to properly charge the battery. After your next long trip of at least an hour, test the voltage of the new battery with the digital multimeter. It should be at least 12.4V or as much as 14.5 volts when it is fully charged. Some signs of a failing alternator include headlights that dim when you come to a stop at a light or stop sign, headlights that become brighter when accelerating, needing to be jump started, a CEL / SES (check engine light / service engine soon) and stalling. Be sure to record the battery change in your vehicle's service records. Please check out all of my
2017-2022 Kia Sportage DIY Repair & Maintenance Guides. |
||
| If you found this guide to be helpful,
please consider making a small donation by clicking on the PayPal.com
"Donate" button located to the right of this paragraph. Thank you!
(Note: I am not a registered charity. Donations are not tax deductible.) |