
Toyota Tacoma
Fog Light Bulbs Replacement Guide
How to change a burnt out fog light bulb
in a third generation 2016 to 2021 Toyota Tacoma pickup truck.

By Paul B. Michaels Author & Photographer Auto Mechanic Since 1989 |
||
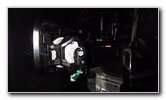
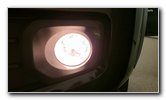 2020 Tacoma Fog Light |
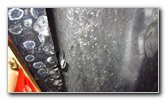
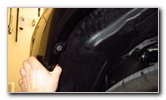
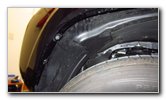
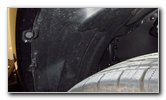 Plastic Wheel Well Liner |
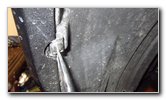 Loosen Plastic Pin |
| This automotive
maintenance tutorial was specifically written to assist owners of the third
generation (2016, 2017, 2018, 2019, 2020, 2021 and probably also the 2022
and 2023 model years) Toyota Tacoma pickup truck in changing a burnt out fog
light bulb in the front bumper cover or upgrading both of them to brighter
LED units. Owners of other Toyota or Lexus vehicles such as the Tundra, 4Runner, Hilux, Highlander, C-HR, Avalon, Camry, Corolla, Supra, Land Cruiser, Prius, RAV4, Mirai, Sequoia, Sienna, Yaris, CT 200h, ES 300h, RX 350, GX 460, LX 570, NX 300, RX 450h, UX 200 and UX 250h may also find these DIY instructions to be helpful. The compatible replacement light bulb part number is H16 which is available from various manufacturers such as Sylvania, Osram, Hella and PIAA. If you would like to have brighter fog lights that will also last much longer before burning out, install some H16 LED units. The tools needed to access and replace the bulbs include a flat head screwdriver, a 10mm socket and a 1/4" drive ratchet or a Phillips head screwdriver. An optional step is to turn the steering wheel all the way in the opposite direction of the burnt out fog light bulb for more working room in the wheel well. The front of the black plastic wheel well liner (also known as the "splash guard" or "engine shield") is held in place to the quarter panel by a plastic pin and two metal screws. Loosen the plastic pin by turning it in the counterclockwise direction with a flat head screwdriver. |
||
|
|
||
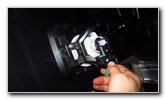
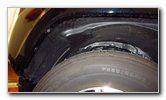
 Plastic Fastener Removed |
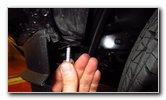
 Silver Screw - Underside |
 Screw - In Front of Tire |
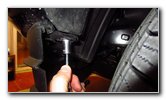
| Pull out the
plastic pin and set it aside in a safe place. Locate the silver metal screw on the underside of the wheel well liner and the black metal screw in front of the tire. |
||
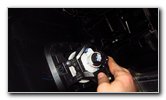
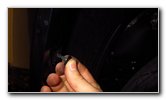
 Loosen Counterclockwise |
 Plastic Pin & Black Screw |
 Remove Lower Screw |
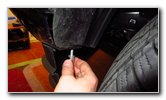
| Loosen the black
metal screw in front of and just above the tire by turning it in the
counterclockwise direction with a 10mm socket and a 1/4" drive ratchet. Then remove silver metal screw on the underside of the wheel well liner by turning it in the counterclockwise direction with the 10mm socket and a 1/4" drive ratchet or a stubby Phillips head screwdriver. |
||
 Bottom Screw Removed |
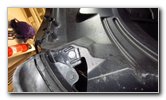
 Pull Back Plastic Liner |
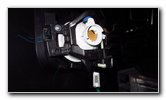
 Push In Tab, Pull Off Plug |
| Set the two screws
aside in a safe place. Carefully pull the wheel well liner back to access the rear of the fog light bulb housing. Push in the black plastic release button on the electrical connector before sliding it straight off the base of the old light bulb. |
||
 1/4 Turn Counterclockwise |
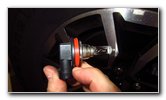 Old Light Bulb Removed |
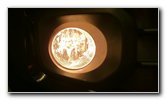
 Osram H16 12V 19W |
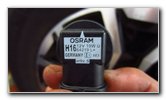
| Rotate the base of
the old light bulb 1/4 turn in the counterclockwise direction before pulling
it straight out of the housing. The OEM (original equipment manufacturer) light bulb in this 2020 Tacoma TRD Sport was an Osram H16 12V 19W halogen unit. |
||
 Empty Bulb Housing |
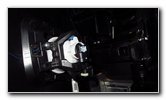 1/4 Turn Clockwise - Lock |
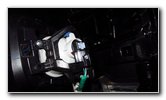 Push On Connector |
| Try to avoid
touching the glass part of the new halogen bulb with your fingers or
anything greasy or oily in the wheel well. If you do get the new bulb dirty, clean it off with a paper towel and some rubbing alcohol. Insert the new number H16 light bulb into the housing and rotate it 1/4 turn in the clockwise direction to secure it into place. If you would like to have much brighter and longer lasting fog lights, install some compatible replacement H16 LED bulbs. Push the electrical connector straight on to the base of the new bulb. You should hear or feel the power plug "click" securely into place. |
||
 Replace Plastic Liner |
 Spin In Bottom Screw |
 Tighten Screw Clockwise |
| Push the wheel well
liner back into place. Spin in the lower silver metal screw back into place. Tighten the screw in the clockwise direction with the 10mm socket and a 1/4" drive ratchet until it is snug. |
||
 Push In Plastic Pin |
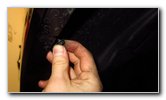 Replace Upper Screw |
 Fasteners Replaced |
| Push the plastic
pin back into place. Replace the upper screw just in front and above the tire by turning it in the clockwise direction until it snug. |
||
 Wheel Well Liner Secured |
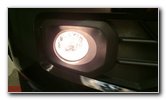 Test New Fog Light Bulb |
 Light Bulb Change Done! |
| Double check that
the wheel well liner fasteners are securely in place. To test the new light bulbs, turn on the headlights and then activate the fog light switch. Be sure to write down the bulb change in your vehicle's service records. Please
check out all of the
2016-2021 Toyota Tacoma DIY Repair & Maintenance Guides. |
||
| If you found this guide to be helpful,
please consider making a small donation by clicking on the PayPal.com
"Donate" button located to the right of this paragraph. Thank you!
(Note: I am not a registered charity. Donations are not tax deductible.) |