
Chevrolet
Camaro Rear Side Marker Light Bulb Replacement Guide
How to change a burnt out rear side
marker light bulb in a sixth generation 2016 to 2021 GM Chevy Camaro.

By Paul B. Michaels Author & Photographer Auto Mechanic Since 1989 |
||
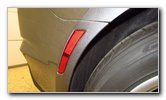 2020 Rear Side Marker |
 Wheel Well Liner |
 Torx Star Bit Screws |
| This automotive
maintenance tutorial was specifically written to assist owners of the sixth
generation (2016, 2017, 2018, 2019, 2020 and 2021) GM Chevrolet Camaro in
changing a burnt out rear side marker light bulb in the back bumper cover or upgrading it to a
brighter LED unit. The development and release of the 7th generation Camaro has been delayed, so the current sixth generation will probably continue into the 2022 and 2023 model years. Owners of other General Motors vehicles from Chevrolet, Buick, GMC and Cadillac such as the Malibu, Impala, Bolt, Corvette, Trailblazer, Trax, Equinox, Blazer, Traverse, Tahoe, Suburban, Colorado, Silverado, Express, Encore, Envision, Enclave, Regal, Sierra, Terrain, Acadia, Yukon, Canyon, Savana, XT4, XT5, XT6, Escalade, CT4, CT5, CTS and CT6 may also find these DIY instructions to be helpful. The compatible replacement miniature wedge base light bulb part number is 194 which are available from various manufacturers such as Sylvania, GE, Bosch, Eiko and Philips. If you would like to have brighter rear side marker lights, install some 194 LED bulbs. The tools needed to access and replace the bulbs include a Torx T15 star bit socket with a 1/4" drive ratchet and a plastic pry bar tool or a flat head screwdriver. The first two steps are to move to the side of the car with the burnt out light bulb and then locate the wheel well fasteners. |
||
|
|
||
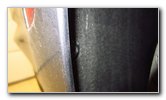
 Upper Screw |
 Torx Socket |
 Loosen Counterclockwise |
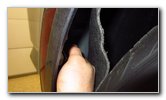
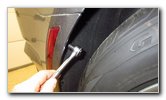
| There are two small
Torx fasteners on the outer edge of the wheel well liner. One fastener is near the top of the rear side marker housing and the other is near the bottom of the light housing. Loosen the two screws by turning them in the counterclockwise direction with the Torx T15 star bit socket and a 1/4" drive ratchet. (If you only have a set of Torx screwdrivers, you'll have to remove the wheel for better access.) |
||
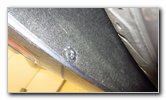
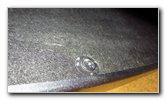
 First Screw Removed |
 Remove Second Screw |
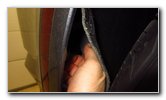
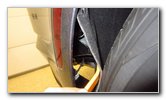 Pull Back Liner |
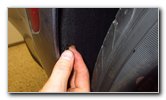
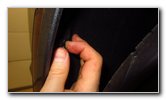
| Set the two screws
aside in a safe place. Gently pull back the wheel well liner with the plastic pry bar tool or carefully use a flat head screwdriver. |
||
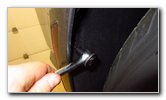
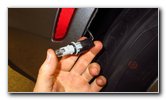
 1/4 Turn Counterclockwise |
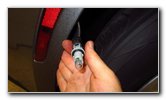 Bulb Socket Removed |
 Pull Out Old Light Bulb |
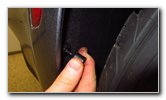
| Reach in and turn
the bulb socket 1/4 turn in the counterclockwise direction before pulling it
straight out of the housing. Carefully pull the old light bulb straight out of the socket. If you have trouble removing the old bulb due to corrosion (rust) or debris in the socket, put on some glove and try gently wiggling the bulb back and forth before pulling it straight out. |
||
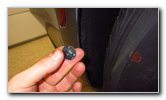
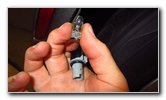
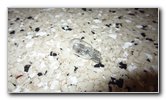 Old Light Bulb Removed |
 Push In New Light Bulb |
 1/4 Turn Clockwise - Lock |
| Push a new number
194 miniature wedge base light
bulb straight into the socket. If you would like to have brighter rear side marker lights that will also last much longer before burning out like the traditional incandescent bulbs, install some compatible replacement 194 LED bulbs. Re-insert the bulb socket into the housing and rotate it 1/4 turn in the clockwise direction to secure it into place. |
||
 Replace Liner |
 Spin In Screws |
 Tighten Lower Screw |
| Push the wheel well
liner back into place. Spin in the two screws a turn or two by hand in the clockwise direction. |
||
 Tighten Clockwise |
 Replace Upper Screw |
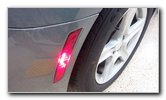 Test New Light Bulb |
| Tighten the two
screws in the clockwise direction with the Torx T-15 star bit socket and a
1/4" drive ratchet until they are snug. To test the new light bulbs, turn on the parking lights or headlights, or you can press the "Unlock" button on the key fob to re-activate the exterior lights. Tip - If you installed an LED bulb and it doesn't work, try removing it from the socket, rotate it 180 degrees and push it back into the socket. Some LED bulbs are "polarized" and will only work when the "+" positive and "-" negative electrical contacts are in the correct orientation. Be sure to record the bulb change in your vehicle's service records. Please
check out all of the
2016-2021 GM Chevrolet Camaro DIY Repair & Maintenance Guides. |
||
| If you found this guide to be helpful,
please consider making a small donation by clicking on the PayPal.com
"Donate" button located to the right of this paragraph. Thank you!
(Note: I am not a registered charity. Donations are not tax deductible.) |