
Chevrolet
Camaro 12V Automotive Battery Replacement Guide
How to change a weak or dead 12 volt car
battery in a 6th generation 2016 to 2021 GM Chevy Camaro.

By Paul B. Michaels Author & Photographer Auto Mechanic Since 1989 |
||
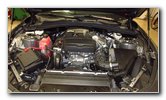 2020 Camaro LTG 2.0L |
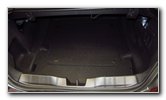
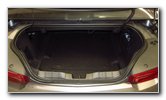 Open Trunk Lid |
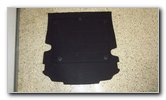 Remove Cargo Area Mat |
| This automotive
maintenance tutorial was specifically written to assist owners of the sixth
generation (2016, 2017, 2018, 2019, 2020 and 2021) GM Chevrolet Camaro
equipped with the Ecotec LTG 2.0 liter turbocharged inline four cylinder
engine in changing a weak or dead 12 volt car battery located in the trunk.
(The steps should be the same or similar for the LGX 3.6L V6, LT1 6.2L V8
and 6.2L LT4 supercharged V8 engines.) The development and release of the 7th generation Camaro has been delayed, so the current sixth generation will probably continue into the 2022 and 2023 model years. Owners of other General Motors vehicles from Chevrolet, Buick, GMC and Cadillac such as the Malibu, Impala, Bolt, Corvette, Trailblazer, Trax, Equinox, Blazer, Traverse, Tahoe, Suburban, Colorado, Silverado, Express, Encore, Envision, Enclave, Regal, Sierra, Terrain, Acadia, Yukon, Canyon, Savana, XT4, XT5, XT6, Escalade, CT4, CT5, CTS and CT6 may also find these DIY instructions to be helpful. The OEM (original equipment manufacturer) 12V battery's "Group Size" is 48 AGM (absorbed glass mat). The genuine General Motors 12 volt battery part number is ACDelco 48AGM. The tools and other items needed to complete this procedure include a pop rivet removal tool, a 14mm socket, a 13mm socket, a 3/8" drive ratchet and a 10mm socket with a 1/4" drive ratchet. The first two steps are to open the trunk lid and remove the cargo area mat. Set the trunk mat aside in a safe place. |
||
|
|
||
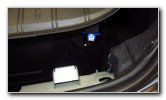
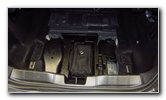 Flat Tire Kit |
 Small Access Cover |
 Access Cover Removed |
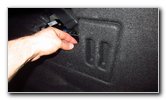
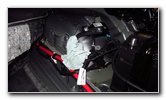
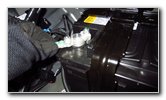
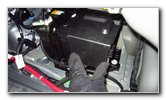
| Once the trunk mat
is out of the way, you'll be able to see the flat tire kit which contains a
compressor and tire sealant. Pull the small fabric access cover off the right (passenger) side of the trunk liner. Set the cover aside in a safe place. |
||
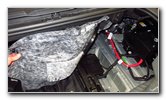
 OEM 12V Battery |
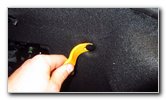
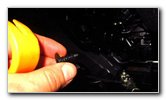
 Pry Out Pop Rivet |
 Pop Rivet Removed |
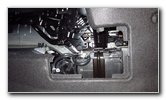
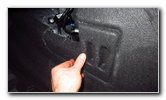
| If you are in a
hurry and don't mind working in a tight space, you could probably remove and
replace the old 12V battery with out detaching any other carpeted liners or
trim panels. Please remember to avoid touching both the "-" negative and "+" positive battery posts at the same time to prevent from being electrocuted! I chose to remove the entire right side of the trunk liner and the rear plastic panel for easier access to the battery. Pry out the black plastic pop rivets with the pop rivet removal tool. |
||
 Remove Other Pop Rivets |
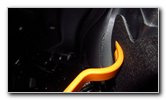 |
 Christmas Tree Fastener |
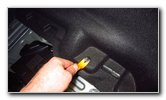
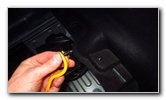
| Continue removing
all of the other pop rivets on the right side of the trunk. Set the "Christmas tree" style friction fasteners aside in a safe place. |
||
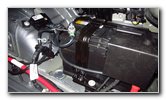 |
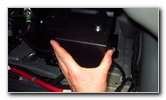
 Rear Edge Plastic Panel |
 Loosen Counterclockwise |
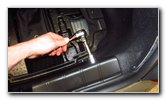
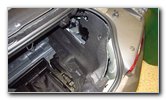
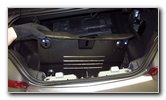
| In order to fully
remove the right side of the trunk liner, you'll have to take off the black
plastic panel on the rear wall of the trunk. Loosen the four large black plastic nuts by turning them in the counterclockwise direction with a 14mm socket and a 3/8" drive ratchet. |
||
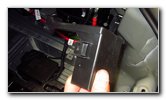
 Plastic & Metal Nut |
 Four Nuts Removed |
 Pull Panel UP & Off |
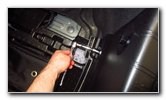
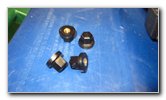
| Set the four nuts
aside in a safe place. The rear plastic trim panel is still held in place by two metal and plastic friction fasteners. Pull straight up on the panel to release two retaining clips. |
||
 Metal Retaining Clips |
 Peel Back Liner |
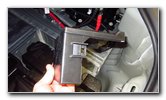
 Pinch In Two Tabs |
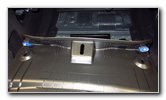
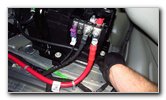
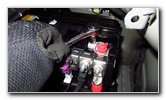
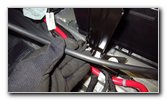
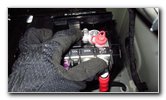
| Set the rear trim
panel aside in a safe place. Now that the rear plastic panel has been removed, you can pull the carpeted trunk liner away from the right side of the cargo area. To remove the black plastic cover on the "+" positive terminal, squeeze together the two release tabs on the left and right side of the cover. |
||
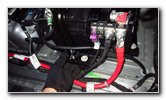
 Left Side Release Tab |
 Plastic Cover Removed |
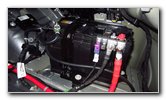 Positive Terminal Exposed |
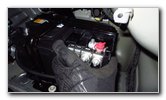
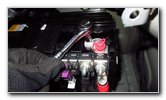
| Slide the black
plastic cover away from the battery. Set the cover aside in a safe place. |
||
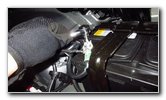
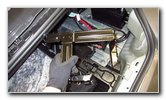
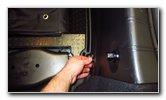
 Loosen Left Bracket Bolt |
 Loosen Rear Bracket Bolt |
 Bracket Bolts Released |
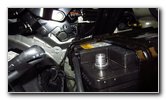
| Locate the two
silver metal bolts on the bottom of the black metal battery hold down
bracket. Loosen the bolts by turning them in the counterclockwise direction with a 13mm socket and a 3/8" drive ratchet. |
||
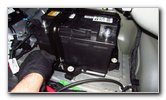
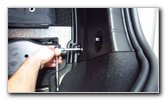
 Left Bolt Released |
 Loosen Negative Terminal |
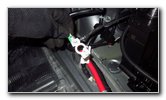 Pull Off Negative Terminal |
| The battery hold
down clamp can not be lifted off the old battery until the two terminals are
disconnected. Loosen the "-" negative battery terminal by turning the nut in the counterclockwise direction with the 10mm socket and a 1/4" drive ratchet. |
||
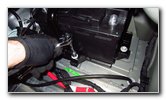
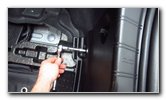
 Wrap Terminal In Towel |
 Loosen Positive Terminal |
 Pull Terminal Off Post |
| Pull the negative
terminal off the "-" battery post. Wrap the terminal in a small towel and tuck it away to help prevent accidental electrical contact. Loosen the "+" positive terminal by rotating the nut a few turns in the counterclockwise direction with the 10mm socket and a 1/4" drive ratchet. |
||
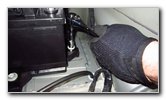
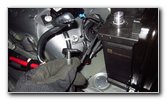
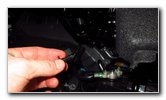
 Positive Terminal Removed |
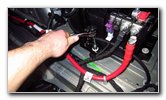
 Rubber Vent Hose |
 Disconnect Vent Tube |
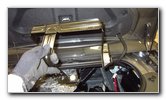
| Pull the positive
terminal off the "+" battery post. Locate the black rubber and plastic vent hose at the left edge of the battery (closest to the front of the car). Pull the plastic gas exhaust vent tube out of the port in the battery. |
||
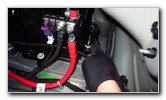
 Pull Hose Off Bracket |
 Lift Off Metal Bracket |
 Hold Down Bar Removed |
| Pull the rubber
vent hose out of the "C" shaped socket on the battery hold down bracket. Carefully lift the black metal hold down bracket off the top of the old battery. Please remember to avoid touching both the "-" negative and "+" positive battery posts at the same time to prevent from being electrocuted! Set the bracket aside in a safe place. |
||
 Raise Plastic Handles |
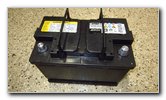 Remove Old Battery |
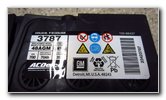 OEM Part # 3787 |
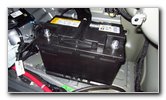
| Swing up the two
plastic handles on the top of the old battery. Carefully lift the old battery out of the trunk. Gently rest the old battery on the ground. Try to avoid dropping or tipping over the old battery to prevent from having acid leak out. I highly recommend purchasing the original General Motors OEM battery which is part number ACDelco 48AGM. |
||
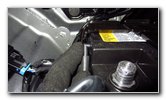
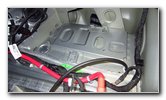 12 Volt Car Battery Tray |
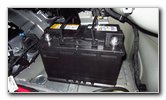 Lower In New Battery |
 Line Up Hold Down Bar |
| Clean off any
debris on the tray so that the new battery will rest evenly on it. Orientate the new battery with the negative post closer to the front of the car and the positive post situated closer to the rear of the vehicle. Carefully lower the new battery into the trunk and slide it into place on the tray. |
||
 Lower Bracket In Place |
 Tighten Bolt Clockwise |
 Tighten Rear Bolt |
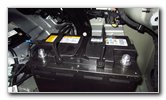
| Carefully lower the
hold down bracket into place over the new battery. Avoid making contact with the battery posts. Tighten the two bolts on the hold down clamp in the clockwise direction with the 13mm socket and a 3/8" drive ratchet until they are snug. Check to see if the new battery can be moved, slid or rocked on the tray. If it can be moved, tighten the two bolts an extra turn or two. If you've had a problem with corrosion (blue, white or green powder) building up on the battery terminals or posts, consider installing some felt anti-corrosion washers over the battery posts. They are cheap insurance against having to replace corroded terminals or cables. |
||
 Push On Positive Terminal |
 Tighten Nut Clockwise |
 Plastic Vent Tube |
| First, push the "+"
terminal over the positive battery post. Tighten the positive terminal nut in the clockwise direction with the 10mm socket and a 1/4" drive ratchet until it is snug. Try to avoid over tightening the terminal nut to prevent from cracking the battery post which could lead to an acid leak. |
||
 Re-Attach Vent Hose |
 Push On Negative Terminal |
 Tighten Nut Clockwise |
| Push the plastic 90
degree elbow connector for the vent hose back into the opening on the side
of the new battery. Push the rubber hose into the "C" shaped socket on the hold down bracket. Push the negative terminal on to the "-" battery post. Tighten the negative terminal nut in the clockwise direction until it is snug. Double check that both terminals are securely in place. |
||
 Slide On Positive Cover |
 Replace Trunk Liner |
 Line Up Friction Fasteners |
| Slide the black
plastic cover back into place over the positive terminal and the power
distribution board. Push the carpeted trunk liner back into place over the right side of the cargo area. Line up the two retaining clips on the black plastic rear trim panel. Push the panel down into place on the rear of the trunk. You should feel or hear the two metal retaining clips "click" securely into place. |
||
 Spin On Four Nuts |
 |
 Tighten Nuts Clockwise |
| Spin on the four
black plastic nuts a few turns by hand to prevent them from becoming cross
threaded. Tighten the four nuts on the rear plastic trim panel by turning them in the clockwise direction with the 14mm socket and a 3/8" drive ratchet. |
||
 |
 Push In Pop Rivets |
 |
| Push in the black plastic pop rivet friction fasteners to secure the trunk liner in place. | ||
 Pop Rivets Secured |
 Replace Small Cover |
 Replace Trunk Mat |
| Replace the small
fabric access cover on the right side of the trunk. Lower the trunk mat back into the cargo area. To test the new 12V battery, start the engine and turn on the headlights. Please remember to adjust the time on the clock and re-program your favorite radio stations before you start driving. Be sure to write down the battery change in your car's service records. Please
check out all of the
2016-2021 GM Chevrolet Camaro DIY Repair & Maintenance Guides. |
||
| If you found this guide to be helpful,
please consider making a small donation by clicking on the PayPal.com
"Donate" button located to the right of this paragraph. Thank you!
(Note: I am not a registered charity. Donations are not tax deductible.) |