
Chevrolet
Cruze Reverse & Parking Light Bulbs Replacement Guide
How to change a burnt out reverse or rear
parking light bulb in a 2nd generation 2016 to 2019 GM Chevy Cruze sedan.

By Paul B. Michaels Author & Photographer Auto Mechanic Since 1989 |
||
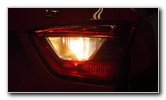
 2018 Cruze Reverse |
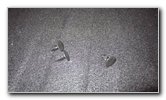
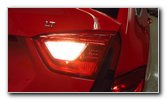 Old Reverse Light Bulb |
 Open Trunk Lid |
| This automotive
maintenance tutorial was specifically written to assist owners of the second
generation 2016, 2017, 2018 and 2019 GM Chevrolet Cruze in changing a burnt
out reverse (or "back-up") and rear parking light bulb in the tail light
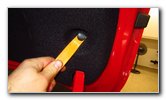
housing attached to the trunk lid. Owners of other General Motors vehicles from Chevrolet, Buick, GMC, Cadillac and Holden such as the Sonic, Spark, Malibu, Impala, Volt, Bolt, Camaro, Corvette, Trax, Equinox, Blazer, Suburban, Tahoe, Traverse, Colorado, Silverado, Express, TrailBlazer, Encore, Regal TourX, Envision, Enclave, LaCrosse, Cascada, Sierra, Canyon, Acadia, Terrain, Yukon, Savana, XT4, XT5, XT6, Escalade, CT5, CTS-V, XTS, CT6, ATS, Astra and Commodore may also find these DIY instructions to be helpful. The compatible replacement light bulb part numbers are as follows: Reverse # 921 and Rear Parking Light # 194. If you would like to have brighter lights, install some 921 LED and 194 LED bulbs. The tools needed to access and replace the light bulbs include a pop rivet removal tool. You may also be able to use a flat head screwdriver or a pair of needle nose pliers to remove the pop rivets. The first two steps are to open the trunk lid and then move to the side of the car with the burnt out light bulb. (If you need to replace the brake or rear turn signal, check out my Chevrolet Cruze Brake & Rear Turn Signal Light Bulbs Replacement Guide.) |
||
|
|
||
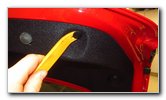 Pry Out Pop Rivet |
 Release Fabric Liner |
 Remove 2nd Pop Rivet |
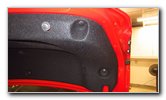
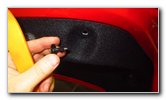
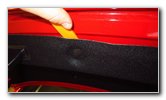
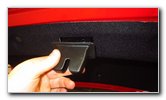
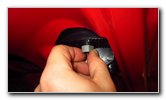
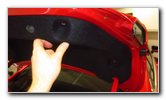
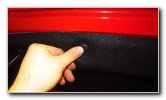
| In order to access
the bulb sockets on the rear of the tail light housing, you'll have to
remove a few fasteners on the gray carpeted trunk lid interior liner. Use a pop rivet removal tool to pry out the pop rivets located around the tail light housing. |
||
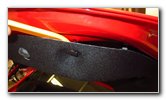
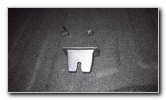
 Friction Fastener Removed |
 Remove 3rd Pop Rivet |
 3rd Fastener Removed |
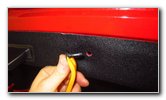
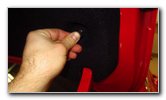
| At a bare minimum, you'll have to remove at least three pop rivets. | ||
 Three Pop Rivets |
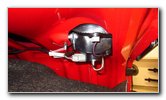
 Trunk Lid Latch Cover |
 Plastic Cover Removed |
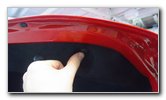
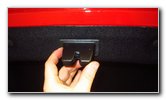
| Then slide the
black plastic cover off the trunk lid latch. Set the latch cover aside in a safe place such as in the cargo area by the pop rivets. |
||
 Pull Back Carpet Liner |
 1/4 Turn Counterclockwise |
 Pull Out Old Light Bulb |
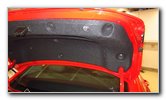
| Gently pull back
the carpet liner to access the two bulb sockets on the back side of the
light housing. The smaller socket contains the "Parking Light" and the larger socket contains the "Reverse" or "Back-Up" light bulb. |
||
 Push In New Light Bulb |
 Reverse - 1/4 Turn CC |
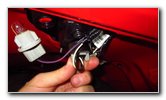
 Reverse Bulb Socket |
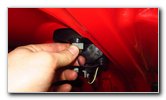
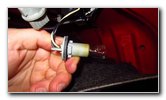
| Rotate the smaller
bulb socket 1/4 turn in the counterclockwise direction before pulling it
straight out of the housing. Pull the old parking light bulb straight out of the socket. If you trouble removing an old stuck or stubborn light bulb due to rust or debris, try gently wiggling the bulb back and forth before pulling it straight out. Push a new number 194 bulb straight into the socket. If you would like to have brighter parking lights, install some compatible replacement 194 LED bulbs. I found it easiest to remove the larger reverse bulb socket by leaving the smaller parking light bulb socket out of the housing. |
||
|
|
||
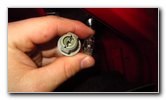
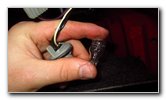 Pull Out Old Light Bulb |
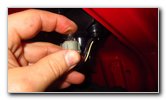
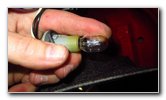 Push In New Light Bulb |
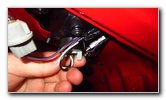
 Re-Insert Bulb Socket |
| Rotate the larger
socket 1/4 turn in the counterclockwise direction before pulling it straight
out of the housing. Pull the old reverse light bulb straight out of the socket. If you have trouble removing the old bulb due to rust or debris, I highly recommend wearing some leather gloves before attempting to pull it out again. Try to avoid using excessive pressure on the bulb to prevent from having it break and cut your fingers. Push a new number 921 light bulb straight into the socket. If you would like to have brighter reverse lights that will also last a lot longer before burning out, install some compatible replacement 921 LED bulbs. |
||
 1/4 Turn Clockwise - Lock |
 Replace Trunk Lid Liner |
 Push In Pop Rivets |
| Re-insert the
reverse light bulb socket into the housing and rotate it 1/4 turn in the
clockwise direction to secure it into place. Push the fabric trunk lid interior liner back into place. |
||
 Secure 2nd Pop Rivet |
 Replace 3rd Fastener |
 Slide On Latch Cover |
| Push the three pop
rivets back into place. Slide the black plastic trunk lid latch cover back into place. |
||
 Carpet Liner Secured |
 Test New Parking Light |
 Test New Reverse Bulb |
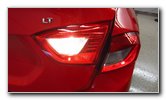
| To test the new
tail light bulbs, have an assistant step on the brake pedal, turn on the
headlights to activate the parking lights and shift the transmission into
reverse. Be sure to write down the bulb change in your vehicle's service records. For more,
please check out all of my
2016-2019 GM Chevrolet Cruze DIY Repair & Maintenance Guides. |
||
| If you found this guide to be helpful,
please consider making a small donation by clicking on the PayPal.com
"Donate" button located to the right of this paragraph. Thank you!
(Note: I am not a registered charity. Donations are not tax deductible.) |