
Chevrolet
Cruze Cabin Air Filter Replacement Guide
How to clean or change the A/C system's
cabin air filter element in a 2nd generation 2016 to 2019 GM Chevy Cruze.

By Paul B. Michaels Author & Photographer Auto Mechanic Since 1989 |
||
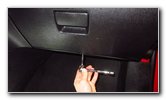
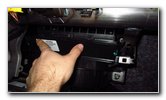
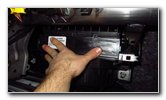
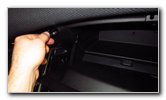
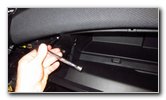
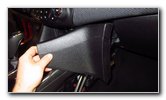
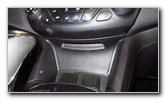
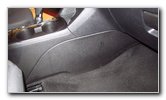
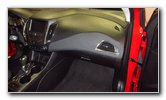 2018 Cruze Glove Box |
 Open Glove Box - Empty |
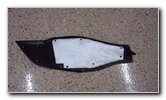
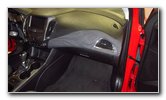
 Plastic Side Trim Cover |
| This automotive
maintenance tutorial was specifically written to assist owners of the second
generation 2016, 2017, 2018 and 2019 GM Chevrolet Cruze in cleaning or
changing the air conditioning system's cabin air filter element located in
the HVAC blower motor housing. Owners of other General Motors vehicles from Chevrolet, Buick, GMC, Cadillac and Holden such as the Sonic, Spark, Malibu, Impala, Volt, Bolt, Camaro, Corvette, Trax, Equinox, Blazer, Suburban, Tahoe, Traverse, Colorado, Silverado, Express, TrailBlazer, Encore, Regal TourX, Envision, Enclave, LaCrosse, Cascada, Sierra, Canyon, Acadia, Terrain, Yukon, Savana, XT4, XT5, XT6, Escalade, CT5, CTS-V, XTS, CT6, ATS, Astra and Commodore may also find these DIY instructions to be helpful. A few compatible replacement cabin air filters with their part numbers include the following: Spearhead BE-966, ACDelco CF185, Fram CF11966, K&N VF2040, EcoGard XC10022C and Wix 24211. The tools needed to access and replace the cabin air filter include the following: a plastic pry bar tool, a 7mm socket with a short extension bar, a 1/4" drive ratchet and a flat head screwdriver. The first few steps are to sit in the front passenger seat, open the glove box and empty out the contents. |
||
|
|
||
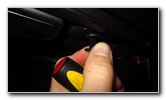
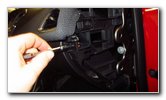
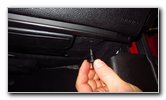
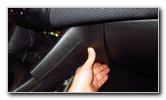
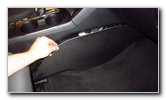
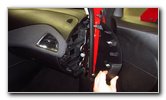
 Pull To Loosen Clips |
 Release Friction Fasteners |
 Side Trim Panel Removed |
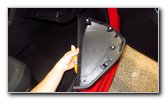
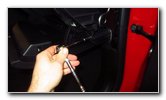
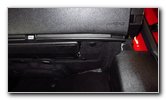
| Then move to the
rounded trim panel that covers the outer edge of the dashboard near the
front passenger door hinges. Carefully pull the trim cover off the side of the dashboard. You may need to use a plastic pry bar tool to gently loosen the plastic friction fastener retaining clips. Set the trim cover aside in a safe place. |
||
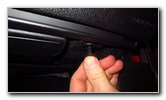
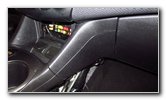
 Two Screws Exposed |
 Left Side Black Screws |
 Loosen Counterclockwise |
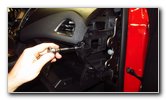
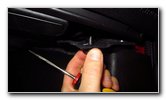
| Once the trim panel
on the outside edge of the dashboard has been removed, you'll be able to see
the two black metal screws on the right side of the glove box. There are another two black metal screws on the left side of the glove box. Remove the two screws on the right side of the glove box by turning them in the counterclockwise direction with a 7mm socket and a 1/4" drive ratchet. I found it easier to attach a short extension bar to the socket for extra reach. |
||
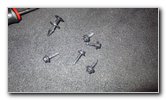
 Loosen Bottom Screw |
 Remove Left Side Screws |
 Lower Left Screw |
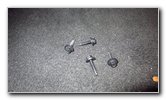
| Then loosen the two
screws on the left side of the glove box by turning them in the
counterclockwise direction with the 7mm socket and a 1/4" drive ratchet. Set the four screws aside in a safe place such as down on the front passenger floor mat. |
||
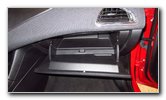
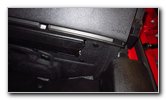
 Four Screws Removed |
 Look Under Glove Box |
 Release Plastic Pop Rivet |
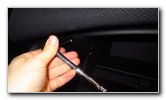
| Next, look under
the glove box and locate the black plastic pop rivet fastener near the right
side of the glove box. Pry out the smaller round pin in the center of the fastener to unlock it. Then pull out the entire pop rivet fastener from the fabric liner to detach it from the underside of the glove box. |
||
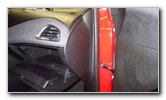
 Pull Out Pop Rivet |
 Fabric Liner Released |
 Bottom Screw Exposed |
| Once the fabric cover under the glove box has been pulled down, you'll be able to see the final black metal screw holding the glove box in place. | ||
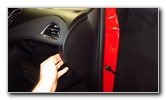
 Loosen Counterclockwise |
 Five Screws Removed |
 Left Side Kick Panel |
| Remove the screw
under the glove box by turning it in the counterclockwise direction with the
7mm socket and a 1/4" drive ratchet. Set the screw aside with the other screws. At this point, you should have removed a total of five screws. Then move to the black plastic kick panel on the left side of the front passenger floor mat. |
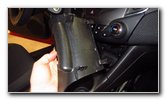
||
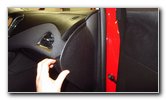
 Gently Pull Off Panel |
 Plastic Clips Released |
 Kick Panel Removed |
| Gently pull the
kick panel straight off the bottom of the center stack to release the
plastic retaining clips. Set the kick panel aside in a safe place. |
||
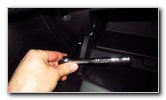
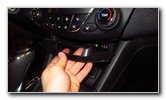
 Pull Fuse Access Cover |
 Fuse Cover Removed |
 Pull Center Console Cover |
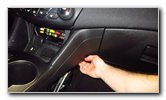
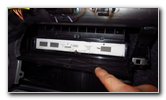
| Then move to the
interior fuse panel access cover located below the A/C system controls on
the dashboard. Place your fingers into the opening in the access cover and firmly pull it straight out. Set the fuse access cover aside in a safe place. Next, pull out the bottom edge of the center console cover located to the right of the interior fuse panel. |
||
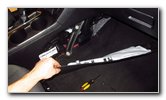
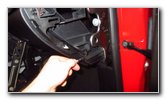
 Rest Panel On Shift Knob |
 Gently Pull Out Glove Box |
 Pulling Out Right Side |
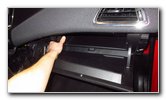
| Rotate the center
console cover towards the shift knob and rest it on the cup holders. Now you can begin pulling the glove box out of the dashboard. |
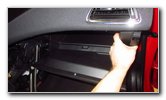
||
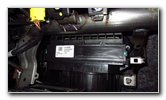
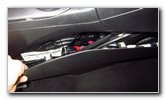
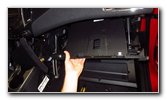 Glove Box Clips Released |
 Glove Box Removed |
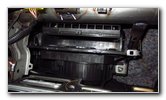
 HVAC Blower Motor |
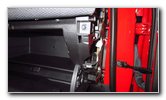
| Carefully pull the
left and right side of the glove box straight out of the dashboard to
release the plastic retaining clips. Gently set the glove box down on the floor mat. Finally, after all of those steps we can see the HVAC blower motor housing and the A/C cabin air filter access cover. |
||
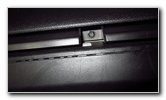
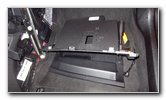
 Filter Access Cover |
 Pull Out Release Tab |
 Right Retaining Clip |
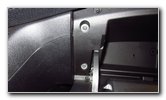
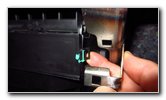
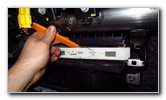
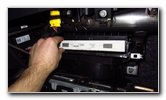
| There are two
retaining clips on the rectangular shaped filter access cover.
One is located on the left side and the other on the right side. Gently pull the tabs away from the center of the filter cover to release the retaining clips. |
||
|
|
||
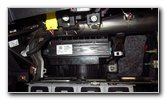
 Swing Down Filter Cover |
 Slide Out Old Filter |
 Remove Filter From Slot |
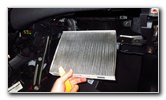
| Swing down the
filter access cover. Slide the old filter straight out of the slot. You may need to use a plastic pry bar tool or a flat head screwdriver to pull the filter out of the slot. |
||
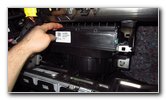
 Old Filter Removed |
 Clean With Vacuum |
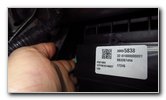
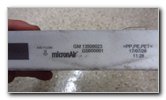 OEM Part Number |
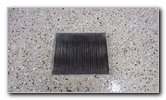
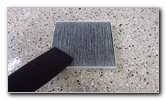
| Inspect both sides
of the old filter. If the old filter is dark grey or black and clogged with dirt, dust, hair, insects, leaves, twigs, soot, pollen, sand and other debris, it should be replaced with a new element. I recommend buying the Spearhead BE-966 cabin air filter since it has excellent reviews on Amazon. If the old filter is relatively clean, just tap out the large debris and remove any fine dust with a wet/dry shop vacuum cleaner. The OEM (original equipment manufacturer) filter part number in this 2018 Chevy Cruze LT was MicronAir GM 13508023 GS600001 (ACDelco # CF185). |
||
 Empty AC Filter Slot |
 "Air Flow" Arrow Down |
 Install New Air Filter |
| Check the filter
slot in the HVAC blower motor housing for any large debris such as leaves,
insects or rodent nests. Clean out any debris with the crevice attachment of a wet/dry shop vacuum. Orientate the new air filter with the "Air Flow" arrow pointing in the down direction towards the floor mat. Slide the new filter straight into the slot. Make sure the new filter is fully seated in the HVAC blower motor housing. |
||
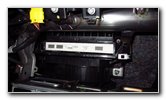
 Swing Up Filter Door |
 Push To Secure Clips |
 Filter Cover Secured |
| Swing the filter
access door up and push on to secure the two retaining clips. You should feel or hear the two retaining clips "click" securely into place. Double check that the filter access cover is secured. |
||
 Raise Glove Box |
 Line Up Retaining Clips |
 Pop In Glove Box |
| Lift the glove box
and line it up with the opening in the dashboard. Line up the plastic retaining clips with their corresponding slots. Carefully push the glove box back into place. You should feel the retaining clips "click" securely into place. |
||
 Spin In Right Side Screws |
 Replace Lower Screw |
 Screw Under Glove Box |
| Replace the two
screws on the right side of the glove box by turning them in the clockwise
direction with a 7mm socket and the 1/4" drive ratchet until they are snug. Replace the single 7mm screw on the underside of the glove box. |
||
 Replace Left Side Screws |
 Tighten Clockwise |
 Replace Fabric Cover |
| Replace the two 7mm
screws on the left side of the glove box. Lift the fabric trim cover back into place on the underside of the glove box. Re-insert the black plastic pop rivet and secure it by pushing in the smaller round button in the center. |
||
 Push In Plastic Pop Rivet |
 Glove Box Replaced |
 Replace Console Cover |
| Swing the center console trim piece back into place on the left side of the glove box. | ||
 Pop Panel In Place |
 Center Console Assembled |
 Replace Fuse Cover |
| Push on the panel
to secure it to the right side of the center stack. Move the fuse access cover back into place below the A/C controls and in front of the gear selector (shift knob). |
||
 Fuse Access Cover |
 Line Up Left Kick Panel |
 Plastic Friction Fasteners |
| Line up the kick
panel on the left side of the front passenger footwell.
Push the kick panel back in to place. |
||
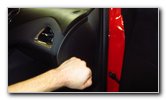
 Firmly Tap In Fasteners |
 Kick Panel Replaced |
 Dashboard Side Cover |
| Firmly tap on the
kick panel to make sure the plastic friction fasteners are secured. Line up the trim cover on the outer right side of the dashboard. |
||
 Line Up Retaining Clips |
 Firmly Tap In Trim Cover |
 Cabin Filter Replaced! |
| Tap on the panel to
secure the retaining clips. Be sure to write down the cabin air filter change in your vehicle's service records. Enjoy the fresh clean air from your A/C system! For more,
please check out all of my
2016-2019 GM Chevrolet Cruze DIY Repair & Maintenance Guides. |
||
| If you found this guide to be helpful,
please consider making a small donation by clicking on the PayPal.com
"Donate" button located to the right of this paragraph. Thank you!
(Note: I am not a registered charity. Donations are not tax deductible.) |