
Toyota RAV4
Interior Door Panel Removal Guide
How to take off the plastic interior door
panels in a 4th generation 2013-2016 Toyota RAV4 to upgrade the OEM speaker.

By Paul B. Michaels Author & Photographer Auto Mechanic Since 1989 |
||
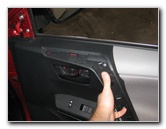
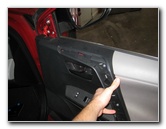
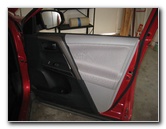
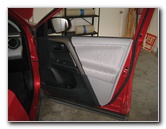 2013 RAV4 Door Panel |
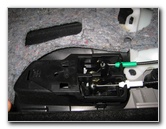
 Gently Pry Out Trim Piece |
 Trim Panel Removed |
| This
automotive maintenance tutorial was specifically written to assist
owners of the fourth generation (2013, 2014, 2015, 2016 and possibly
also the revised 2017 model year) Toyota RAV4 SUV in taking off the
plastic interior door panels in order to upgrade the OEM door
speakers, add soundproofing material, fix a faulty electrical switch
or replace a broken power window motor. Owners of other Toyota, Lexus or Scion vehicles such as the Yaris, Matrix, Prius, Camry, Corolla, Sienna, Tacoma, Tundra, FJ Cruiser, Venza, Highlander, Avalon, Sequoia, Land Cruiser, IS 250, ES 350, GS 350, tC, xB, xD, iQ and FR-S may also find these DIY instructions to be helpful. The tools needed to complete this procedure include a small flathead screwdriver, a large flathead screwdriver or a plastic automotive panel removal tool, a Phillips head screwdriver and possibly also a pair of needle nose pliers. To remove the OEM door speakers from the panel, you'll need an electric drill and some drill bits to drill out the metal rivets. |
||
|
|
||
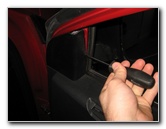
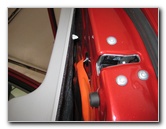
 Gently Pry Off Trim Bar |
 Carefully Release Clips |
 Door Pull Handle Trim Panel |
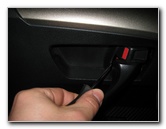
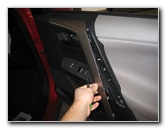
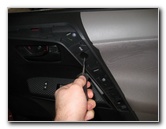
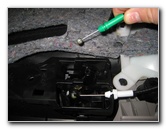
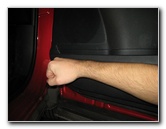
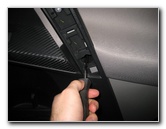
| The first two steps
are to lower the power window all the way down and then open the door. Use a small flathead screwdriver to gently pry out the plastic trim piece behind the door opener handle. Set the trim piece aside in a safe place. Then gently pry off the plastic trim bar located on the outside of the door pull handle. Try to avoid using excessive force, the plastic clips on the back of the trim panel should pop off relatively easily. |
||
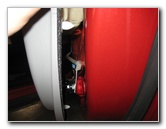
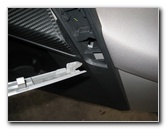
 Loosen Phillips Head Screw |
 Screw Removed |
 Loosen Counterclockwise |
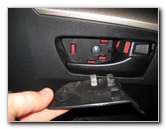
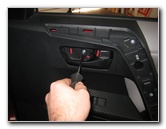
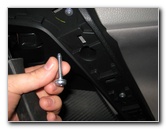
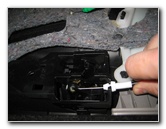
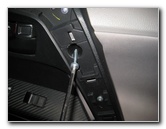
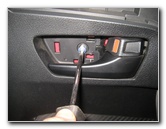
| Remove the screw
behind the door opener handle by turning it counterclockwise with the
Phillips head screwdriver. Set the screw aside with the plastic trim piece that was covering it. Then loosen the upper screw on the door pull handle by turning it counterclockwise with the Phillips head screwdriver. |
||
 Upper Screw Removed |
 Loosen Lower Phillips Screw |
 Pull Out With Pliers |
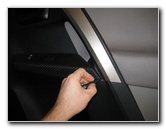
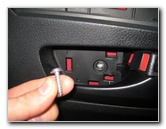
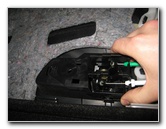
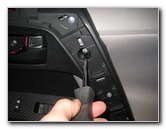
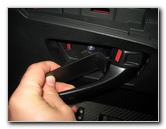
| Remove the lower
Phillips head screw on the door pull handle, located near the armrest, by
turning it counterclockwise. You may need a pair of needle nose pliers to pull out the lower screw. |
||
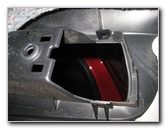
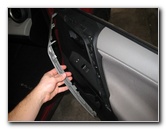
 Pry Off Sail Panel |
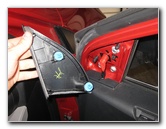 Sail Panel Removed |
 3 Screws & 3 Panels |
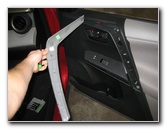
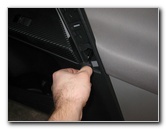
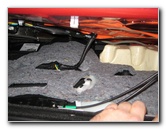
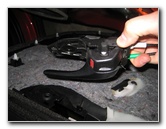
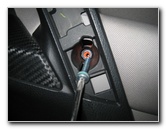
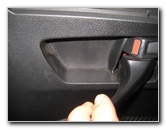
| Move to the inner
top edge of the door panel and gently pry off the sail panel with a flathead
screwdriver or a plastic automotive panel pry bar tool. On some RAV4 models, the sail panel may contain a tweeter speaker that needs to be disconnected. At this point, you should have removed 3 plastic panels and 3 Phillips head screws. |
||
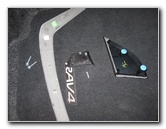
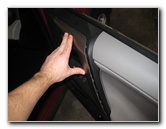
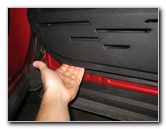 Pull Out Bottom Edge |
 Plastic Pop Rivets Removed |
 Pull Panel Off Metal Frame |
| Move to the bottom
edge of the door panel and firmly pull it out to disengage the pop rivets. You might need to use a large flathead screwdriver or a panel removal pry bar tool. Continue pulling out the pop rivet friction fasteners all along the bottom edge and both sides of the door panel. Lift the plastic door panel up and off the metal door frame. |
||
 Tilt Top Edge Towards You |
 Two Cables |
 Door Opener Handle Cable |
| Tilt the top edge
of the panel towards yourself and support the bottom with your legs. There are two methods for disconnecting the door lock switch cable and door opener handle cable. |
||
 Lift Ball Out of Socket |
 Door Lock Switch Cable |
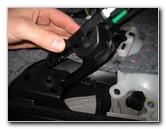
 Or - Pull Off Entire Mount |
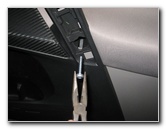
| One method is to
pop the plastic collars out of the bracket and then lift the metal ball at
the end of the cable out of its socket. The other method is to just lift the entire door opener handle and door lock switch assembly off the back of the door panel. |
||
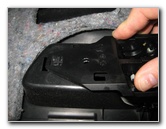
 Released From Bracket |
 Door Handle & Lock Mount |
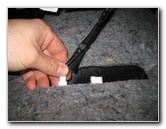
 Press In Release Tab |
| Press in the release tabs on the white plastic power connectors before sliding them straight out of their sockets. | ||
|
|
||
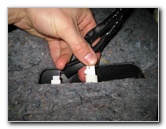
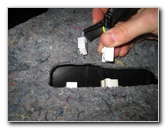 Power Plugs Disconnected |
 Plastic Door Panel Removed |
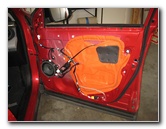 Metal Door Frame |
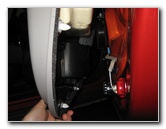
| Once the power
plugs on the bottom of the switch panel have been disconnected, you can set
the plastic door panel aside in a safe place. The OEM speaker is located at the bottom inner corner of the door frame. |
||
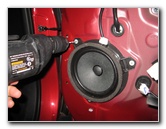 Drill Out Metal Rivets |
 Hold Panel Near Frame |
 Push In Power Plugs |
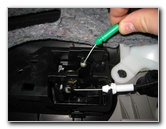
| To remove the OEM
door speaker, you'll need to carefully drill out the metal rivets that hold
it in place. The OEM door speakers can be replaced with aftermarket speakers in the following sizes: 6 1/2" (6.5") and 6 3/4" (6.75"). I'd recommend purchasing new speakers from Crutchfield since they usually include any necessary electrical connector adaptors, wiring harnesses and/or mounting brackets. To make your new speakers sound better and reduce road noise, consider applying some Dynamat Sound Deadener to the metal door frame. It will help stop unwanted vibrations and rattles when you crank up the volume. To replace the plastic door panel, hold it near the door frame and tilt the top edge towards yourself. |
||
 Electrical Connectors Replaced |
 Re-Insert Door Opener Handle |
 Re-Attach Mount To Bracket |
| Push the two white
plastic power plugs straight in to their sockets on the underside of the
switch panel. Re-insert the door opener handle and push the mount back in to place. |
||
 Cables Re-Installed |
 Lower Door Panel On Frame |
 Line Up Plastic Pop Rivets |
| Lower the door
panel on to the top edge of the metal door frame. Line up the white plastic pop rivets on the back of the door panel with their corresponding holes in the metal door frame. |
||
 Push In Plastic Fasteners |
 Firmly Tap In Pop Rivets |
 Push On Sail Panel |
| Firmly tap in the
pop rivets all along the bottom edge and both sides of the door panel. Line up the sail panel and gently push it back in to place at the top inner corner of the door panel. If your Toyota is equipped with tweeter speakers in the sail panels, make sure you re-insert the power plug. |
||
 Re-Insert Phillips Head Screw |
 Tighten Clockwise |
 Replace Lower Screw |
| Re-insert the two Phillips head screws in to the door pull handle and tighten them in the clockwise direction until they are snug. | ||
 Tighten 2nd Screw |
 Replace Door Handle Screw |
 Pop In Plastic Trim Piece |
| Replace the screw
behind the door opener handle and tighten it in the clockwise direction with
the Phillips head screwdriver. Gently pop in the plastic trim piece behind the door opener handle. |
||
 Screw Cover Replaced |
 Line Up Trim Panel |
 Re-Insert Hook - Bottom End |
| Line up the plastic
trim bar over the door pull handle. First re-insert the small hook at the bottom of the trim bar in to its socket. |
||
 Gently Push In Clips |
 Trim Panel Replaced |
 Door Panel Re-Installed |
| Then gently snap in
the retaining clips all along the plastic trim bar. Sit inside the vehicle, close the door and verify that the door opener handle, door lock rocker switch, power window switch and power door lock switch all still work properly. For more,
check out my other
2013-2016 Toyota RAV4 DIY Repair & Maintenance Guides. |
||
| If you found this guide to be helpful,
please consider making a small donation by clicking on the PayPal.com
"Donate" button located to the right of this paragraph. Thank you!
(Note: I am not a registered charity. Donations are not tax deductible.) |