
2009-2013
Toyota Corolla Fog Light Bulbs Replacement Guide
How to change a burnt out fog light bulb
in a 10th generation 2009-2013 Toyota Corolla with picture illustrated steps.

By Paul B. Michaels Author & Photographer Auto Mechanic Since 1989 |
||
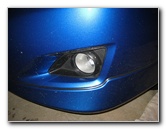 2010 Corolla Fog Light |
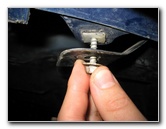
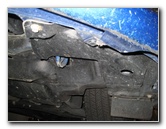 Underbody Splash Guard |
 Remove 10mm Screws |
| This
automotive "how-to" guide was specifically written to assist owners
of the 10th generation (2009, 2010, 2011, 2012, & 2013) Toyota Corolla
in replacing a burnt out fog light bulb in the front bumper. Owners of other Toyota, Lexus or Scion vehicles such as the Yaris, Matrix, Prius, Camry, RAV4, Sienna, Tacoma, Tundra, FJ Cruiser, Venza, Highlander, Avalon, Sequoia, Land Cruiser, IS 250, ES 350, GS 350, tC, xB, xD, iQ and FR-S may also find these DIY instructions to be helpful. A replacement fog light bulb is part # H11 available from manufacturers such as Sylvania, Osram, PIAA, Philips, Putco, GE and Optilux. If you would like to have brighter fog lights, install some compatible replacement H11 LED bulbs. The tools needed to access the bulb include a 10mm socket with ratcheting wrench or a Phillips head screwdriver, and a flat head screwdriver. |
||
|
|
||
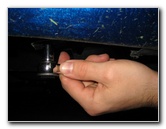
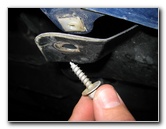 10mm Screw Removed |
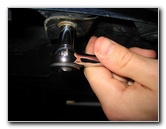
 Fog Light Bulb Housing |
 Press Release Tab |
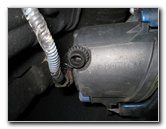
| Look underneath the
front bumper just below the fog light housing and locate the fasteners that
hold the splash guard in place. Loosen the screw with a 10mm socket and ratcheting wrench or a Phillips head screwdriver. My car was missing the other fastener, but you should need to remove a black plastic pop rivet or two. |
||
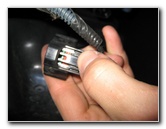
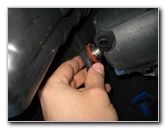
 Slide Off Power Plug |
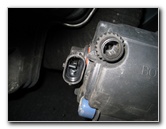
 1/4 Turn Counter Clockwise |
 Pull Out Old Fog Bulb |
|
|
||
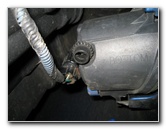
| Pull back the black
plastic underbody panel and locate the black plastic base of the fog light
bulb on the rear of the conical shaped housing. Press the release button on the power connector and slide it straight off the base of the bulb. Rotate the base of the bulb 1/4 turn counter clockwise and pull it straight out of the housing. |
||
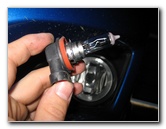
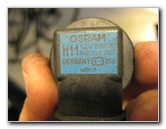 Osram H11 12V 55W |
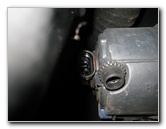
 Insert New H11 Bulb |
 1/4 Turn Clockwise |
| Insert a new #
H11 fog light bulb in to the housing and rotate it 1/4 turn clockwise to secure
it in place. If you would like to have brighter fog lights that will last longer than the halogen bulbs, install some H11 LED bulbs. Try to avoid touching the glass part of the new halogen bulb with your fingers or anything greasy in the engine bay. If you do get the bulb dirty, wipe it clean with an alcohol moistened paper towel. |
||
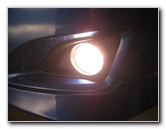 Test New Fog Light Bulb |
 Replace 10mm Screw |
 Tighten Fasteners |
| Test the new fog
light bulb by turning on the headlights and rotate the fog light switch
forward to the "On" position. Replace the underbody splash guard panel and re-insert the fasteners. Be sure to record the bulb change in your vehicle's service records. For more, check out my other Corolla DIY tutorials at the links below - |
||
| If you found this guide to be helpful,
please consider making a small donation by clicking on the PayPal.com
"Donate" button located to the right of this paragraph. Thank you!
(Note: I am not a registered charity. Donations are not tax deductible.) |