
Toyota
Corolla Control Arm Bushings Lubrication Guide
How to lubricate noisy front control arm
bushings that are creaking or popping on a 2009 to 2013 Toyota Corolla.

By Paul B. Michaels Author & Photographer Auto Mechanic Since 1989 |
||
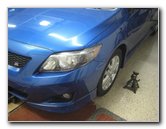 2010 Toyota Corolla S |
 DuPont Silicone Lubricant |
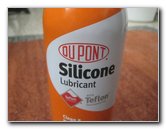 Teflon Lubricating Spray |
| This
automotive "how-to" guide was specifically written to assist owners
of the 10th generation (2009, 2010, 2011, 2012, & 2013) Toyota Corolla
in lubricating the dried out rubber bushings in the front lower
control arms to reduce or eliminate creaking, popping or ticking noises
during slow speed tight turns or when coming to a stop. Owners of other Toyota, Lexus or Scion vehicles such as the Yaris, Matrix, Prius, Camry, RAV4, Sienna, Tacoma, Tundra, FJ Cruiser, Venza, Highlander, Avalon, Sequoia, Land Cruiser, Allion, Premio, Auris, IS 250, ES 350, GS 350, tC, xB, xD, iQ and FR-S may also find these DIY instructions to be helpful. I recommend using DuPont Silicone Lubricant with Teflon for lubricating the dry rubber bushings. Silicone is the preferred rubber-safe lubricant for the bushings and the addition of Teflon should keep the control arms operating quietly for many more miles before needing to be re-applied. If you live in a very dry and hot climate such as Las Vegas or Southern California, you may need to lubricate the bushings more frequently. The items needed to complete this procedure include a floor jack and two jack stands. It would also be a good idea to have Nitrile rubber gloves, protective eyewear and some newspaper or paper towels to protect your garage floor or driveway. |
||
|
|
||
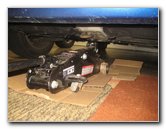 Raise Front of Car |
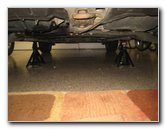 Support With Jack Stands |
 Lubricate Front Bushing |
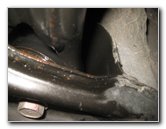
| The first few steps
are to drive the car on to a level surface, shift the transmission into park
and turn off the ignition. Engage the emergency / parking brake and place wheel chocks on both sides of the rear tires. Carefully raise the front of the vehicle with the floor jack. The front jack point is shown in the pictures above. It is located near the center of the underside of the engine bay. Support the car with at least two jack stands. Please do not solely rely on the floor jack to support the vehicle! Place several layers of newspaper, cardboard or paper towels below the lower control arms. You may want to add a second or third layer of paper below the actual bushings. There is a smaller horizontally mounted rubber bushing near the front inner corner of the triangle shaped control arm. The larger vertically mounted bushing is located at the rear inner corner of the control arm. |
||
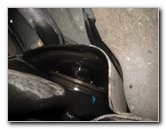
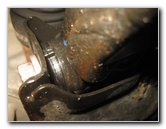
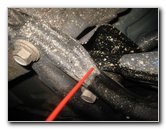 Spray Larger Rear Bushing |
 Driver Side Control Arm |
 Driver Side Rear Bushing |
| Please wear
protective eyeglasses and Nitrile
rubber gloves to protect your eyes and hands. If you have a sensitive respiratory system, it would also be wise to wear a respirator mask to help avoid from breathing in the silicone spray vapors. Make sure that there is adequate ventilation in your workspace. Avoid discharging the spray near pilot lights, open flames or other sources of ignition. Carefully spray a generous coating of the silicone lubricant to every accessible area of the two rubber bushings. |
||
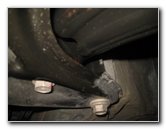
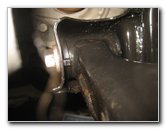
 Spray With Silicone Oil |
 Coated In Lubricant |
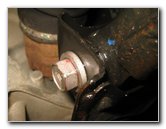 Driver Side Front Bushing |
| Repeat the process
to lubricate the bushings on the other control arm. Do not lubricate the outer part of the control arm that connects to the steering knuckle. The two parts are connected by bolts and nuts with no rubber bushings to lubricate. |
||
|
|
||
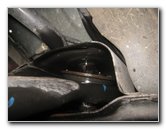
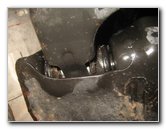 Front Bushing Lubricated |
 |
 Generously Lubricated |
| Allow the excess
lubricant to drip down on to the newspapers or cardboard for at least 15 to
30 minutes. Wipe away any visible lubricant from the control arms with a paper towel. |
||
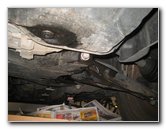
 Wipe Off Excess |
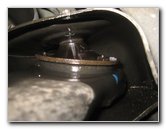 |
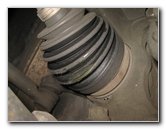 Check CV Boot For Leaks |
| Take the car for a
short test drive with plenty of slow tight turns such as through a parking
lot, some slow stop and go driving and some speed bumps if possible. I noticed that the control arms were creaking, popping and clunking slightly less on the initial test drive. It took about a week of short trips for the lubricant to really work its way into the bushings. So don't be disappointed if the noises are still present during the first few days. Now that I've put about a hundred miles on the car of city driving, I very rarely hear any more unpleasant sounds coming from the control arm bushings. While you are under the car, inspect the condition of the rubber boots on the CVJs (constant velocity joints) that surround the inner and outer ends of the axles. If your Corolla still has very noisy control arms with the additional symptoms of wandering, severe steering wheel vibrations or wandering steering, the bushings may be worn out and the control arm will need to be replaced. Here is a list of compatible replacement lower control arms for the 2009 to 2013 Corolla. Be sure to record the procedure in your vehicle's service records. Check out all of my Toyota Corolla DIY repair and maintenance tutorials: 2009-2013 Toyota Corolla Repair & Maintenance Guides |
||
| If you found this guide to be helpful,
please consider making a small donation by clicking on the PayPal.com
"Donate" button located to the right of this paragraph. Thank you!
(Note: I am not a registered charity. Donations are not tax deductible.) |