
2007-2012
Nissan Altima Tail Light Bulbs Replacement Guide
How to replace the brake light, turn signal,
reverse and side marker bulbs in the tail light of a 07-12 Nissan Altima.

By Paul B. Michaels Author & Photographer Auto Mechanic Since 1989 |
||
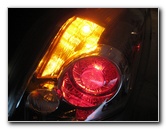
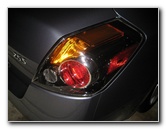 Nissan Altima Tail Light |
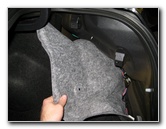
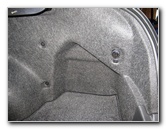 Carpet Trunk Liner |
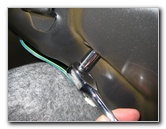
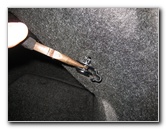 Pull Out Fastener / Cargo Hook |
| This
automotive "how-to" guide was specifically written to assist owners
of the 4th generation 2007 to 2012 Nissan Altima in replacing any of
the bulbs in the tail light assembly. Owners of other Nissan or Infiniti vehicles such as the Versa, Maxima, Juke, Rogue, Murano, Xterra, Pathfinder, Sentra, Cube, Armada, Quest, Frontier, Titan, Armada, Quest, G25, G35, G37 and M37 may also find this guide to be helpful. The tail light assembly of a 07-12 Nissan Altima contains the following bulbs with their corresponding Sylvania part numbers: brake # 3157, rear turn signal # 3156, reverse # 912, and sidemarker # 168. The only tool needed to replace any of the bulbs in the tail light assembly is either a pair of pliers or a flathead screwdriver to help pop out the black plastic fastener that doubles as the cargo net hook. (You may be able to remove it by hand.) |
||
|
|
||
 Cargo Net Hook Removed |
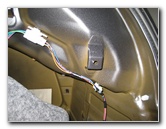 Carpet Pulled Back |
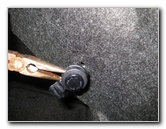
 Wiggle Off Power Wires |
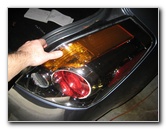
| The first step is
to open the trunk and then locate the black plastic pop rivet fastener that
also doubles as a hook for the cargo net.
Try pulling out the fastener by hand and then use a pair of needle nose pliers or a flathead screwdriver to pry it out. Pulling it at an angle may help. (Don't worry if you cause slight damage to the fastener, it will still hold the carpet securely and support the cargo net.) |
||
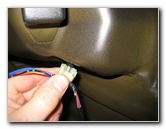 |
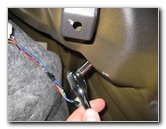 Remove Two 8mm Nuts |
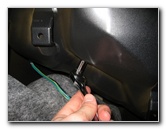 |
| Peel back the
carpet lining at the rear corner of the trunk to reveal two white plastic
wiring connection junction points.
Pull off those two wiring connections from the ends of the metal screws. Use an 8mm socket or wrench to remove the two small hex head nuts attached to the screws. |
||
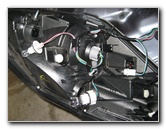
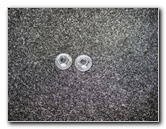 Two 8mm Nuts Removed |
 Pull Off Tail Light Assembly |
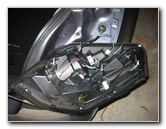 Turn Over Assembly |
| Once the two 8mm
nuts have been removed, carefully pull the tail light assembly away from the
rear of the vehicle.
Gently rest the tail light assembly upside down on the rear corner of the car. To prevent from scratching the tail light or the body work of the car, place a towel or rag in between the two surfaces. |
||
|
|
||
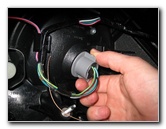 1/4 Turn Counter-Clockwise |
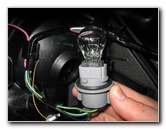 # 3157 Stop Light Bulb |
 Pull Bulb Straight Out |
| The brake or "stop"
light bulb is the largest light grey socket located near the center of the
tail light assembly.
To remove it, rotate the socket 1/4 turn counter clockwise and pull it straight out from the assembly. Remove the old # 3157 brake light bulb by pulling it straight out from the socket. If you have trouble removing it, try gently wiggling the bulb while pulling it out. Push in a new # 3157 brake light bulb, insert the bulb into the tail light and rotate it 1/4 turn clockwise to secure it within the assembly. Repeat the same process if you need to replace the reverse (back up) # 912 bulb, turn signal (parking light) # 3156 bulb, or the side marker # 168 light bulb. |
||
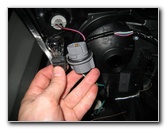
 Bulb Sockets Removed |
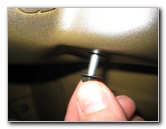
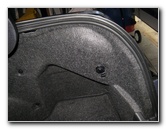
 Metal Spike & Hole |
 Re-Attach Tail Light |
| Double check that
all the bulb sockets are securely in place before lining up the metal spikes
on the rear of the tail light with the corresponding holes on the corner of
the vehicle.
Carefully push the tail light assembly back on to the vehicle until it rests flush against the painted metal body work. |
||
 Replace 8mm Nuts |
 Tighten Nuts |
 Replace Wires & Carpet |
| Move to the inside
of the trunk and thread on the two 8mm nuts on to the screw ends by hand.
Then tighten them with the 8mm socket and ratcheting wrench. Re-attach the white plastic wiring connectors and replace the grey trunk carpeting. Push in the black plastic fastener that doubles as the cargo net hook. |
||
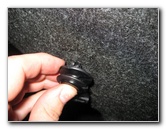 Push In Cargo Net Fastener |
 Trunk Capet Liner Replaced |
 Testing New Tail Light Bulbs |
| Test the new bulbs
by turning on the parking lights, activating the hazard signals, having
someone step on the brake pedal and also put the car into reverse.
Be sure to record the tail light bulb change
in your vehicle's service records. |
||
| For more of my
maintenance instructions, click on the following links:
2007-2012 Nissan Altima 2.5 S Maintenance Guides, and
2002-2006 Nissan Altima 2.5 S Maintenance Guides. |
||
| If you found this guide to be helpful,
please consider making a small donation by clicking on the PayPal.com
"Donate" button located to the right of this paragraph. Thank you!
(Note: I am not a registered charity. Donations are not tax deductible.) |