
2007-2012
Nissan Altima Headlight Bulbs Replacement Guide
How to replace the low beam, high beam,
turn signal and side marker light bulbs in the headlight of a 2007-2012 Nissan
Altima.

By Paul B. Michaels Author & Photographer Auto Mechanic Since 1989 |
||
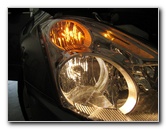
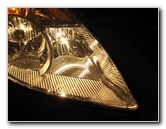
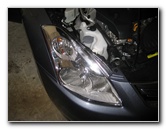 Passenger Headlight Assembly |
 Turn Wheels To Left |
 Plastic Wheel Well Cover |
| This
automotive "how-to" guide was specifically written to assist owners
of the 4th generation 2007 to 2012 Nissan Altima in replacing any of
the light bulbs in either of the headlight assemblies. Owners of other Nissan or Infiniti vehicles such as the Versa, Maxima, Juke, Rogue, Murano, Xterra, Pathfinder, Sentra, Cube, Armada, Quest, Frontier, Titan, Armada, Quest, G25, G35, G37 and M37 may also find this guide to be helpful. The headlight assembly of a 07-12 Nissan Altima contains the following bulbs with their corresponding Sylvania part numbers: Low Beam # H11, High Beam # H9, Turn Signal / Parking Light # 3457A, and Side Marker # 2825. To access the low beam, turn signal and side marker bulbs, you'll need both a flathead and a Phillips head screwdriver. To replace the passenger high beam bulb you'll need a 10mm socket for removing the coolant overflow bottle. (Accessing the driver side high beam may require removing the 12V battery.) |
||
|
|
||
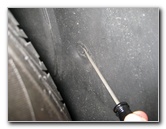
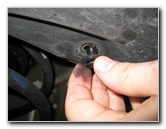
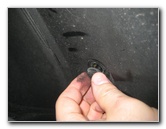
 Remove Plastic Pop Rivet |
 Flathead Screwdriver |
 Pop Rivet Removed |
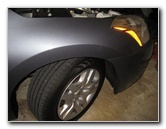
| The first step for
replacing the low beam, turn signal or side marker bulbs is to turn the
steering wheel all the way to the left for working on the passenger side or
all the way to the right when working on the driver side of the vehicle. In this guide, I've turned the steering wheel all the way to the left in order to gain some extra clearance for replacing the headlight bulbs on the passenger side of the car. If you just need to replace the passenger side high beam bulb, remove the coolant overflow bottle by unscrewing the single 10mm bolt that holds it into place. To access the high beam bulb on the driver side, remove the battery. |
||
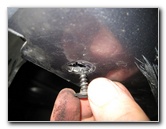
 2nd Pop Rivet In Wheel Well |
 3rd Fastener Location |
 Screw On Bottom of Bumper |
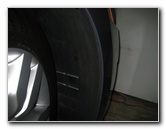
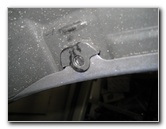
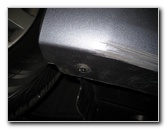
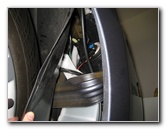
| Move to the wheel well and
locate the three pop rivet fasteners that secure the wheel well liner in
place.
One is located deep in the wheel well by the suspension spring, another is in front of the tire, and the third is at the top outer edge. Remove them by gently prying the fasteners out with a small flathead screwdriver inserted into their indentations. Next locate the single Phillips head screw that attaches the black plastic wheel well cover to the bottom lip of the painted bumper cover and remove it with a Phillips head screwdriver. |
||
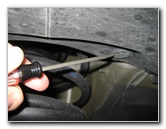
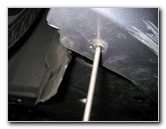 Phillips Screwdriver |
 Pull Back Wheel Well Liner |
 Side Marker & Turn Signal Bulbs |
| Once the pop rivets
and the Phillips head screw are removed, you can carefully pull back the
front part of the wheel well liner to reveal the low beam, turn signal and
side marker headlight bulb bases. The small side marker bulb socket and slightly larger turn signal bulb socket are both light grey in color and located next to each other at the top of the headlight assembly. |
||
 Low Beam Headlight Bulb |
 Pull Off Power Connector |
 1/4 Turn Counter Clockwise |
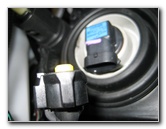
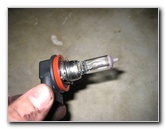
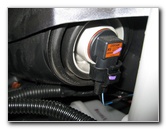
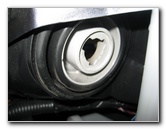
| The low beam bulb
is marked by a light blue rectangle on the base.
To remove it, first depress the tab on the power connector and wiggle it off the bulb's base. Then turn the base 1/4 turn counter clockwise and carefully pull it out of the socket in the headlight assembly. |
||
|
|
||
 H11 12V 55W Bulb |
 Low Beam Bulb Socket |
 Turn Signal - Top View |
| Be sure to not
touch the glass part of the new H11 low beam bulb with your fingers.
If you do touch the bulb, clean it with a tissue moistened with rubbing alcohol to remove any oil, dirt, or fingerprints left on the glass. Insert the new H11 low beam bulb into the socket in the headlight assembly and rotate it 1/4 turn clockwise to secure it in place. Push the power connector on to the base of the new bulb until it clicks into place. Tug on the power connector to ensure that it is attached securely. |
||
 1/4 Turn Counter Clockwise |
 Pull 3457A Turn Signal Out |
 High Beam - Near Car Center |
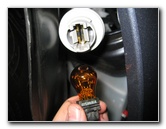
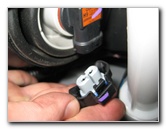
| To remove the turn
signal bulb or the side marker bulb, rotate the light grey socket 1/4 turn
counter clockwise and pull them out of the headlight assembly.
Then carefully pull the bulb straight out of the socket. Replace the turn signal / parking light bulb with a new # 3457A bulb. Replace the side marker bulb with a new # 2825 bulb. Insert the new bulb back into the headlight assembly and rotate the base 1/4 turn clockwise to secure it. |
||
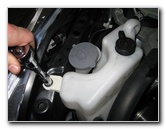
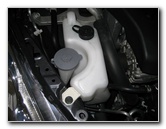 Coolant Reservoir Bottle |
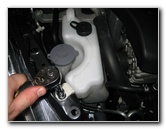 Remove One 10mm Bolt |
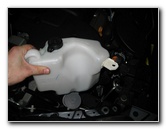 Pull Out Coolant Bottle |
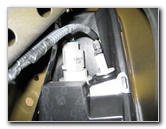
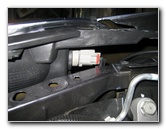
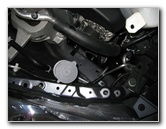
| The passenger side
high beam bulb can most easily be accessed by moving the coolant reservoir
bottle out of the way.
To do this, remove the single 10mm bolt that holds it in place on the side of the engine bay. (Accessing the driver side high beam bulb should be easily done by removing the car battery.) |
||
 Coolant Bottle Removed |
 H9 12V 65W High Beam |
 Remove Power Connector |
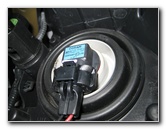
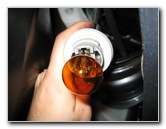
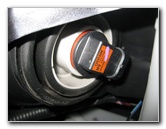
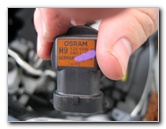
| The #
H9 high beam
bulb is marked by a small orange rectangle.
To remove it, depress the black plastic tab on the power connector and wiggle it off. Then rotate the base of the high beam bulb 1/4 turn counter clockwise and carefully pull it out of the headlight assembly. |
||
 1/4 Turn Counter Clockwise |
 Remove High Beam Bulb |
 High Beam Bulb Socket |
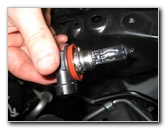
| Be sure to not
touch the glass part of the new # H9
high beam bulb.
Clean it with a alcohol moistened tissue if you do touch it. Place the new bulb into the headlight assembly in the same position as the old one was removed and rotate the base 1/4 turn clockwise to lock it into place. |
||
 Osram H9 64213 |
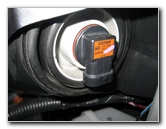 New Bulb Installed |
 Push On Power Connector |
| Push on the high
beam bulb's power connector until it snaps into place.
Tug down on the power connector to check that it is securely attached. Then replace the coolant reservoir bottle and tighten the single 10mm bolt that holds it into place. |
||
 Re-Attach Coolant Bottle |
 Testing Low Beam & Turn Signal |
 Testing High Beam Bulb |
| Test the new low
beam, high beam, side marker, or turn signal light bulb(s) by turning on the
headlights.
Activate the hazard lights to test both turn signals and flip on the high beams to test those bulbs. |
||
 Re-Insert Wheel Well Fasteners |
 Push In Pop Rivets |
 Replace Screw Under Bumper |
| Once you are sure
that all of the headlight bulbs work properly, replace the three plastic pop
rivet fasteners in the wheel well and re-attach the single Phillips head
screw on the underside of the bumper cover.
Be sure to record the bulb change in your
vehicle's service records. |
||
| For more of my
maintenance instructions, click on the following links:
2007-2012 Nissan Altima 2.5 S Maintenance Guides, and
2002-2006 Nissan Altima 2.5 S Maintenance Guides. |
||
| If you found this guide to be helpful,
please consider making a small donation by clicking on the PayPal.com
"Donate" button located to the right of this paragraph. Thank you!
(Note: I am not a registered charity. Donations are not tax deductible.) |