
Honda Pilot
Rear Coil Spring & Bump Stop Replacement Guide
How to change the rear suspension coil
spring, insulators and rubber bump stop on a 2003 to 2008 Honda Pilot SUV.

By Paul B. Michaels Author & Photographer Auto Mechanic Since 1989 |
||
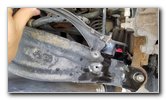
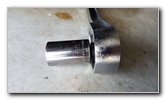
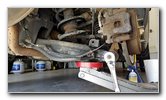
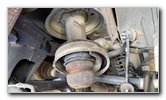
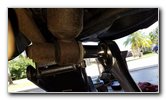
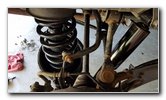
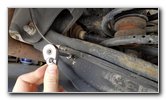 ABS Sensor Wire |
 Loosen Counterclockwise |
 Pull Off ABS Wire |
| This
automotive maintenance tutorial was specifically written to assist
owners of the first generation (2003, 2004, 2005, 2006, 2007 and
2008) Honda Pilot SUV in replacing the rear suspension coil springs,
rubber insulators and the rubber bump stop to prevent sagging and bottoming
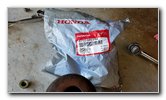
out when driving over speed bumps or potholes. Owners of other Honda or Acura vehicles such as the Accord, Civic, Crosstour, CR-V, CR-Z, Fit, Insight, Odyssey, Pilot, Ridgeline, ILX, TSX, TLX, TL, RLX, RDX, NSX and MDX may also find these DIY instructions to be helpful. The genuine OEM compatible replacement part numbers are as follows: Rear Coil Spring Honda 52441-S9V-A01, Rear Rubber Bump Stop Honda 52722-S9V-A04, Upper Insulator Honda 52686-S3V-023 and Rear Spring Seat Rubber Insulator Honda 52748-S0X-A00. If you would like stronger coil springs, I recommend buying the Moog 81649 since they have a higher spring rate as well as being slightly taller and thicker than the OEM springs. If you would like to also replace the shock absorber, the original OEM part number is Honda 52610-S9V-A02 or you could install some Monroe Load Adjusting Shock Absorbers. The tools needed to complete this procedure include a lug nut wrench, a floor jack, two jack stands, a 10mm socket with a 1/4" drive ratchet, a 14mm wrench, a 5mm hex bit socket or a 5mm Allen key, a 17mm socket with a 3/8" drive ratchet, a 14mm deep well socket with an extension bar and a can of penetrating oil. |
||
|
|
||
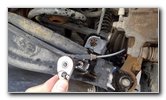
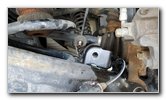
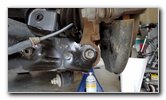
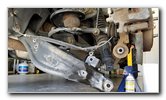
 ABS Bracket Removed |
 |
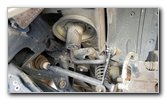
 Sway Bar End Link |
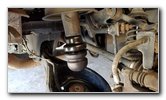
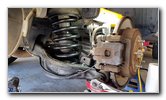
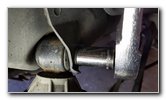
| The first few steps
are to drive the SUV on to a level surface, place the transmission in park
and turn off the ignition. Engage the emergency / parking brake and place wheel chocks on both sides of the front tires to prevent the vehicle from moving. Slightly loosen the five lug nuts on the rear wheel about 1/4 to 1/2 turn in the counterclockwise direction with the lug nut wrench. Raise the rear of the SUV with the floor jack and securely support it with at least two jack stands. Do not solely rely on the floor jack to support the vehicle! Spin off the five lug nuts and set them aside in a safe place. Pull off the rear wheel and set it aside. Remove the 10mm bolts that hold the ABS sensor wire bracket to the control arm by turning them in the counterclockwise direction. Set the bolts aside in a safe place. If you have trouble removing any of the bolts, spray on some penetrating oil and wait at least a few minutes. Detach the lower half of the sway bar end link by loosening the fastener in the counterclockwise direction with the 5mm hex bit socket and a ratchet. While you are loosening the 5mm hex bolt, hold the nut in place with the 14mm wrench. |
||
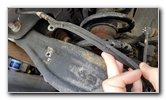
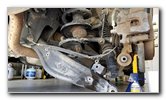
 Loosen Counterclockwise |
 5mm Hex & 14mm Wrench |
 Detach Bottom of Sway Bar |
| Pull the bottom of the sway bar end link off the control arm. | ||
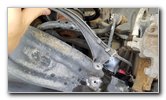
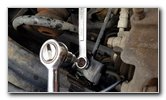
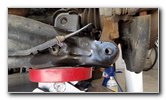
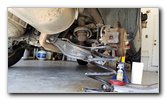
 17mm Socket & Ratchet |
 Control Arm Bolt & Hub |
 Loosen Counterclockwise |
| Loosen the bolt
that holds the control arm to the wheel hub by turning it in the
counterclockwise direction with the 17mm socket and a 3/8" or 1/2" drive
ratchet.
You may need to spray some penetrating oil on this bolt. Do not fully remove the bolt! |
||
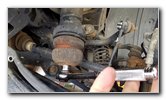
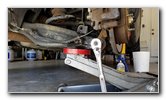 Floor Jack Under Arm |
 |
 Disconnect Arm & Hub |
| Place a floor jack
under the control arm. Slightly raise the control arm to release the tension on the bolt that connects the control arm to the wheel hub. Carefully pull out the bolt. |
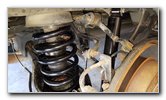
||
 Lower Control Arm |
 Remove Old Coil Spring |
 Old Rubber Bump Stop |
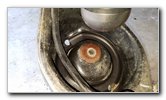
| Carefully lower the
floor jack and the control arm. Pull out the old coil spring. |
||
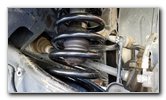
 Old Spring Removed |
 14mm Deep Well Socket |
 Loosen Counterclockwise |
| Attach the 14mm
deep well socket to an extension bar and a 3/8" drive ratchet. Loosen the fastener for the rubber bump stop in the counterclockwise direction with the 14mm deep well socket. |
||
|
|
||
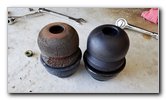
 New Rubber Bump Stop |
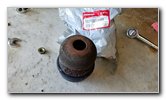 |
 Old Bump Stop Removed |
| Discard the old rubber bump stop. | ||
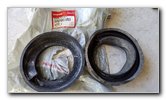 Upper Spring Insulator |
 Old & New Bump Stops |
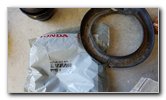 Spring Seat Insulator |
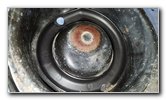
| Remove the old spring seat insulator from the top of the control arm. | ||
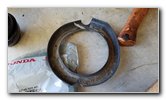 |
 New Spring Rubber Seat |
 Rubber Stop Installed |
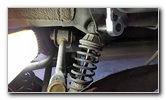
| You may choose to
install the new rubber bump stop at this point. We found it easier to install the new coil spring first with the rubber bump stop loose inside the spring. |
||
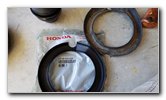
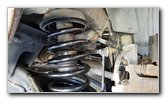
 Install Spring Seat Insulator |
 Line Up Drain Holes |
 Install New Coil Spring |
| Lower the spring
seat rubber insulator into the top of the control arm. Make sure that the water drain holes in the insulator and the control arm are lined up. Attach the new upper spring insulator to the top of the new coil spring. Install the new coil spring. Make sure the bottom "pig tail" end of the coil spring lines up with the drain hole in the rubber insulator and the control arm. Tighten the new rubber bump stop in the clockwise direction with the deep well 14mm socket. The rear bump stop bolt should be tightened to 29 lb-ft of torque as specified in the service manual. |
||
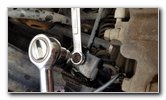
 Lift Control Arm |
 Tighten 17mm Bolt |
 Replacing Monroe Shock |
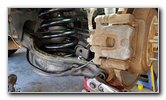
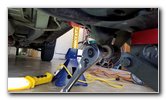
| Use the floor jack
to carefully raise the control arm and compress the spring. Re-attach the sway bar stabilizer to the control arm. Tighten the fastener in the clockwise direction with the 5mm hex bit and a 14mm wrench to 36 lb-ft of torque. (We also replaced the old shocks. Please check out my Monroe Load Adjusting Shock Installation Guide.) |
||
 |
 |
 |
| Line up the bolt
hole in the control arm and the wheel hub. Re-insert the bolt and tighten it in the clockwise direction with the 17mm socket and a ratchet. If you have a torque wrench, the 17mm bolt torque service manual specification is 54 lb-ft. |
||
 |
 |
 Job Complete! |
| Be sure to replace
the ABS sensor wire bracket. The 10mm bolts should be tightened to 7.2
lb-ft of torque. Double check that all of the fasteners are tight. Be sure to record the spring and bump stop replacement in your vehicle's service records. For more, check out all of my
2003-2008 Honda Pilot DIY Repair & Maintenance Guides. |
||
| If you found this guide to be helpful,
please consider making a small donation by clicking on the PayPal.com
"Donate" button located to the right of this paragraph. Thank you!
(Note: I am not a registered charity. Donations are not tax deductible.) |