
Honda Pilot Front Stabilizer
Bar Bushings Replacement Guide
How to change the front stabilizer (or
"sway") bar bushings on a 1st generation 2003 to 2008 Honda Pilot SUV.

By Paul B. Michaels Author & Photographer Auto Mechanic Since 1989 |
||
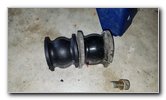
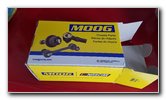 New Moog Parts |
 Part Number |
 Two New Bushings |
| This
automotive maintenance tutorial was specifically written to assist
owners of the first generation (2003, 2004, 2005, 2006, 2007 and
2008) Honda Pilot SUV in replacing the front suspension stabilizer
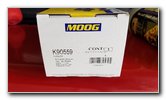
bar bushings. The stabilizer bar is also kwown as the "sway" bar. Owners of other Honda or Acura vehicles such as the Accord, Civic, Crosstour, CR-V, CR-Z, Fit, Insight, Odyssey, Pilot, Ridgeline, ILX, TSX, TLX, TL, RLX, RDX, NSX and MDX may also find these DIY instructions to be helpful. The tools and other items needed to complete this procedure include a lug nut wrench, a floor jack, two jack stands, a 14mm socket with a 3/8" or 1/2" drive ratchet, a 17mm wrench and a 6mm hex head socket or a 6mm Allen key. The compatible replacement bushings kit part number is Moog K90559. |
||
|
|
||
 Test Fit Socket On Bolt |
 Loosen Counterclockwise |
 Two Bolts Removed |
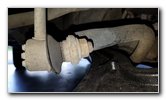
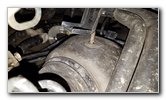
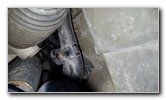
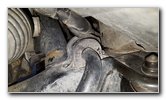
| The first steps are
to drive the SUV on to a level surface, shift the transmission into park and
switch off the ignition. Then engage the emergency / parking brake and place wheel chocks on both sides of the rear wheels to prevent the vehicle from moving. Slightly loosen the five lug nuts on the front wheel by turning them about 1/4 to 1/2 turn in the counterclockwise direction with the tire iron. Raise the front of the SUV with the floor jack and securely support it with at least two jack stands. I prefer to only work on one side of the car at a time to keep three tires on the ground for extra safety. Spin off the five lug nuts and set them aside in a safe place. Carefully remove the front wheel. Locate the two bolts that hold the stabilizer bar to the frame. Remove the two bolts by turning them in the counterclockwise direction with a 14mm socket and a 3/8" or 1/2" drive ratchet. If you have trouble reaching any of the bolts, I highly recommend using an offset box end wrench set. Set the two bolts aside in a safe place. Remove the metal bracket. |
||
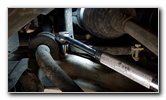
 Sway Bar & End Link |
 Loosen Counterclockwise |
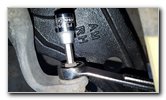 Disconnect End Link Bar |
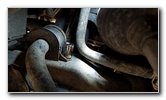
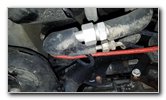
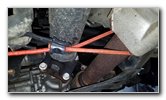
| Then move to where
the stabilizer bar attaches to the end link bar.
Loosen the nut in the counterclockwise direction with a 17mm socket and a ratchet. If you have trouble loosening the bolt, use a 17mm wrench and hold the ball joint pin with a 6mm hex head socket or a 6mm Allen key. |
||
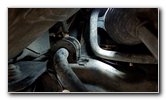
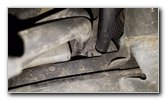
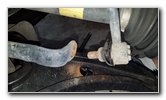 End Link Detached |
 Lift Sway Bar |
 Old Bushing Removed |
| Lift the sway bar and remove the old rubber bushing. | ||
|
|
||
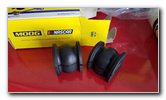
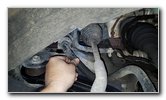
 New Versus Old Bushing |
 Fuel Lines in the Way |
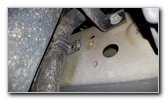 Clean Mounting Holes |
| If the fuel lines get in your way, hold them back with a bungee cord. | ||
 Fuel Lines - Bungee Cord |
 |
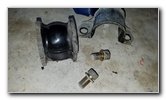
 Install New Bushing |
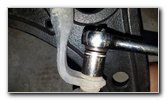
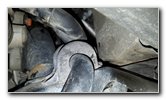
| Install the new
bushing on to the sway bar.
The opening (split / cut) side on the bushing should be facing the rear of the car. The closed side of the bushing should be facing the front of the SUV. Align the bushing with the paint marks on the stabilizer bar. Do not place the bushing at the bent or curved part of the stabilizer bar. |
||
 |
 Replace Bolts & End Link |
 Bushings Replaced |
| Re-install the
bracket or "holder" over the bushing and the stabilizer bar. Replace the two bolts and tighten them in the clockwise direction. It would be best to use a torque wrench to properly tighten the bolts. Tighten the two flange bolts to the service manual specification of 29 lb-ft (39 Nm) of torque. Re-attach the sway bar end link. The 17mm nut on the end link should be tightened to 58 lb-ft (78 Nm) of torque. Double check that every nut and bolt is tight before moving on to the next steps. Replace the front wheel and spin on the five lug nuts a few turns in the clockwise direction by hand to prevent them from becoming cross threaded. Slightly tighten the lug nuts in a criss-cross or "star" pattern with the lug nut wrench. Carefully lower the SUV from the jack stands by using the floor jack. Continue progressively tightening the lug nuts in a criss-cross or "star" pattern to 80 lb-ft of torque. Be sure to record the bushing change in your vehicle's service records. Take the SUV for a short test drive and listen closely for any strange sounds in the front end. For more, check out all of my
2003-2008 Honda Pilot DIY Repair & Maintenance Guides. |
||
| If you found this guide to be helpful,
please consider making a small donation by clicking on the PayPal.com
"Donate" button located to the right of this paragraph. Thank you!
(Note: I am not a registered charity. Donations are not tax deductible.) |