
Nissan
Qashqai / Rogue Sport Reverse Light Bulb Replacement Guide
How to change a burnt out reverse light
bulb in a 2nd generation 2014 to 2021 Nissan Qashqai or Rogue Sport.

By Paul B. Michaels Author & Photographer Auto Mechanic Since 1989 |
||
 2020 Rogue Sport |
 Tail Light Housings |
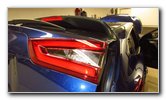 Reverse Light Housing |
| This automotive
maintenance tutorial was specifically written to assist owners of the second
generation 2014, 2015, 2016, 2017, 2018, 2019, 2020 and 2021 Nissan Qashqai
and the 2017, 2018, 2019, 2020 and 2021 Nissan Rogue Sport (USA) in changing
a burnt out reverse (also known as the "back-up" or "backup") light bulb
located in the separate tail light housing attached to the tailgate door for
the cargo area. Owners of other Nissan, Infiniti or related Renault vehicles such as the Rogue, X-Trail, Note, Versa, Altima, Maxima, Sentra, Juke, Kicks, Murano, Pathfinder, Armada, Frontier, Titan, Quest, NV200, Q50, Q60, QX50, QX60, QX80 and Renault Kadjar may also find these DIY instructions to be helpful. The compatible replacement miniature wedge base light part number is 921 (also known as W16W). If you would like to have brighter reverse lights that will also last much longer before burning out like the traditional incandescent bulbs, install some 921 LED units. The tools needed to access and replace the bulbs include a Phillips head screwdriver, a flat head screwdriver and possibly also a plastic pry bar tool. The first two steps are to open the tailgate and move to the side of the SUV with the burnt out reverse light bulb. |
||
|
|
||
 Open Tailgate Door |
 Door Pull Handle |
 Loosen Counterclockwise |
| In order to access
the bulb socket, you'll have to take off the plastic interior tailgate door
panel. Move to the right side and locate the screw inside the door pull handle. Remove the screw by turning it in the counterclockwise direction with the Phillips head screwdriver. |
||
 Screw Removed |
 Pry Out Center of Fastener |
 Remove Plastic Fastener |
| Set the screw aside
in a safe place. There are two round black plastic fasteners that need to be removed. There is one fastener on each side of the electronic tailgate latch. Use the flat head screwdriver to gently pry out the smaller round center "button" on each fastener to unlock them. Then pry out the base of the fasteners. |
||
 Remove Other Fasteners |
 Pry Along Edge |
 Releasing Pop Rivets |
| Set the two
fasteners aside in a safe place. There are still about 14 or 15 white plastic pop rivets that secure the tailgate door's interior panel in place. Use the plastic pry bar tool to gently release the pop rivets all along the two sides and bottom edge of the interior panel. |
||
 Pull Out Pull Handle |
 Fasteners Removed |
 Pulling Off Plastic Panel |
| Pull the door pull
handle out of the interior panel and set it aside with the two plastic
fasteners. Try to avoid using excessive force when you remove the interior panel. The pop rivets should pop out relatively easily. |
||
 Rear of Light Housing |
 Interior Cover Removed |
 Pull Out Stuck Pop Rivets |
| Set the interior
panel aside in a safe place. Check to see if any of the pop rivets remained attached to the underside of the metal tailgate assembly. Pry out any stuck pop rivets and re-attach them to the plastic panel. |
||
 Re-Attach Pop Rivets |
 Bulb Socket Exposed |
 Push In Release Button |
| Once the interior
panel has been removed, you'll be able to see the white plastic electrical
connector and the gray plastic bulb socket. Push in the release button on the white plastic electrical connector and slide it straight off the bulb socket. |
||
 Power Plug Removed |
 1/4 Turn Counterclockwise |
 Bulb Socket Removed |
| Rotate the gray
plastic bulb socket 1/4 turn in the counterclockwise direction before
pulling it straight out of the housing. If you have trouble removing the bulb socket due to the metal surrounding it being in the way, you have two options. You can either slightly bend the metal down away from the rear of the light housing or detach the light housing from the tailgate door by removing the two nuts that secure it into place. I believe the two nuts that secure the reverse light housing in place are 8mm. I chose to just gently bend down the metal situated just below the reverse bulb socket for that extra bit of clearance needed to remove it from the housing. |
||
 Pull Out Old Light Bulb |
 Old Light Bulb Removed |
 Slightly Bend Metal |
| If the old light
bulb was recently turned on, be careful when you remove it. The bulb might
still be hot enough to burn your fingers. Pull the old light bulb straight out of the socket. If you have trouble removing the old light bulb due to corrosion (rust) or debris in the socket, put on a pair of gloves and try gently wiggling it back and forth while pulling it straight out. Avoid using excessive pressure on the bulb to prevent from having it break and possibly cut your fingers. To make it even easier to re-install the bulb socket, I used a pair of pliers and a towel to gently bend down the metal a bit more away from the housing. |
||
 Push In New Light Bulb |
 Testing New Light Bulb |
 Insert Bulb Socket |
| Push a new number
921 light bulb straight into
the socket. If you would like to have brighter reverse lights that will also last much longer before burning out like traditional incandescent bulbs, install some compatible replacement 921 LED bulbs. If you are upgrading your lights to LED units, I highly recommend testing them before you re-attach the tailgate's interior panel. To test the new light bulb, place wheel chocks on both sides of the tires and have an assistant engage the emergency / parking brake to make sure the vehicle doesn't move unexpectedly. Then have them place their foot firmly on the brake pedal before shifting the gear selector from "P" to "R". Tip - If you installed an LED bulb and it doesn't work, try removing it from the socket, rotate it 180 degrees and push it back into the socket. Some LED bulbs are "polarized" and only work when the "+" positive and "-" negative electrical contacts are in the correct orientation. Re-insert the bulb socket into the housing and rotate it 1/4 turn in the clockwise direction to secure it in place. |
||
 1/4 Turn Clockwise - Lock |
 Push In Power Plug |
 Tap In Pop Rivets |
| Push the electrical
connector straight into the socket on the bulb socket until it clicks
securely into place. You should feel or hear the power plug "click" securely into place. If you bent down the metal below the bulb socket, carefully bend it back into place. Line up the plastic interior panel with the underside of the tailgate. |
||
 Push To Secure Fasteners |
 Interior Cover Attached |
 Replace Pull Handle |
| Push on the
interior panel to secure the pop rivet fasteners. Push the door pull handle back into the opening. |
||
 Tighten Screw Clockwise |
 Re-Insert Fasteners |
 Pop In Center Button |
| Replace the screw
by turning it in the clockwise direction with the Phillips head screwdriver
until it is snug. Make sure the smaller round buttons in the center of the two fasteners are in the up and released position. Re-insert the two fasteners and pop in the buttons to lock them into place. |
||
 Two Fasteners Secured |
 Test New Reverse Bulb |
 Testing Driver Side Bulb |
| To test the new
reverse light bulbs again, have your assistant engage the emergency /
parking brake, firmly step on the brake pedal and shift the transmission
from "Park" to "Reverse". Be sure to write down the bulb change in your car's service records. Please
check out all of the
2014-2021 Nissan Qashqai / Rogue Sport DIY Repair & Maintenance Guides. |
||
| If you found this guide to be helpful,
please consider making a small donation by clicking on the PayPal.com
"Donate" button located to the right of this paragraph. Thank you!
(Note: I am not a registered charity. Donations are not tax deductible.) |