
Mitsubishi
Outlander Engine Air Filter Replacement Guide
How to change the air filter for the
MIVEC 2.4L I4 engine in a 3rd generation 2014 to 2021 Mitsubishi Outlander.

By Paul B. Michaels Author & Photographer Auto Mechanic Since 1989 |
||
 2020 Outlander 2.4L I4 |
 Engine Air Filter Housing |
 Front Metal Latch |
| This automotive
maintenance tutorial was specifically written to assist owners of the third
generation (2014, 2015, 2016, 2017, 2018, 2019, 2020 & 2021) Mitsubishi
Outlander SUV in checking, cleaning and changing the air filter element for
the MIVEC 2.4 liter inline four cylinder naturally aspirated engine. (The
procedure should be the same or very similar for models with the 2.0L I4
engine and the 3.0L V6 engine.) Owners of other Mitsubishi vehicles such as the Outlander Sport, Eclipse Cross, Mirage, Mirage G4, Lancer, ASX, Montero Sport, Pajero, Xpander, Strada and RVR may also find these DIY instructions to be helpful. The OEM (original equipment manufacturer) engine air filter was part number Mitsubishi MR968274 (made in Japan by Denso). A few other compatible replacement aftermarket engine air filters with their part numbers are as follows: Premium Guard PA99078, EcoGard XA10418, Bi-Trust CA10910 and Pentius PAB10910. Please double check the OEM part number on your old filter before buying a new one. The correct part number may vary depending on the model year, trim level, engine type and your region of the world. No tools are required to access and replace the engine air filter. If you have trouble removing or installing the filter due to the tight working area, you might need a Phillips head screwdriver or a 10mm socket with a 1/4" drive ratchet to disconnect the air intake tube. The first two steps are to open the hood and move to the right (driver) side of the engine bay. The engine air filter housing is situated in front of the windshield and to the left of the electrical fuse box. There are two silver metal latches on the top edge of the air box. |
||
|
|
||
 Flip Open Front Latch |
 Release Rear Latch |
 Separate Two Halves |
| Flip open the right
side of the front latch and swing it over to the left side. Repeat the process to release the rear latch situated closer to the cowl and the windshield. Pull apart the two halves of the air box to reveal the old filter. |
||
 Pull Out Old Air Filter |
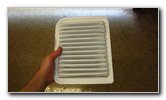 Old Air Filter Removed |
 Check Both Sides |
| Carefully lift the
old filter out of the air box. Make a mental note of how the old filter is orientated in the box. There are three rounded corners and one somewhat square looking corner. Check both sides of the old filter. If the old filter is dark grey or black and clogged with dirt, dust, sand, hair, insects, pollen, soot, twigs and other debris, it should be replaced with a new element. If the old filter is relatively clean, just tap out the large debris and remove any fine dust with a wet/dry shop vacuum. |
||
 Clean With Vacuum |
 OEM Part Number |
 Trying Install New Filter |
| Lower the new
filter down into the air box. I had trouble getting the new filter properly installed in the air box, so I decided to detach the air intake tube from the air box cover. |
||
 Loosen Hose Clamp |
 Pull Off Air Intake Hose |
 Pull Hose Off Air Box |
| Loosen the hose
clamp on the air intake tube by using a Phillips head screwdriver or a 10mm
socket with a 1/4" drive ratchet to turn the fastener in the
counterclockwise direction. Pull the rubber air intake hose off the plastic tube on the air box cover. Pull the small rubber hose off the top of the air box cover. |
||
 Air Box Cover Removed |
 Install New Air Filter |
 Reattach Cover |
| Lift the air box
cover (left side of the assembly) out of the way and set it aside in a safe
place. Now you can easily see how to properly install the new filter into the air box (on the right side). If the new filter doesn't seem to fit in the air box, try rotating it until the 3 rounded corners and the 1 square corner are in the correct orientation. Line up the two tabs on the bottom edge of the air box cover with their corresponding slots on the bottom edge of the air filter housing. Push the two halves of the air box assembly back together. |
||
 Flip Over Front Latch |
 Secure Rear Latch |
 Secure Wire Loom |
| Flip the two metal
latches up and over to the right. Push down on the latches to secure them into place. You should hear or feel the latches "click" when they are properly locked into position. Double check that the two halves of the air box are flush together at every edge with no part of the new filter visible. Push the wire loom back into its holding slot. |
||
 Push On Rubber Hose |
 Push On Air Intake Tube |
 Tighten Hose Clamp |
| Push the rubber
hose back into its retaining clip. Push the air intake hose over the plastic tube on the air filter housing. Tighten the hose clamp by turning the screw in the clockwise direction with either the Phillips head screwdriver or a 10mm socket with a 1/4" drive ratchet until it is snug. |
||
 Or Use 10mm Socket |
 Air Box Reassembled |
 Filter Change Done |
| Be sure to record
the filter change in your vehicle's service records. According to the "Warranty & Maintenance Manual" the service interval specification for the engine air filter is to change it every 30,000 miles (48,000 km) or at least every 24 months (2 years). (If you start the engine and it sounds much louder, the air box might be separated on the lower edge.) Please check out all of the
2014-2021 Mitsubishi Outlander DIY Repair & Maintenance Guides. |
||
| If you found this guide to be helpful,
please consider making a small donation by clicking on the PayPal.com
"Donate" button located to the right of this paragraph. Thank you!
(Note: I am not a registered charity. Donations are not tax deductible.) |