
GM Power
Window Motor & Regulator Replacement Guide
Instructions for replacing the power
window motor & regulator in a General Motors 2001 Pontiac Grand Prix GTP sedan.

|
This guide was specifically written to assist owners of the 6th generation (1997, 1998, 1999, 2000, 2001, 2002 & 2003) Pontiac Grand Prix GTP "W-Body" four door sedan in replacing the power window motor and regulator assembly. This set of instructions may also be useful for owners of other General Motors coupes, sedans, SUVs, trucks or crossovers. Some of the other GM vehicles that possibly have a similar replacement procedure include the Grand Am, Trans Am, Torrent, Vibe, Solstice, Firebird, G8, G6, G5, Chevy Cobalt, GMC Savana, Buick LaCrosse, Lucerne, Cadillac CTS, DTS, STS, Aveo, Malibu, Impala, Saab 9-3, 9-5, Saturn Astra, Aura, XLR, Corvette, Sky, Escalade, Trailblazer, Tahoe, Suburban, Envoy, Yukon, Hummer H3, H2, Saturn Vue, Colorado, Silverado, Avalanche, Canyon, Sierra, Enclave, SRX, HHR, Equinox, Acadia, Outlook, Uplander, Express, Bonneville, Regal, Century, Oldsmobile Cutlass Supreme, Lumina, and Monte Carlo. Please note that I am not a professional ASE certified auto mechanic. I take no responsibility for any damage to your vehicle, person, pets, or property. Please proceed with caution & consult a professional if you have any doubts. Good luck! |
||
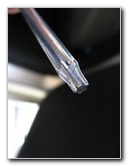
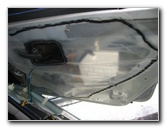
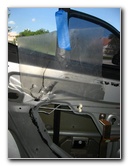
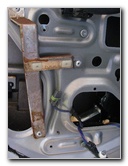
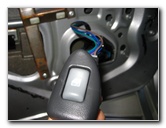
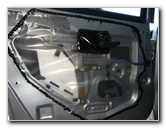
 Left Rear Window Propped Up |
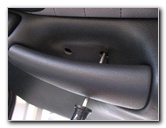
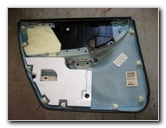
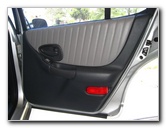 Right Rear Door Panel |
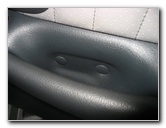 Screw Access Hole Covers |
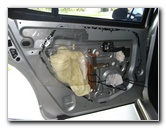
| The left
rear passenger window of my 2001 Pontiac Grand Prix GTP quit working
on a brutally hot South Florida summer day after I heard a loud pop.
Because of a quickly approaching thunder storm, I had to remove the
door panel and prop up the glass with wooden dowels.
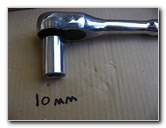
At the time I wasn't able to take pictures so the first half of this power window motor and regulator replacement procedure guide was demonstrated on the right rear door panel. Then I switched back over to the left side to insert the new part and reattach the door panel. To successfully complete this procedure you'll need a flat head screwdriver, a Torx T-27 screwdriver, painter's masking tape, a 10mm socket, and a ratcheting socket wrench with extension. You can buy a GM power window motor & regulator assembly at your local dealership or online at Amazon. Please verify the correct replacement part for your car by using the Amazon Part Finder website. |
||
|
|
||
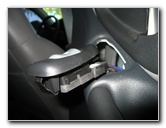
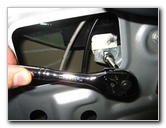
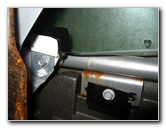
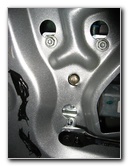
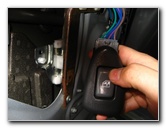
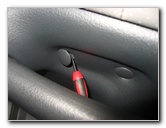 Popping Off Plastic Covers |
 Torx Screwdriver |
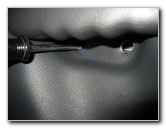
 Unscrewing 2 Door Screws |
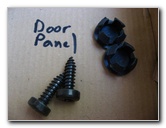
| Begin by prying off
the small round plastic screw hole covers that are located just behind the
inner handle on the door panel with a small flat head screwdriver.
Then use a Torx T-27 head screwdriver to unscrew the two door panel screws. The Torx screws can be reached by putting the Torx T-27 screwdriver under the door handle and going up at slight angle. |
||
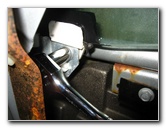
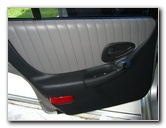
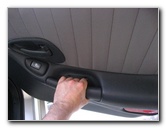 Pulling Off Door Panel |
 Two Torx Screw Fell Out |
 Removing Rear Door Panel |
| The two Torx screws
will fall to the bottom of the panel.
Then you can grab the door handle and give it a gentle tug until you feel the plastic pop rivets start to come out. If they are very tight, you can also try using a screwdriver to pry off the door panel at the edges but this may leave scratches on the paint or door panel. When the door panel finally pops off, try not to lose the two Torx screws that will fall to the ground. Remember that the wires going to window switch are still attached. |
||
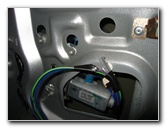
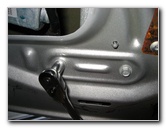
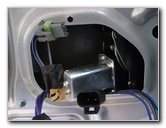
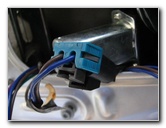
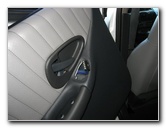
 Power Window Switch |
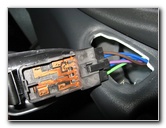 Switch Power Connector |
 Plastic Sheet & Adhesive |
| To remove the power
window switch, use the small flat head screwdriver and insert it in between
the rear of the switch and the door panel.
Once the switch is out of the door panel, disconnect the power connector and put the switch to the side. Now that the door panel is completely removed, you'll see a plastic sheet glued at the edges covering the internal components. |
||
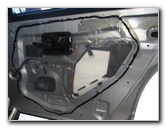
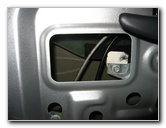
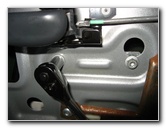
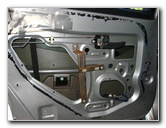
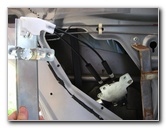
 Door Panel Removed |
 Plastic Cover Removed |
 |
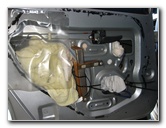
| Carefully remove
the plastic cover and try to keep most of the sticky black adhesive in place
so that you can securely replace it later.
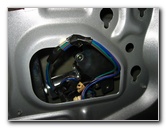
Under the plastic sheet you'll see a foam block tucked into the largest cavity of the door panel. Remove it by pushing down on the black retaining clip located at the top left of the Styrofoam block and pulling it towards yourself. |
||
 Styrofoam Block Insert |
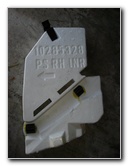 Foam Insert Removed |
 Plastic Flap Under Foam |
|
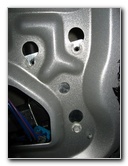
Now locate the four 10mm bolts that are attached to the regulator. There are two of them near the top of the door panel and two at the bottom. If you connected the dots they would form a tall rectangular box. The three bolts that hold in the power window motor are near the lower corner of the panel and are in a triangle formation. Don't remove any of them just yet. |
||
 Power Window Motor |
 Regulator Attached To Glass |
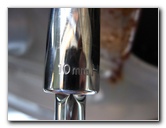 10 MM Socket & Wrench |
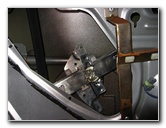
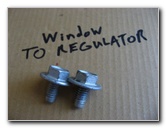
| First we need to
re-attach the power window switch and lower the window down to access the
two 10mm bolts that attach the plastic window clips to the metal regulator.
You may have to move the window again to access the 10mm bolt on the other side. I had to use the socket wrench extension piece to remove one of the bolts, then move the window and remove the extension to access the other bolt. |
||
 2 Bolts: Glass & Regulator |
 Remove Both 10 MM Bolts |
 Regulator & Window Bolt |
| After you remove
both of the 10mm bolts that attach the window glass to the regulator arm,
manually push the window all the way up till it closes completely.
Then secure it in that position by using some painter's masking tape, which won't leave any marks when you remove it later. |
||
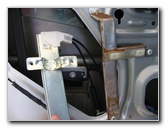
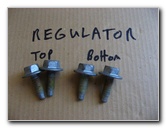
 Lower 10mm Regulator Bolts |
 Two Top 10mm Regulator Bolts |
 3 10mm Window Motor Bolts |
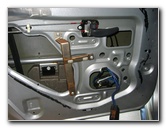
| Now that all of the
other parts and the window glass are safely out of the way, you can loosen
and remove the seven 10mm bolts that secure the power window motor and
regulator assembly.
Disconnect the set of wires attached to the motor by using the small flat head screwdriver to pry off the retaining clip. Lift out the the old assembly by first removing the top of the regulator, followed by the bottom of the regulator and then finally the motor. |
||
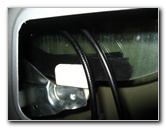
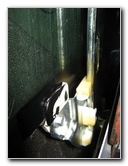
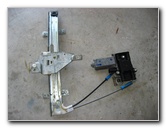 Old Window Motor & Regulator |
 Window Temporarily Propped Up |
 Temporary Wood Supports |
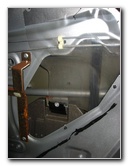
| (Now I'm moving back over to the driver's side of the car where I had to quickly stuff in towels and wood sticks to support the window while I waited for the new part to be delivered.) | ||
|
|
||
 Plastic Flap Taped Up |
 Ready For The New Part |
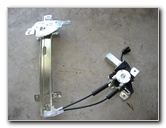 New Motor & Regulator |
| After I removed all
of the towels and wooden sticks, I got the new part out of the box and ready
for installation.
Take a moment to figure out the correct orientation of the new window motor & regulator before inserting it into the door frame. I put it in the wrong way the first time and then had to wrestle it back out and try again. It would be a good idea to add some extra lubrication to the tracks of the new part at this time. The employees at Advance Auto Parts recommended white lithium grease for this application. I've read that many window motor/regulator assemblies fail because of inadequate lubrication. |
||
 Orientation In Door Frame |
 Insert Window Motor First |
 Insert Window Regulator Next |
| First insert the
window motor into the large opening with the flat metal mounting plate
facing towards you.
Then insert the top of the regulator track followed the by the bottom of it. |
||
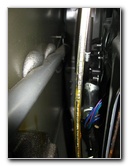
 Tape Up Loose Window Glass |
 Motor & Regulator In Frame |
 4 10mm Regulator Bolts |
| Now line up the
bolt holes in the regulator with the ones in the door frame and loosely
attach at least two of the bolts to hold it in place.
Then pull the window motor partially out of the other opening in the door frame and re-attach the power connector and plastic retaining clip. Re-insert the window motor back into the door frame, line up the 3 bolt holes, and loosely thread in the 3 10mm bolts. |
||
 3 10mm Window Motor Bolts |
 2 10mm Glass To Regulator Bolts |
 Torx Door Panel Screws & Covers |
 Power Motor Connector Clip |
 2 Regulator Bolts Attached |
 Window Motor & Cable |
| After all 7 of the 10mm bolts for the window motor & regulator are threaded in, you can securely tighten them by hand. | ||
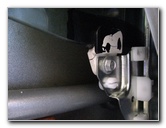
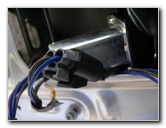 Motor Power Connector |
 Power Connector Clip Attached |
 Wire Loom Snapped In Place |
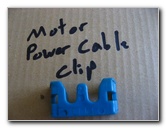
| Don't forget to re-attach the tiny plastic rivet that holds the power window motor wire loom in place as pictured in the last image in the row above this paragraph. | ||
 3 Window Motor Bolts |
 10mm Socket & Wrench |
 All 7 Bolts Tightened |
 Window Motor Switch Connected |
 Regulator At Bottom |
 Window Regulator Bracket |
| Now that the window
motor & regulator are securely in place, we need to re-attach the window
glass to the regulator arm.
To do this we have to hook up the window switch, turn on the vehicle's accessory power, and raise the regulator halfway up to meet the window. Then remove the painter's tape from the outside of the glass and slowly lower the window until the white plastic clips rest on top of the regulator's arm. |
||
 Regulator Attachment Point |
 Raising Regulator To Meet Glass |
 Regulator & Glass Together |
| You may have to
wiggle the window glass and regulator arm a bit to get the bolt holes in
each to line up together.
The left bolt hole on my new part lined up perfectly so I inserted the bolt and tightened it with just my fingers. |
||
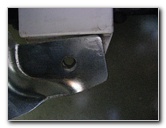 Holes Don't Line Up |
 Bolt Attaches Regulator & Glass |
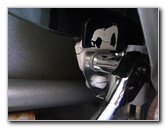 Tightening Regulator To Window |
| The bolt holes on
the right side of the glass mount and the regulator arm did not line up very
well so I could not insert the other OEM bolt.
I went searching through my tool box for a smaller screw with a matching nut and metal washers. |
||
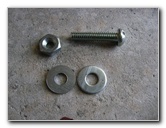 Smaller Screw & Nut |
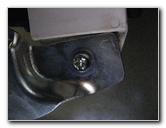 Small Screw Secures Regulator |
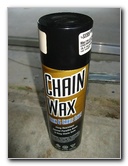 Motorcycle Chain Wax Lube |
| Luckily, the smaller screw fit perfectly and did just as good of a job securing the parts together as the OEM bolt did on the other side. | ||
 Lubrication Sprayed On Towel |
 Lubricating Regulator Tracks |
 Regulator Lubed |
| Since I still had
the window switch connected, I tested out the new part and found that it
went down quickly but didn't raise the window very well.
Then I remembered that the old part had a waxy lubricant smeared all over the tracks and metal wires. The most suitable lubricant that I had in the garage was the "Chain Wax" lube that I use to keep the drive chain on my motorcycle running smoothly. First I soaked a paper towel with the lubricant and rubbed it all over the regulator's tracks. That didn't seem to get enough of the lubricant on the moving parts so I carefully sprayed it directly onto the regulator. After that treatment, the window would operate faster, quieter, and more smoothly than before. |
||
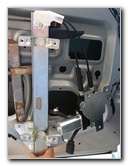
 Lower Plastic Flap & Insert Foam |
 Plastic Sheet Glued Back On |
 Inner Door Handle Inserted |
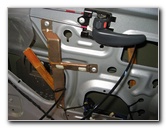
| To put everything
back in place, start by lowering the plastic flap back into the large
opening in the door frame and then re-insert the Styrofoam block.
Then you can re-apply the large plastic covering over the entire door frame by pushing the plastic firmly into the adhesive with your fingers. To re-attach the door panel, maneuver the door handle through the top opening in the panel and also pull out the window switch power connector. Then line up the plastic rivets on the back of the door panel with the holes in the metal door frame. Gently apply pressure until you feel the plastic door panel fasteners snap into place. |
||
 Door Panel Re-Attached |
 Power Window Switch Connected |
 Switch Popped Into Place |
| Once all of the
fasteners are snugly holding the door panel against the frame, you can
re-attach the door switch to the power connector and snap it back into
place.
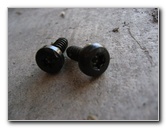
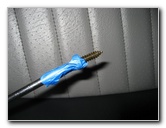
The door switch goes in with the part facing the front of the car first and then pops down with some light pressure on the metal clip at the back of the switch. To keep the Torx T-27 screws from falling into the door panel since I don't have a magnetic Torx screwdriver, I used some of the blue painter's tape to hold them in place. After the two Torx screws were
fastened, I popped the plastic screw hole covers back in place and the job
was done.
|
||
 Screw Secured With Tape |
 Door Panel Screw Tightened |
 Plastic Screw Hole Covers Attached |
| For
more of my vehicle maintenance updates, check out the following links:
Eaton M90 Supercharger Oil Change Guide,
GM Wheel Bearing Hub Assembly Replacement Guide,
Pontiac Grand Prix GTP Engine Oil Change Guide,
GM 3800 Series II Engine Alternator Replacement Guide,
Grand Prix PCV Valve Replacement Guide,
GM ABS TCS Off SES Warning Lights Troubleshooting Guide,
GM A/C Condensate Drain Pipe Unclogging Guide and the
K&N Air Filter Cleaning Guide.
For more, check out all of my
Pontiac Grand Prix DIY Repair & Maintenance Guides. |
||
| If you found this guide to be helpful,
please consider making a small donation by clicking on the PayPal.com
"Donate" button located to the right of this paragraph. Thank you!
(Note: I am not a registered charity. Donations are not tax deductible.) |