
Pontiac Grand
Prix Front Brake Pads Replacement Guide
A pictures illustrated instruction guide
for replacing worn front brake pads on a 1997 to 2003 GM Pontiac Grand Prix.

| This guide was
specifically written to assist owners of the 6th generation (1997, 1998,
1999, 2000, 2001, 2002 & 2003) GM Pontiac Grand Prix
SE/GT/GTP in replacing the brake pads on the front wheels.
Owners of other General Motors vehicles may also find this guide to be useful. The procedure is similar on many GM automobiles including the Pontiac Grand Am, Trans-Am, Firebird, Saturn Ion, Astra, Aura, Sky, Vue, Chevy Camaro, Corvette, Oldsmobile Aurora, Buick LeSabre, Regal, GTO, G6, G5, G8, Bonneville, Aztek, Torrent, Sunfire, Vibe, Cobalt, Malibu, Impala, Grand National, Lucerne, Century, Park Avenue, Cadillac Catera, DeVille, Eldorado, Seville, Escalade, STS, CTS, and DTS. Please note, I am not a professional mechanic. Proceed at
your own risk. I take no responsibility for any damage to your vehicle,
person, property or pets.
|
||
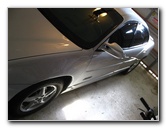 2001 Pontiac Grand Prix |
 Painter's Tape, Plastic Bags |
 Paint Protected |
| My 2001
Pontiac Grand Prix GTP is about to reach 91,000 miles on the odometer.
The front brake pads were last changed during the 60,000 mile service.
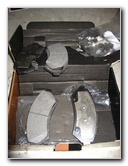
I had been noticing some slight grinding coming from the brakes and brake fade (soft pedal) during hard stops. I decided to replace the brake pads at each of the four wheels and bleed the brake lines. If you only need to change the rear pads, click here to view the Pontiac Grand Prix Rear Brake Pads Replacement Guide. For instructions on how to flush the brake lines, take a look at my Grand Prix Brake Line Bleeding Guide. My first step was to protect the bodywork with some garbage bags and painter's tape. Since brake fluid eats paint, I wasn't going to take any chances. A few compatible replacement front brake pads with their part numbers are as follows: Wagner ThermoQuiet QC699, ACDelco 14D699CH, Raybestos PGD699C, Akebono ACT699, Bosch BC699, Prime Choice SMK699, Monroe CX699, Bendix MKD699, Wagner ZD699 and Dura International BP699 MS. Please verify the correct replacement parts for your car by using the Amazon Part Finder website. The correct parts might vary depending on the model year, trim level and whether it has ABS (anti-lock) brakes or not. |
||
|
|
||
 Pristine Paint Protected |
 Brake Quiet, Cleaner, DOT 3 |
 Advance Auto Parts Receipt |
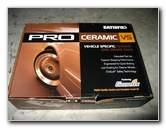
| In anticipation of
this project,
I bought Satisfied brand vehicle specific ceramic front brake pads for about $47. I also purchased some DOT 3 brake fluid ($4.29), brake cleaner ($3.29), and CRC Brake Quiet gel ($5.50). |
||
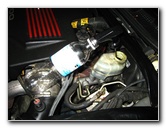
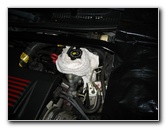
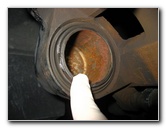
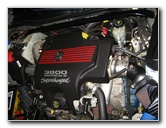 GM 3800 Series II Engine |
 Brake Master Cylinder |
 Old Black Brake Fluid |
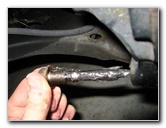
| Even if you don't
plan on bleeding the brake lines, it's best to remove as much of the old
dirty fluid in the master brake cylinder reservoir as possible.
Later we'll be compressing the brake caliper pistons, so leave the cap on but unscrewed to prevent excessive pressure from building up when brake fluid is forced back into the system. |
||
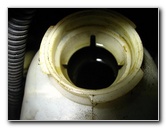
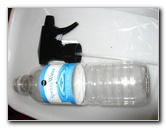 Sprayer Pump & Bottle |
 Pumping Out Old Brake Fluid |
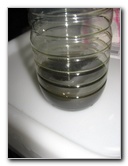 Old Brake Fluid |
| I used a spray
bottle pump and an empty water bottle to pump out a few ounces of the dark
black fluid from the master brake cylinder.
New brake fluid is crystal clear so it's obvious that my brake fluid hasn't been changed in years. This explains the brake fade (mushy pedal) during hard braking. Brake fluid is hygroscopic which means that it absorbs water over time. My old brake fluid was probably saturated with water which boils at a much lower temperature. The gas bubbles that form in the brake lines during hard braking will compress easily and lead to a soft pedal and reduced braking performance. |
||
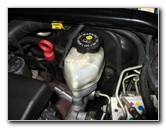
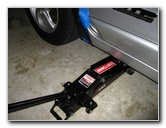
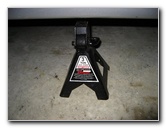
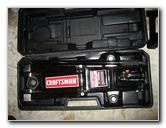 Craftsman Floor Jack |
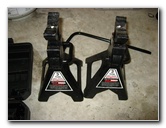 Craftsman Jack Stands |
 Master Cylinder & Towel |
| I got out my
Craftsman 2.5 ton floor jack and a pair of Craftsman 3 ton
jack stands.
To prevent brake fluid from overflowing out of the top of the master brake cylinder on to the engine, I wrapped it with an old towel. |
||
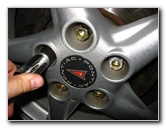
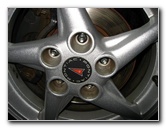
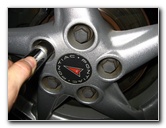 Removing Plastic Caps |
 Loosening Lug Nuts |
 Lifting Side of Car |
| First remove the
black plastic lug nut caps with a 19mm socket.
Then crack the seal on the lug nuts with a lug wrench before raising the car off the ground with the floor jack. Then replace the floor jack with the jack stand. You can quickly spin off the loosened lug nuts with the 19mm socket. |
||
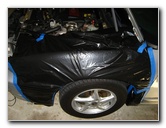
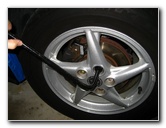
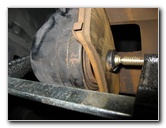
 Jack Stand In Place |
 Removing Lug Nuts |
 Lug Nuts Removed |
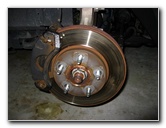 Wheel Taken Off |
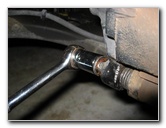
 Brake Line & Caliper Bolt |
 Bleeder Nipple Rubber Cover |
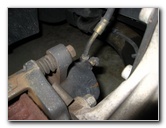
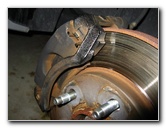
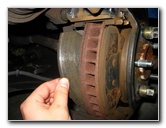
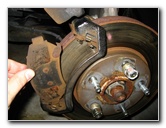
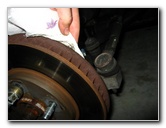
| With the wheel
removed, we can access the brake rotor and the brake caliper.
You'll need a 15 mm wrench or socket to loosen the caliper bolts.
|
||
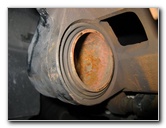
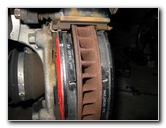
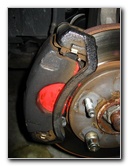
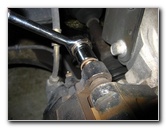
 Bleeder Valve Uncovered |
 Brake Caliper |
 Brake Rotor |
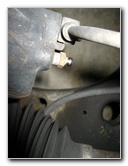
| The bleeder valve
is located on the other side of the caliper and it's covered by a small rubber
cap.
If you plan on flushing your brake fluid, visit my Pontiac Grand Prix Brake Line Bleeding Guide. |
||
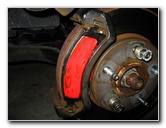
 Satisfied Ceramic Pads |
 New Front Brake Pads |
 CRC Disc Brake Quiet |
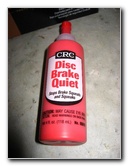
| The CRC Disc Brake
Quiet gel requires about 10-20 minutes to dry before installation.
It contains known carcinogens (cancer causing agents) so I put on some latex gloves to work with it. I spread a generous layer of CRC Disc Brake Quiet on the metal backs of each brake pad. Do not get any of the CRC Disc Brake Quiet on the friction surface of the pads. |
||
|
|
||
 Brake Quiet Applied |
 Separating Old Pads From Caliper |
 Rubber Mallet Tapping Caliper |
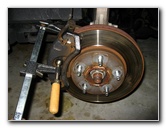
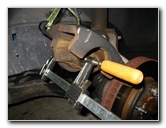
| To separate the old
brake pads from the caliper, you'll need to compress them with a carpenter's
C clamp.
Make sure that the C clamp doesn't apply pressure to anything sensitive on the back of the caliper such as a brake line or the bleeder valve. |
||
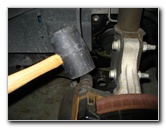
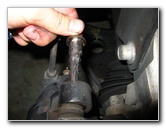
 Tapping Lower Bolt |
 Rubber Mallet Loosening Top Bolt |
 Loosening Lower Bolt |
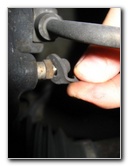
| If you have trouble
loosening the caliper bolts, try tapping the caliper and the caliper bolts
with a rubber mallet.
Then hit a wrench on the caliper bolt with the rubber mallet. After that, you can use a ratcheting wrench with a 15mm socket to remove the lower bolt only. If you feel your brake rotor moving at all, spin on two lug nuts to keep it securely in place. |
||
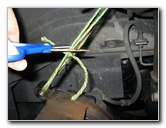
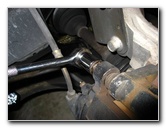
 Unscrewing Lower Caliper Bolt |
 |
 2 Lug Nuts To Hold Rotor |
| Once the bottom
caliper bolt is removed and the top one is loosened, you can swing the
caliper upwards using the top caliper bolt as a pivot point.
Tie the caliper up and out of the way using a piece of twine or rope. Thread the rope through the lower caliper bolt hole and the suspension spring. My first piece of twine snapped under the weight of the caliper so I used two pieces for extra safety. Trust me, you don't want that heavy steel caliper to come crashing down on your fingers. |
||
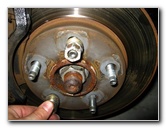
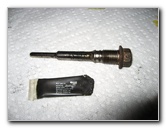
 Removing Lower Caliper Bolt |
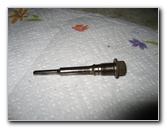 Lower Caliper Bolt/Pin |
 Removing Old Brake Pads |
| With the caliper up
and out of the way, the old brake pads should easily come off the brake
rotor.
If they don't come off easily, you can use a flat head screwdriver to gently pry them off the rotor. |
||
 |
 New & Old Pad Compared |
 Brake Parts Cleaner |
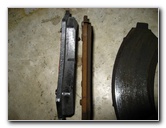
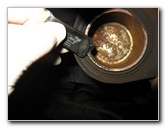
| After 30,000 miles,
my front brake pads were worn down almost to the wear or "squeal" bar.
The cut down the middle of the pad that is clearly visible on the new pad was worn completely away on the old pad. |
||
 Cleaning Front of Rotor |
 Cleaning Rear of Rotor |
 Compressing Caliper Piston |
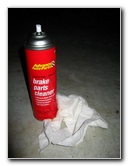
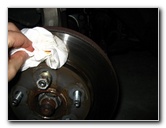
| While I waited for the CRC Disc Brake Quiet to dry on the backs of the new pads, I cleaned off both sides of the rotor with some Advance Auto Parts brake cleaner and a paper towel. | ||
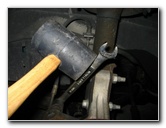
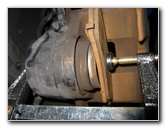 Clamp On Caliper Piston |
 Still Compressing Piston |
 Lubricating Caliper Pin |
| The brake caliper
piston is extended out of the caliper body to push against the very thin old
brake pads.
In order to make room for the thicker new brake pads, I had to compress the caliper piston back into the caliper's body using the carpenter's C clamp. Make sure that the cap on the master brake cylinder is unscrewed while compressing the piston to avoid creating too much back pressure in the brake lines. Some people recommend cracking open the brake fluid bleeder valve (10mm). But this may introduce air bubbles in to the brake lines. |
||
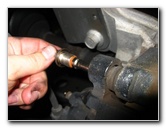
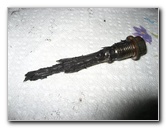 Greased Up Caliper Bolt |
 Caliper Piston Compressed |
 Piston Flush With Rubber Boot |
| I tightened the handle on the C clamp a quarter turn every few seconds to gradually and gently push the caliper piston back until it was flush with the rubber dust boot. | ||
 Lubricating Caliper Piston |
 Spreading Moly Grease |
 High Pressure Grease On Caliper |
| Then I spread some
of the high pressure moly grease (included with the Satisfied brake pads)
around the brake caliper piston and on the inside of the brake caliper.
Proper lubrication of any metal to metal contact points will prevent braking noises. |
||
 New Brake Pads On Caliper |
 Push Pads Flush On Rotor |
 Cut Twine Holding Up Caliper |
| After about 20
minutes the layer of CRC Brake Quiet gel on the back of the new brake pads
was finally tacky and dry enough for installation.
The Satisfied brake pads came with new "anti-rattle" pad abutment clips. I re-used the old ones since I had a hard time fitting the new brake pads on with the new clips on the rear rotors. Make sure that the new pads are flush with the rotor. Try to avoid getting the CRC Disc Brake Quiet on your skin since the manufacturer warns that it is a carcinogen. The wear or "squeal" bar should be at the bottom of the rotor and on the outermost pad. Now that the new pads are on the rotor, I cut the twine holding up the caliper and gently lowered it over the new pads. If the caliper won't fit over the new pads, the caliper piston may need to be compressed some more with the C clamp. |
||
 Lower Caliper On Pads |
 Re-Inserting Lower Caliper Bolt |
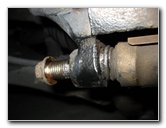 Lining Up Rubber Dust Boot |
| The smooth ends of
the caliper bolts or "pins" need to slide freely inside the caliper.
I greased the lower caliper bolt with the packet of high pressure moly brake caliper grease that came with the new Satisfied brake pads. Then I re-inserted the lower caliper bolt and torqued it down to about 63 ft/lbs. |
||
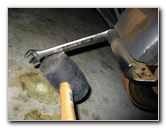
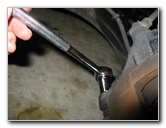
 Tightening Lower Caliper Bolt |
 Loosening Top Caliper Bolt |
 Removing Upper Caliper Bolt |
| Once the bottom
caliper bolt was back in place, I removed the upper caliper bolt to apply
some grease to it as well.
Then I re-inserted the top bolt and again applied about 63 ft/lbs of torque to it. That's about it. Now you can remove those two lug nuts from the rotor, put the wheel back on, hand tighten the lug nuts, lower the car off the jack stand, torque the lug nuts to 100 ft/lbs and replace the plastic lug nut caps. It would be best to use a torque wrench. Before you go test drive the car, refill the master brake cylinder to the "Max" line, and pump the brakes a few times to build up brake line pressure. Satisfied recommends that you break in these new ceramic brake pads by performing 10 to 20 near-stops from about 30-40 mph down to about 5-10 mph with 30 seconds in between stops to allow the braking system to cool. Then you should avoid towing, hauling heavy loads or panic stops for the first 200 miles or so. |
||
 Greasing Upper Caliper Bolt |
 Re-Inserting Upper Caliper Bolt |
 Tightening Top Caliper Bolt |
|
For more, visit the following links: Grand Prix Rear Brake Pads Replacement Guide, Grand Prix Brake Line Bleeding Guide, Pontiac Grand Prix Engine Oil Change, Grand Prix Power Steering Fluid Maintenance Guide, GM Power Window Motor & Regulator Replacement Guide, Grand Prix "TCS OFF" SES & ABS Warning Light Troubleshooting Guide, GM 3800 Series II Engine PCV Valve Replacement Guide, Pontiac Grand Prix Alternator Replacement Guide, GM Wheel Bearing Hub Assembly Replacement Guide, GM A/C Condensate Drain Pipe Unclogging Guide, Eaton M90 Supercharger Oil Change Guide, and the K&N Air Filter Cleaning Guide.
For more, check out all of my
Pontiac Grand Prix DIY Repair & Maintenance Guides. |
||
| If you found this guide to be helpful,
please consider making a small donation by clicking on the PayPal.com
"Donate" button located to the right of this paragraph. Thank you!
(Note: I am not a registered charity. Donations are not tax deductible.) |