
Ford EcoSport
Cabin Air Filter Replacement Guide
How to change the A/C system's cabin air
filter element in a 2nd generation 2013 to 2021 Ford EcoSport.

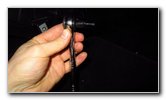
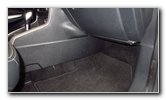
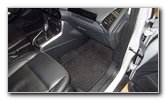 2020 Ford EcoSport |
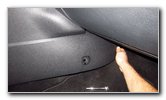
 Passenger Side Footwell |
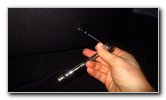
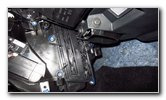
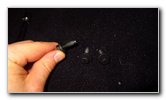
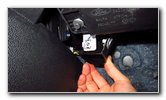
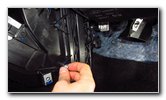
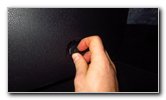
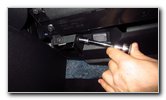
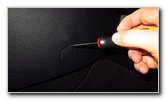 Pry Off Plastic Cover |
| This automotive
maintenance tutorial was specifically written to assist owners of the second
generation 2013, 2014, 2015, 2016, 2017, 2018, 2019, 2020 and 2021 Ford
EcoSport compact SUV in cleaning or changing the A/C system's cabin air
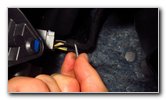
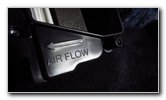
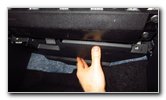
filter element located in the HVAC blower motor housing. Owners of other Ford or Lincoln vehicles such as the Fiesta, B-Max, Escape, Edge, Bronco Sport, Explorer, Expedition, Transit, Focus, Mondeo, S-Max, Puma, Kuga, Endura, Everest, Ka, Figo, Endeavour, Aviator, Corsair, Nautilus and Navigator may also find these DIY instructions to be helpful. A few compatible replacement cabin air filters with their part numbers include the following: EcoGard XC26175, TYC 800163P, Purolator C26175, Motorcraft FP-69, Bosch P3927WS and Potauto MAP 1042C. Please verify the correct replacement part number for your vehicle before purchasing by using the Amazon Part Finder website. The tools needed to access and replace the cabin air filter include a flat head screwdriver, a 10mm socket, a 1/4" drive ratchet and a Torx T20 star bit screwdriver or a T20 socket. The HVAC blower motor housing and filter slot are located behind the kick panel attached to the center console in the passenger footwell and near the underside of the glove box. Locate the small round plastic cover by the front bottom of the kick panel. Use the flat head screwdriver to gently pry out the cover. |
||
|
|
||
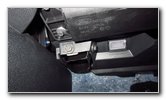
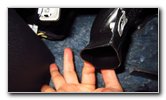
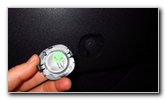 Trim Cover Removed |
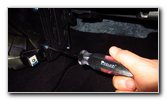
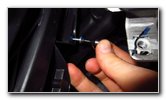
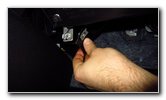
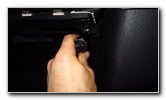
 Loosen Counterclockwise |
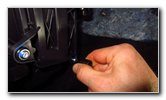
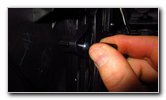
 Black Bolt Removed |
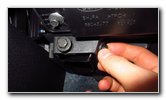
| Set the cover aside
in a safe place. Remove the single black metal bolt located behind the cover by turning it in the counterclockwise direction with the 10mm socket and a 1/4" drive ratchet. Set the bolt aside with the plastic cover. |
||
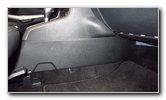
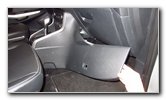
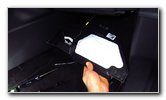
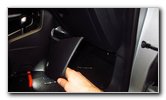
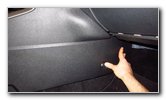
 Pull Out Kick Panel |
 Gently Open Plastic Panel |
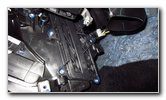
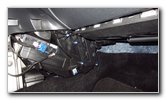 HVAC Blower Motor |
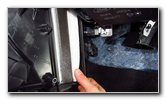
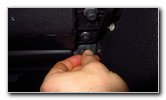
| Gently pull open
the front edge of the kick panel to access the HVAC blower motor housing and
the filter slot. Try to avoid bending the kick panel too much to prevent from damaging the plastic by creating a crease or cracking it. If the outside temperature is very cold, consider moving the SUV into a heated garage or wait for a warmer day before performing this procedure. I didn't attempt to fully remove the kick panel since it is not necessary to just replace the filter. |
||
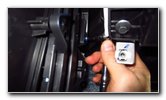
 A/C Filter Access Cover |
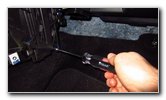
 Loosen Counterclockwise |
 Remove Second Screw |
| Locate the black
plastic rectangular shaped filter access cover.
The cover is held in place by four Torx T-20 star bit screws. Three of the screws are easy to access but the fourth screw at the top front corner is a bit harder to reach. |
||
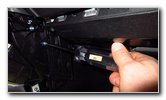 Remove 3rd Screw |
 Torx Socket & Ratchet |
 Panel Under Glove Box |
| I was able to reach
the first three screws (bottom rear, front rear, and top rear) relatively
easily. Loosen the screws by turning them in the counterclockwise direction with the Torx T-20 screwdriver or a T-20 socket with a 1/4" drive ratchet. In order to gain easier access to the fourth T-20 screw at the top front (closer to the front of the SUV), I chose to remove the plastic panel located under the glove box. |
||
 Loosen Counterclockwise |
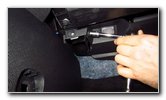 Remove Second Bolt |
 Remove 3rd Bolt |
| The plastic trim
panel under the glove box is held in place by three black metal bolts. Loosen the two bolts on the left side by turning them in the counterclockwise direction with a 10mm socket and a 1/4" drive ratchet. Remove the third 10mm bolt, located on the right side of the glove box, by also turning it in the counterclockwise direction. |
||
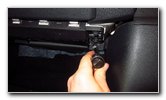
 Third Bolt Removed |
 Panel Under Glove Box |
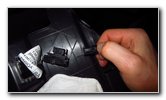 Disconnect Power Plug |
| Set the three bolts
aside in a safe place. Gently pull the plastic trim panel off the underside of the dashboard below the glove box. Disconnect the electrical connector for the footwell light by pushing in the release tab before sliding it straight out of its socket. |
||
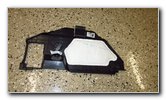 Plastic Panel Detached |
 Footwell Air Vent |
 Move Air Vent To Right |
| Set the plastic
trim panel aside in a safe place. I also found that moving the footwell air vent away from the filter cover made it even easier to access the fourth screw. Gently pull the black plastic air vent towards the right and away from the HVAC blower motor housing. |
||
 Air Vent Out of the Way |
 Pull Back Kick Panel |
 Loosen 4th Silver Screw |
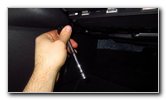
| Loosen the fourth
filter cover screw by turning it in the counterclockwise direction with the
Torx T20 socket and a 1/4" drive ratchet.
You might also be able to use a stubby Torx T20 screwdriver. |
||
 Rotate Counterclockwise |
 4th Screw Removed |
 4 Screws & 4 Bolts |
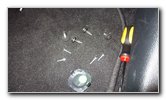
| Set the fourth
screw aside with the other three. At this point, you should have removed 1 plastic bolt cover, the plastic panel under the glove box, 4 silver Torx screws and four black metal bolts. |
||
 Pull Off Filter Cover |
 Filter Cover Removed |
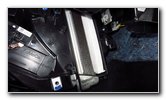 Old Filter Exposed |
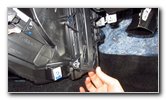
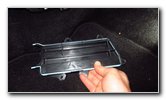
| Gently pull the
filter cover off the HVAC blower motor housing. Try to avoid dislodging the rubber gasket from the back side of the filter cover. |
||
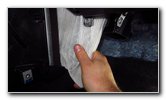 Pull Out Old Air Filter |
 Tilt Old Filter Down |
 Check Slot For Debris |
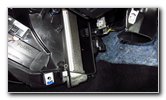
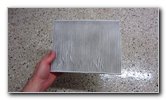
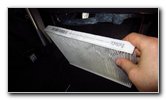
| Carefully slide the
old filter out of the slot. You may need to angle the old filter downwards to get it past the bottom of the glove box. Check the filter slot for any large debris such as leaves, insects or twigs. If you do see any debris, clean it out with the crevice attachment of your wet/dry shop vacuum. |
||
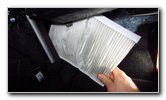
 <--- Air Flow Arrow |
 Old Air Filter Removed |
 Inspect Both Sides |
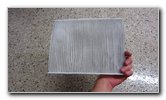
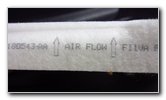
| If you look at the
bottom of the filter slot, you'll see an arrow with the words "AIR FLOW"
printed below it. Inspect both sides of the old air filter. If the old filter is dark grey or black and clogged with dirt, dust, sand, pollen, soot, leaves, insects, hair and other debris, it should be replaced with a new element. I recommend buying the TYC 800163P cabin air filter since it has excellent reviews on Amazon from other Ford owners. If the old filter is relatively clean, just tap out the large debris and remove any fine dust with a wet/dry shop vacuum. |
||
 Clean With Shop Vacuum |
 8V51-18D543-AA |
 Filter "Air Flow" Arrows |
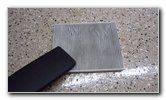
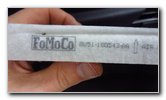
| The OEM (original
equipment manufacturer) filter part number is
Motorcraft FP-69 also known as
FoMoCo 8V51-18D543-AA or 8V5118D543AA. Check your new filter for an "Air Flow" arrow. |
||
 Orientate Air Flow Arrow |
 Install New Air Filter |
 Re-Attach Filter Cover |
|
Orientate the new filter with the "air flow" arrow pointing towards the rear of the SUV. Carefully slide the new filter into the slot until it is fully seated. Push the filter cover back into place. |
||
 Spin In Silver Screws |
 Turn Screws Clockwise |
 Lower Front Screw |
| Spin in the four silver screws a few turns by hand in the clockwise direction. | ||
 Replace Top Rear Screw |
 Filter Cover Secured |
 Replace Kick Panel |
| Tighten the four
screws by turning them in the clockwise direction with the Torx T20
screwdriver or a T20 socket with a 1/4" drive ratchet until they are snug. Push the plastic kick panel back into place. |
||
 Spin In Kick Panel Bolt |
 Move Footwell Air Vent |
 Push In Power Plug |
| Spin in the black
metal bolt to secure the kick panel in place. Tighten the bolt in the clockwise direction with the 10mm socket and a 1/4" drive ratchet until it is snug. Move the footwell air vent to the left and back into place. Push the electrical connector for the footwell light back into its socket. You should feel or hear the power plug "click" securely into place. |
||
 Line Up Plastic Panel |
 Spin In Left Side Bolts |
 Spin In Right Side Bolt |
| Raise the plastic
trim panel back into place below the dashboard. Spin in the three bolts a few turns by hand in the clockwise direction. |
||
 Tighten Bolts Clockwise |
 Tighten Inner Bolt |
 Tighten Right Side Bolt |
| Tighten the three bolts by turning them in the clockwise direction with the 10mm socket and a 1/4" drive ratchet until they are snug. | ||
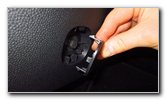 Push On Trim Cover |
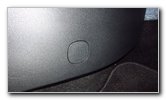 Bolt Cover Secured |
 Cabin Air Filter Replaced |
| Line up the small
plastic bolt cover and push it into place. Be sure to write down the filter change in your SUV's service records. Enjoy the fresh clean air from your A/C system! According to the maintenance schedule in the owner's manual, the cabin air filter should be replaced every 12,500 miles (or every 20,000 km). For more,
check out all of the
2013-2021 Ford EcoSport DIY Repair & Maintenance Guides. |
||
| If you found this guide to be helpful,
please consider making a small donation by clicking on the PayPal.com
"Donate" button located to the right of this paragraph. Thank you!
(Note: I am not a registered charity. Donations are not tax deductible.) |