
How To
Replace A Corroded Automotive Battery Terminal
A pictures illustrated guide to replacing
a corroded battery terminal and the 12V car battery in a 2005 Toyota Corolla S.

|
This "how to" automotive repair
guide was specifically written to assist owners of the 2005 Toyota Corolla S
in replacing a corroded battery terminal and the car's 12V battery. I am not
a professional mechanic. I assume no responsibility for damage to your
vehicle, persons, property or pets. If you have any doubts, please consult
an ASE certified mechanic. Please proceed with caution at your own risk.
|
||
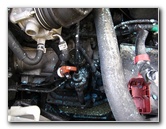
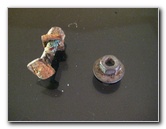 Corroded Nuts & Bolts |
 Corroded Positive Terminal |
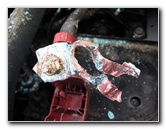 Corroded Battery Terminal |
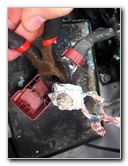
| During the
last year of this five year old battery's life, the positive (red)
terminal had been plagued by light blue corrosion dust.
A corroded battery terminal is usually a sign of a battery that is leaking acid. When our 2005 Toyota Corolla S wouldn't start up one morning, I knew it was finally time to replace the OEM AC Delco brand battery. The average lifespan of a car battery is 3-5 years, so I was fairly happy that it had lasted this long. I went to Wal-Mart and purchased an EverStart Maxx brand automotive battery, model # MAXX-35S. I also purchased an EverStart universal battery terminal replacement. To complete this repair, you'll need the following tools: needle nose pliers, standard pliers, 11mm socket, 12mm socket, and wire or cable cutters, and a wet/dry shop vacuum for cleanup. |
||
|
|
||
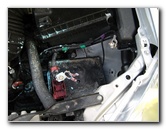
 Negative Battery Terminal |
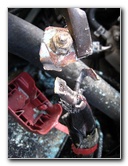
 Light Blue Corrosion Dust |
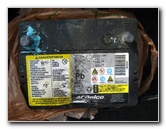 Old AC Delco Battery |
| To remove the old battery in our 2005 Toyota Corolla, I first had to remove one small nut and loosen another on the metal arm that holds the battery in place. | ||
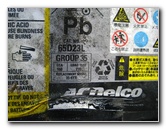 Lead Acid 12V Battery |
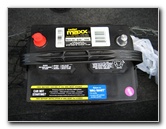 Wal-Mart Car Battery $75 |
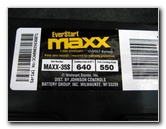 EverStart Maxx Maxx-35S |
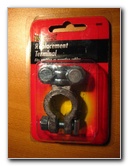 EverStart Battery Terminal |
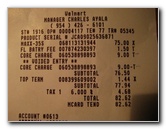 New Terminal $1.44 |
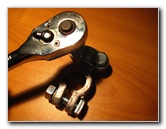
 11mm Socket |
|
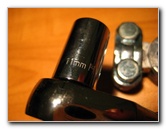
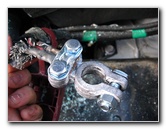
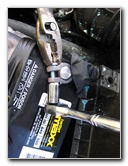
The bolts on the wire clamp side of the EverStart replacement battery terminal require an 11mm socket. The other side of the new terminal that tightens over the battery post, requires a 12mm socket. |
||
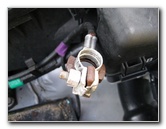
 Loosening Wire Clamp |
 12mm Socket On Terminal |
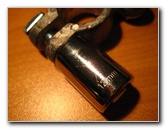
 Cutting Off Old Terminal |
|
If possible, try to unbolt the old corroded battery terminal. If that's not possible, cut it off with a pair of cable cutters or needle noise pliers equipped with a cutting edge. Try to cut the old terminal off with as much original wiring as possible. The Toyota engineers didn't provide any more wire than necessary to reach the OEM battery post. The new terminal barely fit on the new EverStart battery since the cable was slightly shortened by cutting off the old terminal. To prevent any further corrosion from building up, I plan on installing some felt anti-corrosion washers over the battery posts. |
||
 Old Terminal Cut Off |
 Cables In New Terminal |
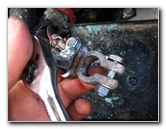 Tightening Terminal On Cables |
|
Before attaching the terminals to the battery, make sure that both the posts and terminals are free of any corrosion or grease. A wire brush does a great job of polishing up the surfaces so that they make good contact with each other. I used a wet/dry vacuum to clean up most of the light blue corrosion dust that littered the engine bay. The new EverStart battery from Wal-Mart had enough juice to start the car right off the shelf without me having to charge it first. I left the car running for a few minutes and then drove about 30 minutes to allow the alternator to charge the battery. If you have a Battery Tender or an automotive battery charger, it would be a good idea to let the new battery trickle charge over night. |
||
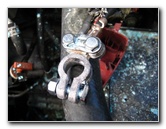 New Terminal Attached |
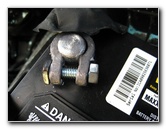 New Terminal On Battery Post |
 Tightening Terminal On Post |
|
For more of my related
automotive maintenance instructions, click on the following links:
Toyota Corolla PCV Valve Replacement Guide,
Toyota Corolla Cabin Air Filter Replacement Guide,
Toyota Corolla Oil Change Guide,
Buffing Old Faded Headlights,
K&N Air Filter Cleaning Guide,
Fuzion ZRi Tire Review,
Automotive Interior Carpet Replacement,
Falken Ziex ZE-512 Tire Review,
WeatherTech FloorLiner Car Mats Review, and the
Headlight & Tail Light Condensation Removal Guide. |
||
| If you found this guide to be helpful,
please consider making a small donation by clicking on the PayPal.com
"Donate" button located to the right of this paragraph. Thank you!
(Note: I am not a registered charity. Donations are not tax deductible.) |