
Jeep Wrangler
Headlight Bulbs Replacement Guide
How to change a burnt out low / high beam
headlight bulb in a 4th generation 2018 to 2023 Jeep Wrangler.

By Paul B. Michaels Author & Photographer Auto Mechanic Since 1989 |
||
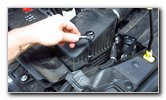
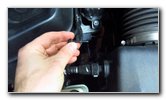
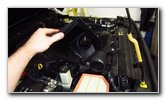
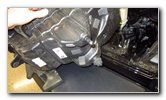
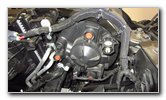
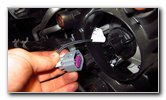
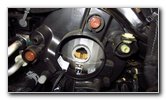
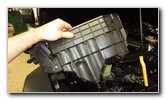
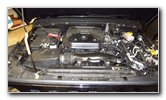
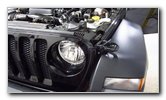 2020 Wrangler Headlight |
 Driver Side - Bottles |
 Bottles Mounting Bolt |
|
This automotive
maintenance tutorial was specifically written to assist owners of the "JL"
fourth generation (2017, 2018, 2019, 2020, 2021, 2022 & 2023) Jeep Wrangler
SUV in changing a burnt out dual filament combination low beam and high beam
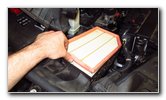
headlight bulb or upgrading both of them to brighter LED units. Owners of other Jeep, Dodge and RAM vehicles such as the Grand Cherokee, Compass, Renegade, Gladiator, Cherokee, Grand Wagoneer, Wagoneer, Charger, Challenger, Durango, RAM 1500, Promaster, 2500 and 3500 may also find these DIY instructions to be helpful. The compatible replacement halogen dual filament combination low beam and high beam headlight bulb part number is H13. If you'd like to have brighter headlights that will also last much longer before burning out, install some H13 LED units. The tools needed to access and replace the headlight bulbs include a 10mm socket with a 1/4" or 3/8" drive ratchet, an 8mm socket with an extension bar and a 1/4" drive ratchet. If you don't have an 8mm socket, you could also use a Phillips head screwdriver or a flat head screwdriver to remove the air box on the passenger side. To access the rear of the headlight housing on the driver side, you'll need to remove the single 10mm bolt that secures the windshield washer fluid bottle and the coolant overflow (expansion) tank. Then carefully lift the bottles up and out of the way. In this guide, I'll showing how to replace the headlight bulb on the passenger side which requires a few more steps. |
||
|
|
||
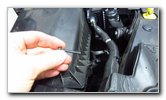
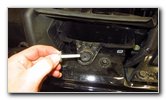
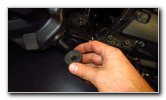
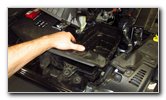
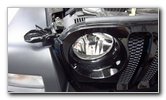 Passenger Side Headlight |
 Loosen Counterclockwise |
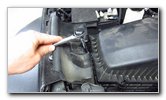 Left Middle Screw |
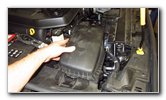
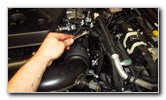
| To access the
headlight bulb on the passenger side, you'll need to remove the entire air
filter housing.
There are four screws that secure the air box cover in place. They can be loosened with an 8mm socket, a Phillips head screwdriver or a flat head screwdriver. I also removed the screw at the middle left edge near the air box cover. I'm not certain that was necessary to lift out the air box assembly. |
||
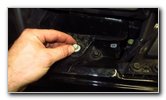
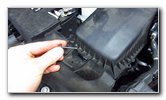 Left Middle Removed |
 Remove Air Box Screws |
 Phillips / 8mm / Flat |
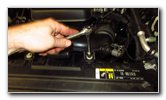
| Remove the four
screws on the air box cover by turning them in the counterclockwise
direction. If you'd prefer to, you can leave the screws attached to the air box cover rather than removing them entirely. |
||
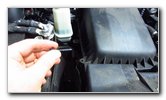
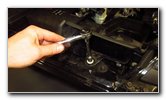
 Last Screw Removed |
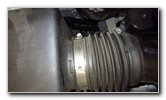 Air Intake Hose Clamp |
 Loosen Counterclockwise |
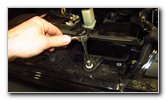
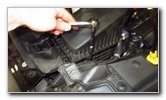
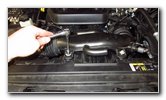
| Next, loosen the clamp on the air intake hose by turning it in the counterclockwise direction with a 10mm socket and a ratchet. | ||
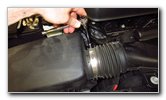
 Lift Air Box Cover |
 Remove Air Filter |
 Loosen Air Box Bolt |
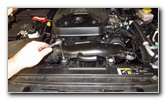
| Lift the air box
cover and slide out the engine air filter. Set the filter aside in a safe place. Remove the larger bolt on the left side of the air intake by turning it in the counterclockwise direction with a 10mm socket and a 1/4" or 3/8" drive ratchet. |
||
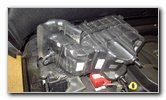
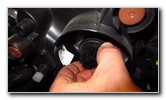
 10mm Bolt Removed |
 Pull Out Lower Air Box |
 Rubber Friction Fastener |
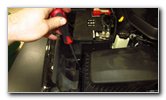
| Set the 10mm bolt
aside in a safe place. Firmly pull the lower half of the air box out of the engine bay. It is held in place by some rubber friction fasteners. |
||
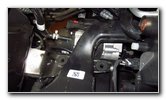 Lower Air Box Removed |
 Set Aside Air Box |
 Rear of Headlight Housing |
| Set the lower half
of the air box aside in a safe. Once the air box has been removed, you'll have easy access to the rear of the passenger side headlight housing. |
||
 1/4 Turn Counterclockwise |
 Dust Cover Removed |
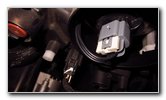 Electrical Connector |
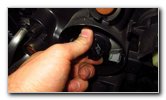
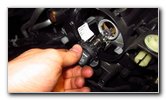
| Remove the black
plastic dust cap on the rear of the headlight housing by rotating 1/4 turn
in the counterclockwise direction. Set the dust cap aside in a safe place. Locate the gray plastic electrical connector on the base of the old low / high beam headlight bulb. |
||
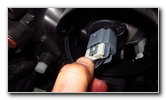
 Slide Out White Lock Clip |
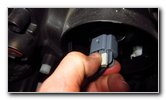 Push Down Release Tab |
 Power Plug Disconnected |
| Gently slide out
the white plastic locking clip away from the electrical connector. Push down the gray plastic release tab and slide the electrical connector straight off the base of the old light bulb. |
||
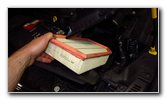
 1/4 Turn Counterclockwise |
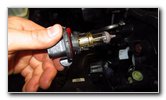 Remove Old Light Bulb |
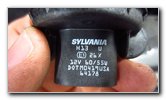 Sylvania H13 60/55W |
| Rotate the base of
the old light bulb 1/4 turn in the counterclockwise direction before pulling
it straight out of the housing. The OEM (original equipment manufacturer) headlight bulb in this 2020 Wrangler was a Sylvania H13 (U 12V 60/55W). |
||
 Empty Bulb Housing |
 Install New Light Bulb |
 1/4 Turn Clockwise |
| Clean off any oil,
grease or dust on the new halogen light bulb with a paper towel and some
rubbing alcohol. If there is any debris left on the new bulb, it may cause a hot spot and lead to the bulb burning out prematurely. Insert the new H13 light bulb into the housing and rotate it 1/4 turn in the clockwise direction. If you'd prefer to have brighter headlights that will also last much longer before burning out, install some H13 LED units. |
||
 Push On Power Plug |
 Slide In White Lock Clip |
 Twist On Dust Cap |
| Push the gray
plastic electrical connector straight on to the base of the new light bulb. It should "click" securely into place. Slide the white locking clip straight in towards the electrical connector. Replace the dust cover by rotating it 1/4 turn in the clockwise direction. I recommend testing the new headlight bulb before reinstalling the air box. Tip - If you installed an LED bulb and it doesn't work, try disconnecting the power plug, rotating it 180 degrees and pushing it back into place. Some brands of LED bulbs are "polarized" and will only work when the "+" positive and "-" negative electrical contacts are in the correct orientation. |
||
 Lower Air Box |
 Push To Secure Fasteners |
 Spin In 10mm Bolt |
| Lower the bottom
half of the air box down into the engine bay. Firmly push the air box down into place to secure the rubber friction fasteners. Replace the 10mm bolt on the left side of the air intake. |
||
 Tighten 10mm Clockwise |
 Lower In Air Filter |
 Push On Air Box Cover |
| Tighten the 10mm
bolt by turning it in the clockwise direction until it is snug. Lower the engine air filter back into place. Push the air box cover down into place. |
||
 Tighten 8mm Clockwise |
 Phillips / 8mm / Flat Head |
 Tighten Hose Clamp |
| Replace the four
8mm screws into the top of the air box cover and tighten them in the
clockwise direction until they are snug. Tighten the hose clamp situated closer to the center of the engine bay. |
||
 Push On Intake Hose |
 Tighten 10mm Bolts |
 Tighten Clockwise |
| Push the air intake
hose back on to the air box. Tighten the 10mm bolts on the front of the air intake assembly in the clockwise direction. |
||
 |
 Air Box & Intake Secured |
 Test New Headlight Bulb |
| Double check that
the air intake assembly is fully secured in place and that the two halves of
the air box are flush together with no parts of the filter visible at any
edge. To test the new light bulb, turn on the headlights and flash the high beams. Be sure to write down the bulb change in your vehicle's service records. For more,
please check out all of my
2018-2023 Jeep Wrangler DIY Maintenance Guides. |
||
| If you found this guide to be helpful,
please consider making a small donation by clicking on the PayPal.com
"Donate" button located to the right of this paragraph. Thank you!
(Note: I am not a registered charity. Donations are not tax deductible.) |