
Volvo XC60
Map & Dome Light Bulbs Replacement Guide
How to change a burnt out map or dome
light bulb in the overhead console of a 1st generation 2010 to 2017 Volvo XC60.

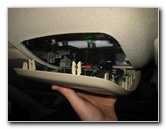
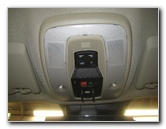 2017 XC60 Map / Dome |
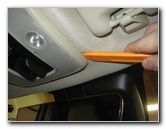 Insert Plastic Pry Bar Tool |
 Release Retaining Clip |
| This
automotive maintenance tutorial was specifically written to assist
owners of the first generation (2010, 2011, 2012, 2013, 2014, 2015,
2016 and 2017) Volvo XC60 SUV in changing a burnt out map or dome
light bulb in the overhead console. Owners of other Volvo vehicles such as the XC90, XC70, S80, S90, S60, S40, V90, V70, V60 and V40 may also find these DIY instructions to be helpful. The compatible replacement miniature wedge base light bulb is part number 168 available from various manufacturers such as Sylvania, GE, Eiko and PIAA. You may also use any other miniature wedge base bulbs such as the 2825, 2821, 194 or a brighter LED unit. The only tool needed to access and replace the light bulbs is a plastic automotive panel removal tool or a flathead screwdriver. |
||
|
|
||
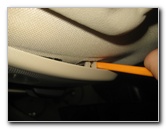
 Front Left Corner |
 Rear Left Corner |
 Rear Right Corner |
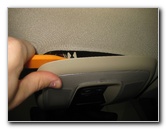
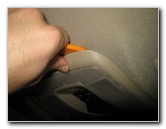
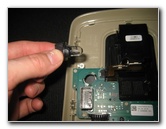
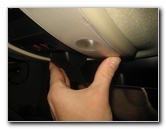
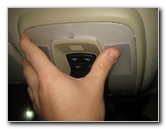
| To prevent from
scratching the plastic surfaces or ripping the headliner fabric, you can
either cover the tip of your flathead screwdriver with a thin micro fiber
cloth or use a plastic automotive pry
bar tool. Insert the blade of the pry bar tool in between the edge of the plastic overhead console and the fabric headliner. Gently pull down the overhead console to release the four friction clip fasteners. Re-insert the the panel removal tool at each corner of the overhead console until all four clips have been released. Try to avoid using excessive force, the friction fasteners should pop out relatively easily. |
||
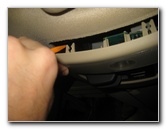
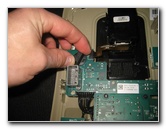
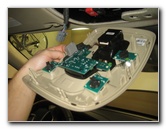
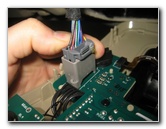
 Pull Off Overhead Console |
 Push In Release Tab |
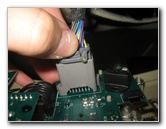
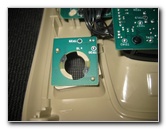
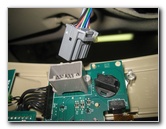 Disconnect Power Plug |
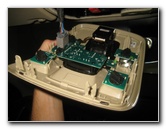
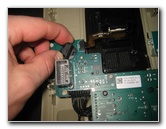
| Pull the overhead
console out of the ceiling of the SUV and locate the electrical connector. Push in the release tab before sliding the power plug straight out of its socket. |
||
 Overhead Console Removed |
 1/4 Turn Counterclockwise |
 Dome Light Bulb Socket |
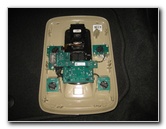
| Set the overhead
console down on a soft surface, such as the floor mat or a towel on your
work bench to avoid scratching the plastic lens covers. The two "dome" lights are located near the rear end of the assembly. The two "map" lights are near the front of the housing (closest to the windshield and rear view mirror). Rotate the base of the bulb socket 1/4 turn counterclockwise before pulling it straight out. |
||
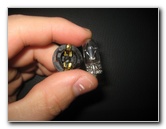 Pull Out Old Light Bulb |
 Push In New Light Bulb |
 Dome Light Bulb Housing |
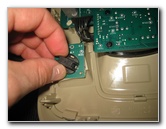
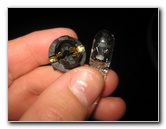
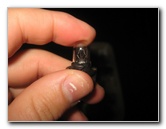
| Pull the old light
bulb straight out of the socket. The OEM light bulbs in this 2017 Volvo XC60 T5 were Toshiba part number 168. If necessary, you can also use any other miniature wedge base bulbs such as the # 2825, W5W, 194 or a compatible LED. Push a new light bulb in to the socket. |
||
|
|
||
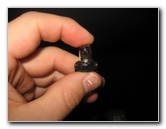
 1/4 Turn Counterclockwise |
 Map Light Bulb Socket |
 Pull Out Old Light Bulb |
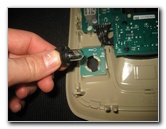
| Re-insert the bulb
socket in to the housing and rotate it 1/4 turn clockwise to secure it in
place. To replace one of the other bulbs, just repeat the process. |
||
 Push In New Light Bulb |
 1/4 Turn Clockwise - Lock |
 Raise Overhead Console |
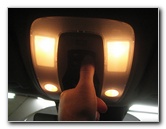
| You may want to
test the new light bulbs before re-installing the overhead console,
especially if you installed LED bulbs. Hold the overhead console near the headliner. Push the grey plastic power plug straight in to its socket until it clicks securely in to place. |
||
 Replace Electrical Connector |
 Line Up Plastic Fasteners |
 Push To Secure Clips |
| Push the "On/Off"
buttons to test the new light bulbs. Line up the four plastic retaining clips with their mounting slots in the headliner. |
||
 Secure Rear Clips |
 Overhead Console Replaced |
 Test Map & Dome Lights |
| Gently snap the
retaining clips back in to place. Make sure that the overhead console is flush with the headliner at every edge. To test the new map and dome light bulbs, push the "On/Off" switches. You may need to push the "Unlock" button on the key fob to re-activate the interior lights. For more,
check out all of my
2010-2017
Volvo XC60 DIY Repair & Maintenance Guides. |
||
| If you found this guide to be helpful,
please consider making a small donation by clicking on the PayPal.com
"Donate" button located to the right of this paragraph. Thank you!
(Note: I am not a registered charity. Donations are not tax deductible.) |