
Infiniti QX60
Serpentine Accessory Belt Replacement Guide
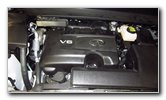
How to change the serpentine accessory
belt on the VQ35DE 3.5L V6 engine in a 2013 to 2020 Infiniti QX60 SUV.

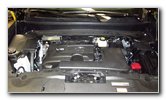 2020 QX60 3.5L V6 |
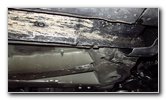 Passenger Side Jack Point |
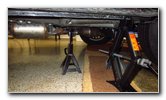 Raise SUV - Jack Stands |
| This automotive
maintenance tutorial was specifically written to assist owners of the first
generation (2013, 2014, 2015, 2016, 2017, 2018, 2019 & 2020) Infiniti QX60
luxury SUV in changing the serpentine accessory belt on the
VQ35DE 3.5 liter V6 engine. (The procedure should be similar for the 2.5L I4
engine in the hybrid models.) Owners of other Infiniti and Nissan vehicles such as the JX35, Q50, Q60, QX50, QX80, Pathfinder, Murano, Rogue, Armada, Kicks, Frontier, Titan, NV, NV200, 370Z, GT-R, Leaf, Maxima, Altima, Sentra and Versa might also find these DIY instructions to be helpful. The OEM (original equipment manufacturer) belt part number is Nissan 11720-3WS0B (also known as 11720 3WS0B or 117203WS0B). A few compatible replacement aftermarket belts with their part numbers are as follows: Contitech 7PK1035, ACDelco 7K407, Bando 7PK1035A and Gates K070407. The tools needed to complete this procedure include a flat head screwdriver and a 3/8" drive ratchet. A few optional items include a lug nut wrench, a floor jack and two jack stands. The first few steps are to drive the vehicle on to a level surface, shift the transmission into "Park" and turn off the ignition. Engage the emergency / parking brake and place wheel chocks on both sides of the rear tires to help prevent the SUV from moving. It is possible to change the belt with out removing the front passenger wheel. I found that it is much easier to access the side of the engine by removing the wheel. If you choose to remove the wheel, first slightly loosen the lug nuts in the counterclockwise direction. Then carefully raise the front passenger side of the SUV and securely support it with at least two jack stands. |
||
|
|
||
 Turn Front Wheels |
 Plastic Engine Cover |
 Pry Out Center Button |
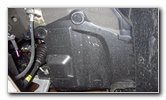
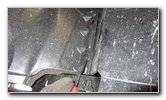
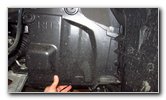
| If you decide to
skip removing the front passenger wheel and tire, I recommend turning the
steering wheel all the way to the right to create more working room in the
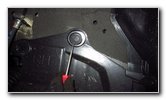
wheel well. Locate the black plastic splash guard on the front passenger side of the engine. It is held in place by four plastic pop rivets. Use a flat head screwdriver to pry up the round button in the center of each fastener to unlock them. |
||
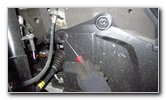 Second Pop Rivet |
 Third Pop Rivet |
 Fourth Pop Rivet |
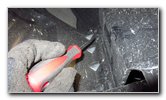
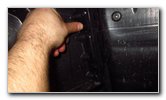
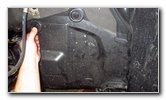
| Then pry out the
base of the fastener. Repeat the process to remove the other three pop rivets. |
||
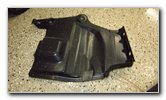 Splash Shield Removed |
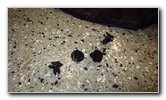 Four Pop Rivets Removed |
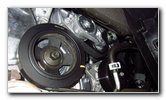
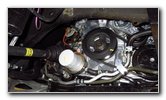 Pulleys, Belt, Oil Filter |
| Set the four pop
rivets and the plastic cover aside in a safe place. Once the splash guard has been removed, you'll be able to see the oil filter, pulleys and old serpentine belt on the passenger side of the VQ35DE 3.5L V6 engine. |
||
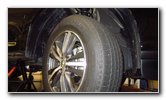
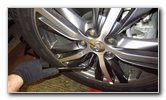 Remove Lug Nuts |
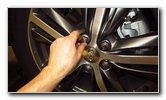 Spin Off Lug Nuts |
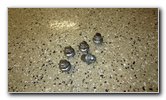 Five Lug Nuts Removed |
| At this point, I decided to remove the front passenger wheel and tire for more working room. | ||
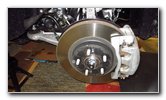 Rotor, Bracket, Caliper |
 Easy Access To Pulleys |
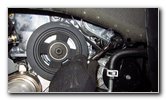
 Tensioner Pulley & Arm |
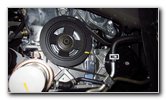
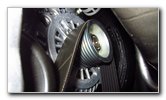
| Take a minute to examine how the OEM belt is routed around the various pulleys including the crankshaft, tensioner, A/C compressor and the alternator pulley. | ||
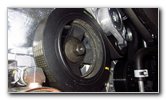 Crankshaft Pulley |
 Alternator & A/C |
 3/8" Drive Ratchet |
| There is a belt
routing diagram in the owner's manual or the service manual and I create a
rough belt routing diagram in the picture below. Locate the square opening in the tensioner assembly's arm just behind the pulley. |
||
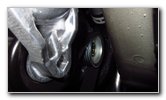
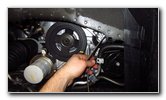
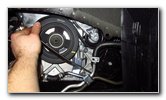
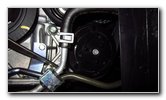
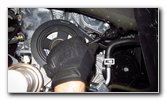 Release Tension On Belt |
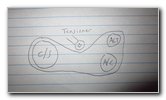 Belt Routing Diagram |
 Pull Belt Off Pulleys |
| Insert the square
peg on the 3/8" drive ratchet into the opening on the tensioner arm. Carefully rotate the ratchet handle down and towards the front of the SUV. As you rotate the ratchet, you'll see the tensioner pulley and arm move up and away from the belt. Hold the tensioner assembly in the released position with one hand and then very carefully slip the old belt off the crankshaft pulley with your other hand.
|
||
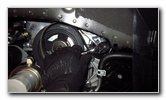
 Removing Old Belt |
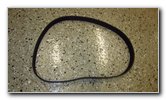 OEM Belt Removed |
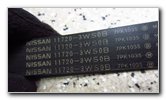 OEM Belt Part Number |
| Continue pulling
the old belt off the other pulleys. The OEM belt part number in this 2020 QX60 was Nissan 11720-3WS0B (or 7PK1035 B). If the tensioner was very easy to rotate or the pulley doesn't spin freely, you may need to replace the tensioner assembly. The OEM part number for tensioner and pulley is Nissan 11955-3JA0A. |
||
 Installing New Belt |
 Last Loop - Crankshaft |
 Belt On Alternator Pulley |
| A good rule to
remember when installing the new belt is that the ribbed side should be
wrapped around ribbed pulleys and the smooth side should be against any
smooth pulleys. Wrap the new belt around the alternator pulley, around the A/C compressor pulley and under the tensioner pulley. Hold the last loop of the new belt near the crankshaft pulley. |
||
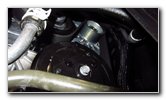
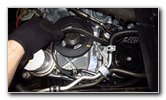
 A/C Compressor Pulley |
 Rotate Ratchet Down |
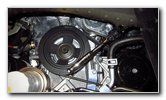 Wrap Belt Over C/S |
| Use one hand to
rotate the ratchet down and towards the front of the SUV to move the
tensioner pulley up and away from the belt. Hold the tensioner in the released position and very carefully slip the new belt over the crankshaft pulley. Slowly release the tensioner back down towards the new belt. Double check that the new belt is routed properly and the belt is fully seated on the ribbed pulleys. |
||
 New Belt Installed |
 Line Up Splash Guard |
 Re-Insert Pop Rivet |
| Line up the plastic
splash guard. Make sure the pop rivets have their round buttons in the up and unlocked position. |
||
 Replace Fasteners |
 Pop In Button - Lock |
 Test New Serpentine Belt |
| Re-insert the four
pop rivets and then snap in the buttons in the center to lock them into
place. Double check that the splash guard is securely attached. Start the engine and listen closely for any strange sounds. If you do hear a weird noise, immediately turn off the ignition and double check your work. There is no service interval for the drive belt specified in the owner's manual or service manual. The OEM belt can last any where from 60,000 miles to over 100,000 miles depending on your unique driving conditions. The "Optional Premium Maintenance Upgrade" service schedule specifies that the drive belt will be replaced every 30,000 miles. I recommend checking your serpentine belt for cracks, fraying, chunks of missing rubber or other signs of wear at every oil change. Don't forget to write down the belt change in your vehicle's service records. Please
take a look at all of the
2013-2020 Infiniti QX60 DIY Repair & Maintenance Guides. |
||
| If you found this guide to be helpful,
please consider making a small donation by clicking on the PayPal.com
"Donate" button located to the right of this paragraph. Thank you!
(Note: I am not a registered charity. Donations are not tax deductible.) |