
Infiniti QX60
Rear Wiper Blade Replacement Guide
How to change the rear wiper blade on the
back window of a 1st generation 2013 to 2020 Infiniti QX60 SUV.

|
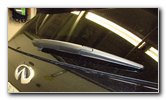
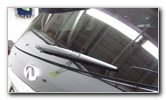 2020 QX60 Rear Wiper |
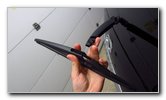
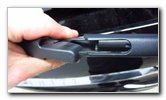
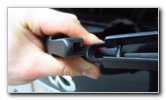
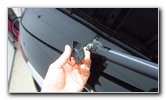 Pull Off Plastic Base Cap |
| This automotive
maintenance tutorial was specifically written to assist owners of the first
generation (2013, 2014, 2015, 2016, 2017, 2018, 2019 & 2020) Infiniti QX60
luxury SUV in changing a worn out rear wiper blade on the back windshield
window. Owners of other Infiniti and Nissan vehicles such as the JX35, Q50, Q60, QX50, QX80, Pathfinder, Murano, Rogue, Armada, Kicks, Frontier, Titan, NV, NV200, 370Z, GT-R, Leaf, Maxima, Altima, Sentra and Versa might also find these DIY instructions to be helpful. The OEM Infiniti and Nissan part number for the rear wiper blade and arm assembly is 28781-3JA0A. A few compatible replacement aftermarket 12" wiper blades with their part numbers include the following: Michelin 9512, Bosch H301, Trico 12-J and Valeo 12E. No tools are required to change the rear wiper blade. The first step is to gently pull the plastic cover off the base of the wiper arm. Set the base cap aside in a safe place. |
|
|
|
|
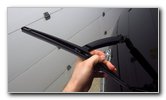
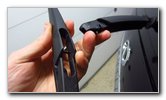
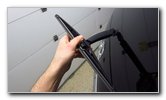
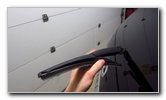 Rotate Away Blade |
 Pop Bar Out of Socket |
| Gently lift the
wiper arm off the back window. Rotate the old wiper blade away from the wiper arm until you feel some resistance. Continue rotating the old wiper blade away from the wiper arm until the mounting bar in the center of the blade pops out of the "C" shaped socket on the arm. |
|
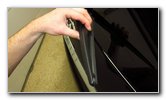
 Pull Blade Off Arm |
 "C" Shaped Socket - Arm |
| Once the mounting bar has been released from the socket on the end of the wiper arm, pull the old blade off the end of the arm. | |
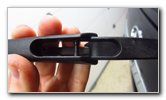 Mounting Bar - Blade |
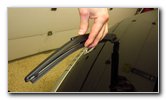
 Lining Up New Blade |
| I recommend buying the Bosch H301 rear wiper blade since it has excellent reviews from other owners of the QX60 and the very similar Nissan Pathfinder. | |
 Bar Center - Tab Right |
 Mounting Bar - Middle |
| Line up the new wiper blade with the wiper arm. | |
 Plastic Tab On Right |
 Slide On New Blade |
| The new rubber
wiper blade should be pointing away from the window and orientated
perpendicular to the wiper arm. Pass the end of the wiper arm through the opening in the middle of the new wiper blade frame. Be aware of the plastic tab on the right (passenger) side of the wiper blade. |
|
 Pop Bar Into Socket |
 Blade Parallel With Arm |
| Rotate the new
wiper blade until you can pop the mounting bar into the "C" shaped socket on
the wiper arm. If the plastic tab gets in your way, make sure it clears the end tip of the wiper arm when you rotate the blade. Make sure the new wiper blade is securely attached. |
|
 Snap On Base Cap |
 Blade Change Done! |
| Gently pop the
plastic cover back on to the base of the wiper arm. For the best wiper performance, I recommend thoroughly cleaning off the back window and applying a glass treatment product that will repel water such as Rain-X. Be sure to write down the rear wiper blade change in your SUV's service records. Please
take a look at all of the
2013-2020 Infiniti QX60 DIY Repair & Maintenance Guides. |
|
| If you found this guide to be helpful,
please consider making a small donation by clicking on the PayPal.com
"Donate" button located to the right of this paragraph. Thank you!
(Note: I am not a registered charity. Donations are not tax deductible.) |