
Infiniti QX60
License Plate Light Bulbs Replacement Guide
How to change a burnt out license plate
light bulb in the tailgate of a 1st generation 2013 to 2020 Infiniti QX60.

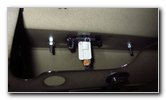
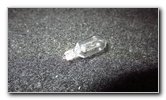
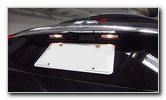
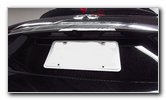 2020 QX60 License Plate |
 Right Side Light Housing |
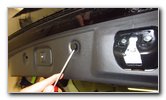
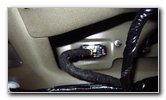
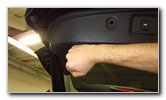
 Pry Out Plastic Handle |
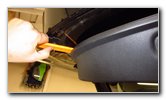
| This automotive
maintenance tutorial was specifically written to assist owners of the first
generation (2013, 2014, 2015, 2016, 2017, 2018, 2019 & 2020) Infiniti QX60
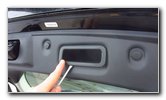
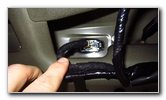
luxury SUV in changing a burnt out license plate light bulb in the tailgate. Owners of other Infiniti and Nissan vehicles such as the JX35, Q50, Q60, QX50, QX80, Pathfinder, Murano, Rogue, Armada, Kicks, Frontier, Titan, NV, NV200, 370Z, GT-R, Leaf, Maxima, Altima, Sentra and Versa might also find these DIY instructions to be helpful. The OEM (original equipment manufacturer) light bulb in this 2020 QX60 was part number Toshiba 12V5W W5W. The compatible replacement miniature wedge base light bulb part number is 2825 (also known as W5W). If you would like to have brighter license plate lights that will also last much longer before burning out compared to the traditional incandescent bulbs, install some 2825 LED bulbs. The tools needed to access and replace the bulbs include a plastic pry bar tool and a small flat head screwdriver. The first step is to open the tailgate door for the cargo area. Use the flat head screwdriver or a plastic pry bar tool to gently remove the plastic door pull handle situated to the right of the metal door latch. |
||
|
|
||
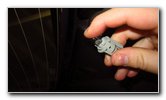
 Plastic Handle Removed |
 Unlock Plastic Pop Rivet |
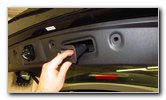
 Remove Plastic Fastener |
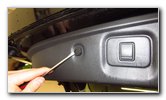
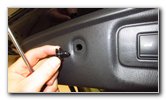
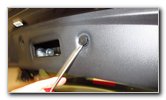
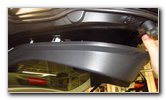
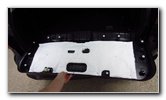
| Set the door pull
handle aside in a safe place. There are four round black plastic fasteners on the bottom edge of the tailgate's interior panel. Use the small flat head screwdriver to gently pry up the smaller round button in the center of the fasteners to unlock them. Then pry out the base of the fastener to remove it from the interior panel. |
||
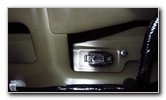
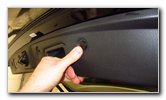
 Remove 2nd Pop Rivet |
 3rd Pop Rivet |
 Remove 4th Pop Rivet |
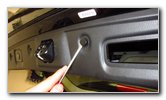
| Repeat the process
to remove the other three plastic fasteners from the bottom edge of the
tailgate door's interior panel. Set the four fasteners aside in a safe place. |
||
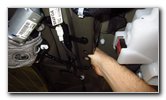
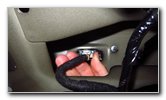
 Pry Out Retaining Clips |
 Release Tailgate Panel |
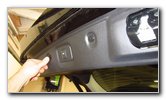
 Power Tailgate Button |
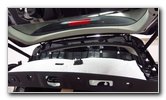
| Insert the plastic
pry bar tool in between the plastic interior panel and the metal frame of
the tailgate. Firmly pry the interior panel off the metal frame to dislodge the plastic pop rivet friction fasteners. Be careful to not let the interior panel fall down quickly since the power tailgate button is still attached by a few wires. Once you have released a few of the pop rivets on the left (driver) side of the panel, locate the electrical connector for the power tailgate door button. |
||
 Disconnect Power Plug |
 Interior Panel Detached |
 Remove Stuck Fastener |
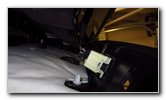
| Push in the release
tab on the electrical connector before sliding it straight out of its
socket. Continue pulling out the white plastic pop rivets all along the bottom edge and both sides of the interior panel. Set the interior panel down in the cargo area. Check to see if any of the pop rivets remained attached to the metal tailgate. Pry out the fasteners with a pop rivet removal tool or a flat head screwdriver. Re-attach the stuck pop rivets back on to the rear side of the plastic interior panel. |
||
 Rear Wiper Motor |
 License Plate Bulb Socket |
 Right Side Bulb Socket |
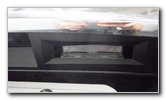
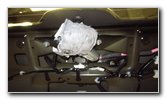
| Once the interior panel has been removed, you'll be able to see the rear window wiper arm motor and the two license plate light bulb sockets. | ||
 1/4 Turn Counterclockwise |
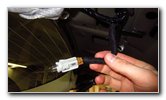 Bulb Socket Removed |
 Pull Out Old Light Bulb |
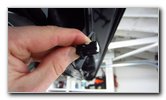
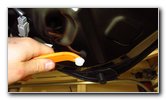
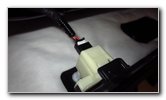
| Be careful when you
reach in to the bulb sockets. The metal edges of the openings may be sharp
enough to cut your skin. Rotate the base of the gray plastic bulb socket 1/4 turn in the counterclockwise direction before pulling it straight out of the housing. If the old incandescent light bulb was recently turned on, be careful when you remove it. The bulb might still be hot enough to burn your fingers. Pull the old light bulb straight out of the socket. |
||
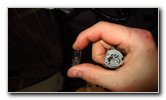
 Toshiba 12V5W W5W |
 Push In New Light Bulb |
 Empty Bulb Housing |
| The OEM light bulb
in this 2020 QX60 was a Toshiba 12V5W W5W. Push a new number 2825 or W5W miniature wedge base light bulb straight into the socket. If you would like to have brighter license plate light bulbs, install some compatible replacement 2825 LED bulbs. Tip - If you install LED bulbs, make sure you test them before re-installing them into the light housing or re-attaching the interior panel. Some LED bulbs are polarized and will only work when the "+" positive and "-" negative electrical contacts are in the correct orientation. |
||
 1/4 Turn Clockwise - Lock |
 Bulb Socket Secured |
 Raise Interior Panel |
| Re-insert the bulb
socket into the housing and rotate it 1/4 turn in the clockwise direction. Repeat the process if you need to change or upgrade the other license plate light bulb. Test the new light bulbs by turning on the parking lights or press the "Unlock" button on the key fob to re-activate the exterior lights. Raise the interior panel up towards the tailgate. |
||
 Plug In Tailgate Connector |
 Tap In Plastic Pop Rivets |
 Firmly Secure Fasteners |
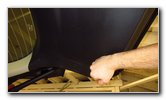
| If you have an
assistant helping you, have them either hold up the plastic panel or push in
the electrical connector for the power tailgate's "close" button. Line up the white plastic pop rivets on the rear of the plastic panel with their corresponding holes in the metal tailgate. Firmly tap in the pop rivets all along the bottom edge and both sides of the plastic panel. |
||
 Pop In Plastic Handle |
 Re-Insert Plastic Fastener |
 Pop In Center Button |
| Make sure the
plastic panel is flush with the metal tailgate at every edge. Push the plastic handle back into place. The handle should "snap" securely into the panel. The four plastic fasteners should have their center pins in the raised and unlocked position. |
||
 Four Fasteners Secured |
 Testing New Light Bulbs |
 Bulb Change Done! |
| Re-insert the four
fasteners and then pop in the center button to lock them into place. To test the new license plate light bulbs, turn on the parking lights or the headlights. Don't forget to write down the bulb change in your vehicle's service records. Please
take a look at all of the
2013-2020 Infiniti QX60 DIY Repair & Maintenance Guides. |
||
| If you found this guide to be helpful,
please consider making a small donation by clicking on the PayPal.com
"Donate" button located to the right of this paragraph. Thank you!
(Note: I am not a registered charity. Donations are not tax deductible.) |