
Chevrolet Camaro V6 Engine
Oil Change Guide
How to change the motor oil and replace
the cartridge oil filter in a 5th generation 2010-2015 GM Chevy Camaro.

By Paul B. Michaels Author & Photographer Auto Mechanic Since 1989 |
||
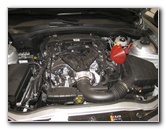
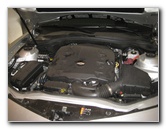 2014 Camaro LFX V6 |
 SAE 5W-30 Oil |
 Twist Off Oil Filler Cap |
| This
automotive maintenance tutorial was specifically written to assist
owners of the fifth generation (2010, 2011, 2012, 2013, 2014 & 2015)
GM Chevrolet Camaro in changing the motor oil and replacing the
cartridge oil filter in either the LLT or LFX 3.6 liter V6 engines. Owners of other General Motors vehicles such as the Spark, Cruze, Malibu, Sonic, Impala, Traverse, Tahoe, Trax, SS, GMC Terrain, Acadia, Yukon, Buick Verano, Regal, LaCrosse, Encore, Enclave and the Holden Barina may also find these DIY instructions to be helpful. The tools and other items needed to complete this procedure include a floor jack, two jack stands, a 15mm socket with a 3/8" drive ratcheting wrench, a used oil catch container, an automotive funnel, a 24mm socket with a 1/2" drive ratcheting wrench, a flathead screwdriver, a new oil filter and 6 U.S quarts (or 5.7 liters) of new SAE 5W-30 oil. |
||
|
|
||
A few compatible replacement cartridge style oil filters with their part numbers are as follows: ACDelco PF2130, Purolator L25274, K&N PS-7003, Wix 57090, Fram CH8765, Mobil 1 M1C-254, Pennzoil HPZ-55, Bosch 3474, Mann Filter ML 1044, Champ Labs P2129 and Mahle OX 399D. Please verify the correct parts for your Camaro by using the Amazon Part Finder website. The correct oil filter may vary depending on the model year, trim level and engine type. |
||
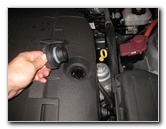
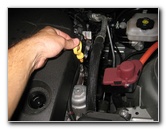 Pull Up Oil Dipstick |
 Raise Front of Vehicle |
 Silver Metal Oil Pan |
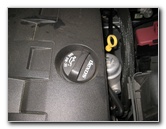
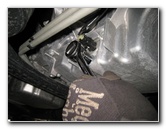
| The first steps are
to warm up the engine for a few minutes, park the vehicle on a level surface
and then turn off the engine. Engage the emergency parking brake and chock both sides of the rear wheels to prevent the vehicle from moving. Open the hood, twist off the oil filler cap and pull up the oil dipstick an inch or two. Removing the oil filler cap and pulling up the dipstick will help prevent a vacuum from forming and allow the old oil to drain out more quickly. Raise the front of the vehicle and securely support it with the two jack stands. Slide under the engine with the 15mm socket, 3/8" drive ratcheting wrench and a used oil catch basin. |
||
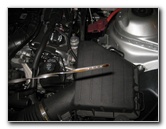
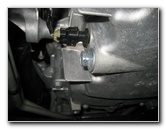 Oil Drain Bolt |
 Loosen 15mm Drain Bolt |
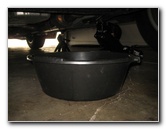 Drain Out Old Oil |
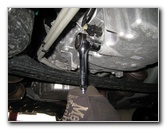
| The silver metal
oil drain bolt faces the passenger side of the vehicle. Slide the used oil catch container to just below the oil drain bolt. Loosen the oil drain bolt by turning it in the counterclockwise direction with the 15mm socket and 3/8" drive ratcheting wrench.
Allow the old oil to drain out for at least a few minutes or until the flow slows to an occasional drip. |
||
 Tighten Drain Bolt Clockwise |
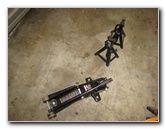 Lower Vehicle From Stands |
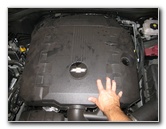
 Lift Off Plastic Engine Cover |
| If the oil drain
bolt is equipped with a crush washer, inspect it and replace it if
necessary. Spin in the oil drain bolt in the clockwise direction and tighten it with the 15mm socket to just past hand tight or about 20-25 ft-lbs of torque. Double check that the oil drain bolt is tight before moving on to the next steps. Lower the vehicle from the jack stands by using the floor jack. I found it easier to access the oil filler hole by lifting off the plastic engine cover. |
||
|
|
||
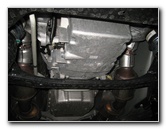
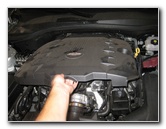
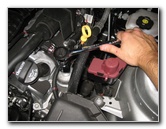
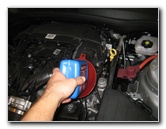
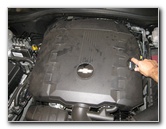
 Insert Automotive Funnel |
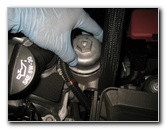
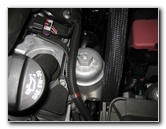 Oil Filter Housing |
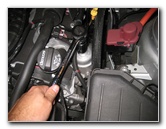 Loosen Cap With 24mm |
| Insert the
automotive funnel in to the oil filler hole. Locate the silver metal oil filter housing just below the oil filler hole and next to the positive terminal on the 12V car battery. Loosen the oil filter housing cap by turning it counterclockwise with a 24mm socket and a 1/2" drive ratcheting wrench. |
||
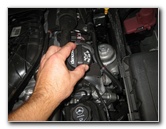
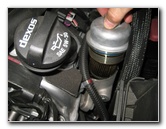 Spin Out Oil Filter Cap |
 Remove Old Oil Filter |
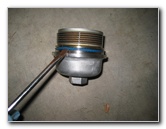 Remove Rubber Gasket |
| Spin out the oil
filter cap and turn it over to access the old cartridge oil filter. Pull the old oil filter out of the metal cap and discard it. I recommend buying the Mobil 1 M1C-254 oil filter since it has excellent reviews on Amazon. Gently pry the old rubber o-ring gasket off the top of the threads on the oil filter cap. Lubricate the new rubber o-ring with some new SAE 5W-30 oil and then install on to the filter cap. |
||
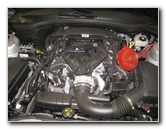
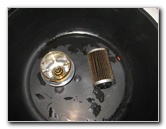
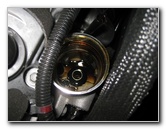 Oil Filter Housing |
 Replace Oil Filter Cap |
 24mm Tighten Clockwise |
| Push a new
cartridge style oil filter in to the metal cap and lower it in to the
engine. Spin on the oil filter cap in the clockwise direction to about 1/4 to 1/3 turn past hand tight. Check that the filter cap is tight by turning it clockwise with the 24mm socket and 1/2" drive ratcheting wrench. |
||
 Funnel In Oil Filler Hole |
 Pour In New Oil |
 Replace Oil Filler Cap |
| The LFX 3.6L V6
engine has a total capacity of 6.0 U.S. quarts (5.7L) for an oil change with
filter replacement. Only pour in about 5 to 5.5 quarts of new SAE 5W-30 oil in to the engine. It is far better to have slightly less oil than necessary in an engine than to overfill it. Running an engine that has been overfilled with oil may cause damage to seals, gaskets or other components. Temporarily replace the oil filter cap and push down the oil dipstick. |
||
 Check Dipstick Oil Level |
 Push On Plastic Engine Cover |
 Engine Oil Changed |
| Start the engine
and allow it to run for a few minutes, turn off the engine and allow the oil
to drain back down to the oil pan for at least 5 to 10 minutes. Pull the oil dipstick out, wipe it clean, re-insert it and pull it out again to check the oil level. If necessary, slow pour in more oil until and repeatedly check the level on the dipstick until it reaches just at or below the upper dot at the end of the dipstick. Lower the plastic engine cover down in to place. To reset the oil life display on your Camaro, follow these steps: 1. Turn the ignition switch to the "On/Run"
position but do not start the engine. For more,
check out my other
2010-2015 GM Chevrolet Camaro DIY Repair Guides. |
||
| If you found this guide to be helpful,
please consider making a small donation by clicking on the PayPal.com
"Donate" button located to the right of this paragraph. Thank you!
(Note: I am not a registered charity. Donations are not tax deductible.) |