
Dodge Charger
Front Brake Pads Replacement Guide
How to replace the front brake pads on a
2006 to 2010 Dodge Charger sedan with picture illustrated instructions.

By Paul B. Michaels Author & Photographer Auto Mechanic Since 1989 |
||
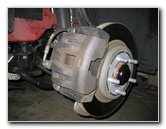
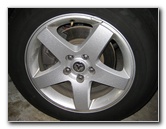
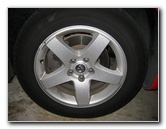 Dodge Charger Front Wheel |
 Loosen 5 Lug Nuts |
 Raise Passenger Side |
| This
automotive "how-to" guide was specifically written to assist owners
of the 2006-2010 Dodge Charger sedan in replacing the front brake
pads. Owners of other Dodge or Chrysler vehicles such as the Magnum, Challenger, 300, Caliber, Journey, Avenger, Nitro, Durango, Grand Caravan, 200 and Town & Country minivan may also find this guide to be useful. To complete this front brake job procedure, you'll need the following items: new brake pads, a floor jack, jack stands, a 13mm socket or wrench, a lug nut wrench and a "C" or "F" clamp. New front brake pads for the '06-'10 Dodge Charger range in price from about $25 for economy semi-metallic pads to over $65 for high performance ceramic units. I've had good luck with the "Wearever" house brand of ceramic brake pads from Advance Auto Parts which currently cost $49.99.A few compatible sets of new front brake pads with their part numbers are as follows: Bosch BC1056, Power Stop 16-1056, Wagner QC1056 and ACDelco 14D1058CH. Please verify the correct replacement part number for your vehicle by using the Amazon Part Finder website. The correct brake pads may verify depending on the model year, engine type, transmission type, trim level and whether the front brake calipers are the one / single piston or two / dual piston models. |
||
|
|
||
 Lug Nut Wrench |
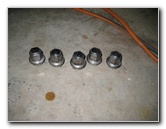 5 Lug Nuts Removed |
 Front Brake Caliper & Rotor |
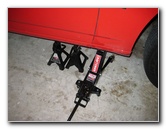
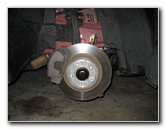
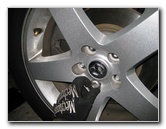
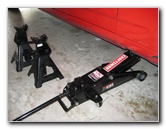
| The first few steps
are to slightly loosen the five lug nuts with the tire iron, raise the
vehicle with a floor jack and support it with at least two
jack stands. Please do not solely rely on the floor jack to support the vehicle. Then completely spin off the lug nuts and carefully pull off the wheel. |
||
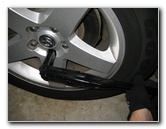
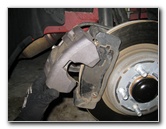
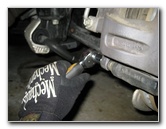
 Brake Caliper |
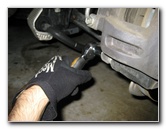 Loosen 13mm Lower Bolt |
 Remove Lower Caliper Bolt |
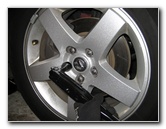
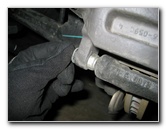
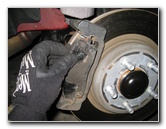
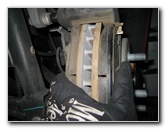
| After the wheel has
been removed, you'll be able to see the front brake rotor and the caliper.
Locate the lower caliper bolt which is located on the rear side of the caliper facing the inside of the wheel well and remove it with a 13 mm socket and ratcheting wrench. |
||
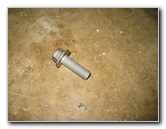 13 MM Caliper Bolt |
 Swing Caliper Upwards |
 |
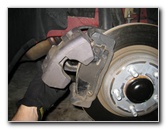
| Then pull the caliper off the brake pads and swing it
upwards away from the caliper bracket and rotor.
Support the brake caliper by securing it to the suspension spring with some twine or rope. This will prevent the caliper from swinging down on top of your fingers or the rotor while you are completing the rest of the brake job. |
||
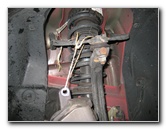 Secure Caliper To Shock |
 Pull Off Old Brake Pads |
 Remove Inner Pad |
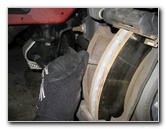
| Pull the old
exterior and interior brake pads off the rotor and out of the caliper bracket.
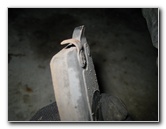
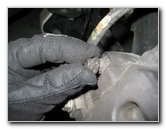
If you have trouble removing the old brake pads, try wiggling them while simultaneously pulling them away from the rotor. Be sure to make a note of where the wear or "squeal" bar is orientated on the old brake pads. On this 2010 Dodge Charger, the wear bar was situated at the top of the inner brake pad as pictured below.
|
||
 Wear Indicator Bar |
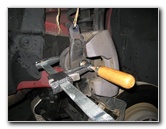 Attach "C" Clamp |
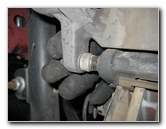
 Brake Fluid Reservoir Cover |
| In order for the brake caliper to fit over the new brake pads, the caliper piston will need to be compressed backwards to make room since the new pads are significantly thicker. | ||
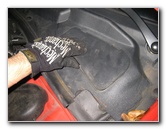
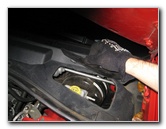 Remove Cover |
 Brake Fluid Reservoir |
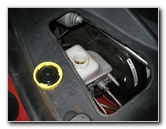 Remove Reservoir Cap |
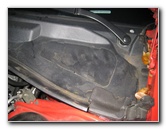
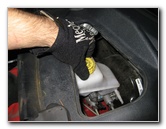
| Remove the brake
fluid reservoir access panel located on the driver side cowl molding. Then
twist off the brake fluid reservoir cap to allow the brake fluid to easily
travel back through the system when you compress the caliper piston. Use the back of an old brake pad and a "C" clamp to very slowly compress the brake caliper piston. Compress the brake caliper piston until it rests flush with the rubber dust boot. |
||
|
|
||
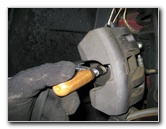 Compress Caliper Piston |
 Brake Parts Cleaner Spray |
 CRC Disc Brake Quiet Gel |
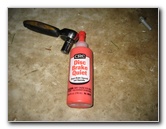
| Clean off the brake
rotors and the caliper bracket with some brake parts cleaner spray.
To help reduce or eliminate braking noise, consider applying some CRC Disc Brake Quiet Gel or a similar product to the back side of the new brake pads where they come in contact with the caliper body. Try to avoid touching or getting any cleaner or gel on the friction side of the new brake pads. |
||
 Install New Brake Pads |
 Push Pads Flush On Rotor |
 Remove Caliper Pin |
| After the caliper
piston is compressed back enough, you can install the new pads into the
caliper bracket.
Be sure that the wear or "squeal" bar on the new brake pad is orientated in the same position as it was on the old pad. Push the two new brake pads together until they rest flush against the brake rotor. |
||
 Check Caliper Pin Lubrication |
 Replace Lower Pin |
 Check Upper Caliper Pin |
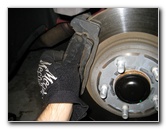
| To ensure proper
brake operation, the caliper pins need to be adequately lubricated with high
pressure moly grease (A.K.A. caliper pin grease).
Pull out the lower caliper pin from the protective rubber boot to check the lubrication and add more if necessary. If the lower pin was well lubricated, you can check the upper pin's lubrication by sliding the caliper body towards and away from you a few times to see if it moves smoothly. If the lower pin needed some more grease, you should also remove the upper caliper bolt and pin to add more lubrication to it as well. |
||
 |
 Lower Caliper Over Pads |
 Replace Lower Caliper Bolt |
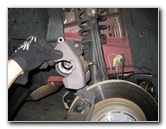
| Then cut the twine
and carefully rotate the caliper down towards the rotor.
The caliper should fit easily over the new brake pads. If you have trouble lowering the caliper over the new pads, the brake caliper piston may need to be compressed backwards some more with the "C" clamp. |
||
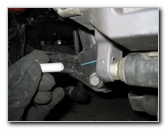
 Tighten Caliper Bolts |
 Brake Line Bleeder Cap |
 Brake Fluid Bleeder Valve |
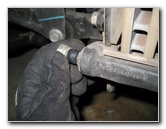
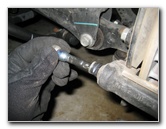
| Insert the lower
caliper bolt into the hole in the caliper through to the bracket and tighten
it with the 13mm socket to the torque setting specified in your vehicle's
service manual.
(The 2006-2010 Dodge Charger caliper bolts should be tightened to about 16-20 ft lbs or 192 to 240 inch pounds.) If you don't have a torque wrench, tighten the two caliper bolts to just past hand tight. Double check that bolt the bolts are properly tightened before continuing to the final steps. If you've ever noticed that your brake pedal has felt spongy or mushy, the old brake fluid may be contaminated with moisture or the brake lines may contain air bubbles. It would be best to bleed the brake lines at this time to flush out the old fluid and replace it with new DOT3 brake fluid. For more information, check out my Brake Line Fluid Bleeding Guide. |
||
 Replace Wheel & Lug Nuts |
 Lower Floor Jack |
 Tighten Lug Nuts |
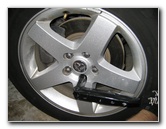
| Replace the front
wheel and spin on the five lug nuts by hand to prevent cross threading them.
Slightly Tighten the lug nuts with the tire iron in a criss cross or "star" pattern. Then lower down the vehicle from the floor jack until the tire holds some weight and complete tightening the lugs nuts. It would be best to use a torque wrench or air gun with a torque stick to tighten the lug nuts to about 100 foot lbs. Double check that the lug nuts are tight before completely lowering vehicle from the floor jack. Get into the driver's seat and pump the brake pedal a few times until the pedal feels firm. Then check the brake fluid level in the reservoir and remove some if it is above the "COLD" line or add a bit of new DOT 3 brake fluid if the level is below the "COLD" level line. |
||
 |
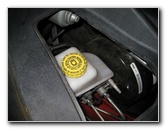
 Replace Reservoir Cap |
 Replace Access Panel |
| Once the brake fluid
in the reservoir is at the correct level, twist on the reservoir cap and
snap the access panel back into place. To break in the new brake pads, drive normally for the first few hundred miles while trying to avoid any hard or "panic" stops. It's also a good idea to regularly check your driveway for drops of brake fluid which may indicate a leak, verify the brake fluid level in the reservoir, and also double check that the lug nuts are still properly tightened. Be sure to record the brake pad change in your vehicle's service records. For more, check out my
Dodge
Charger Maintenance & Repair Guides page. |
||
| If you found this guide to be helpful,
please consider making a small donation by clicking on the PayPal.com
"Donate" button located to the right of this paragraph. Thank you!
(Note: I am not a registered charity. Donations are not tax deductible.) |